Skip to content

Free quilting video tutorials from Missouri Star

Quilting Tutorials
Make a "Sewing Room" Wall Hanging with Misty Doan on At Home with Misty

Make a "Sewing Room" Wall Hanging with Misty Doan on At Home with Misty

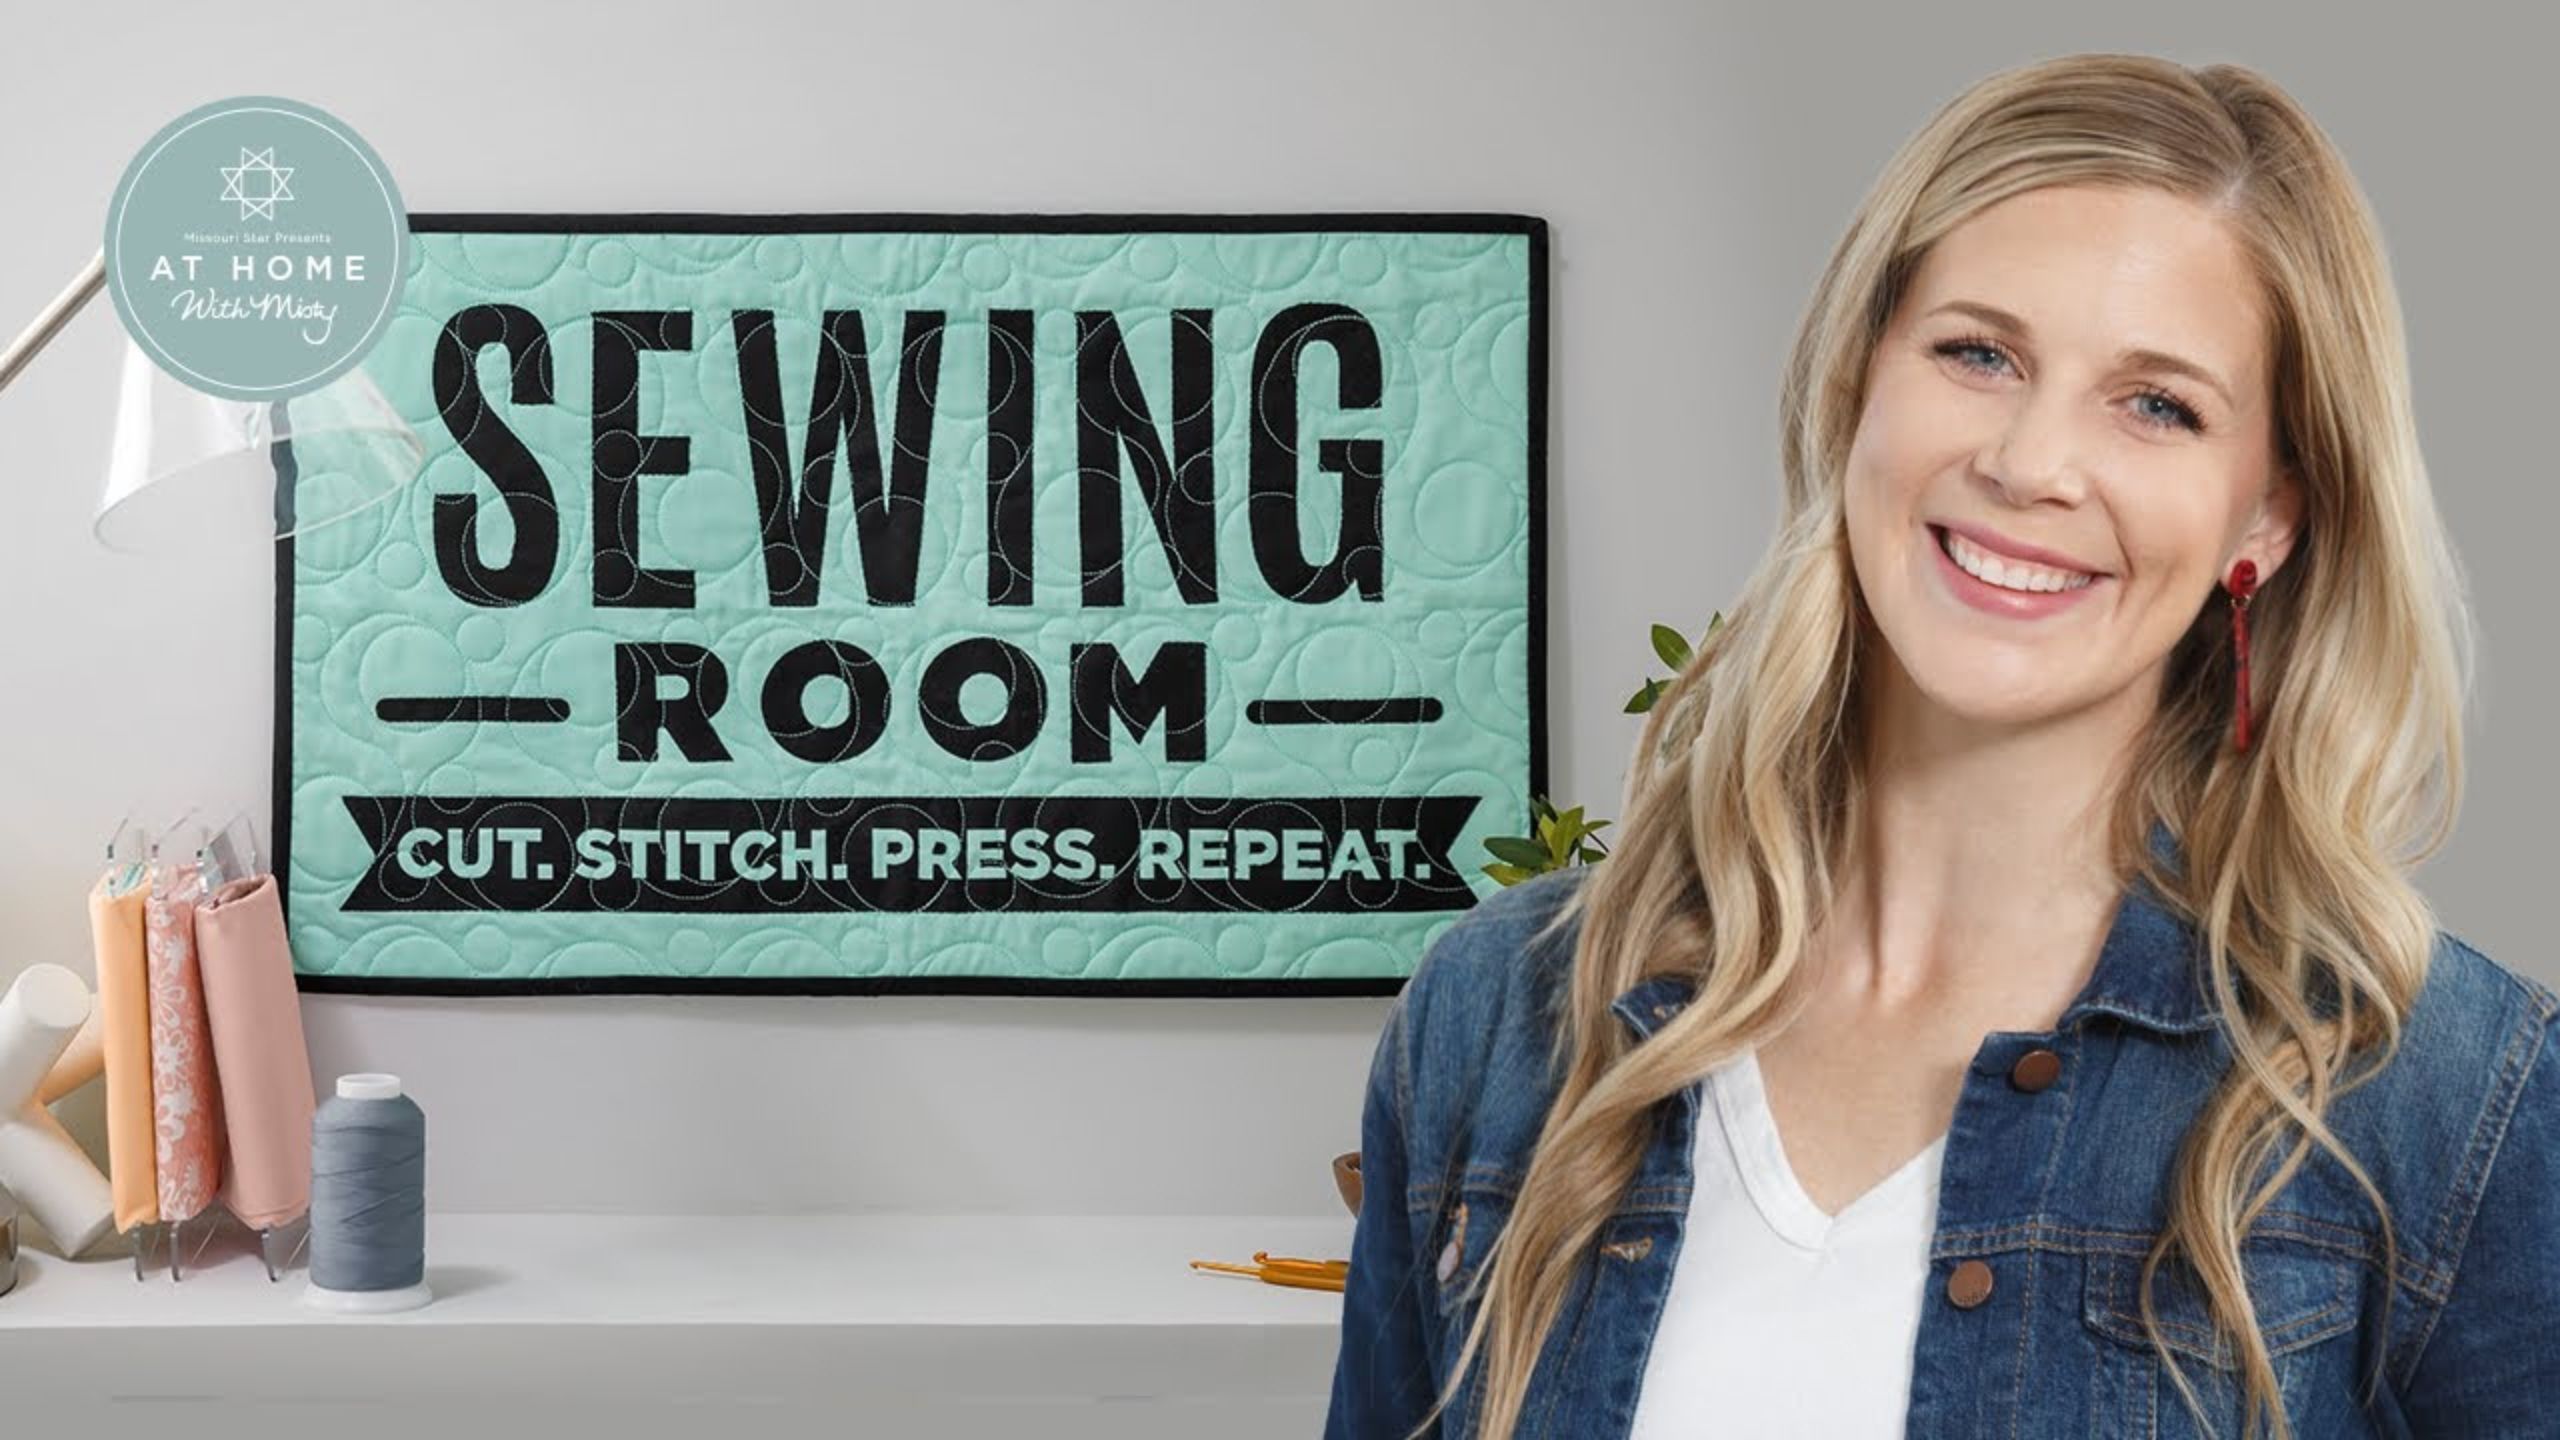
Your sewing room is a unique place because it's where your creativity lives, such a space deserves a grand entrance and Misty has just the thing for you! In this tutorial, she shows you how to use applique shapes to make a beautiful customizable wall hanging that would be perfect for your sewing room. Hang it where it's the first thing guests see when you show them your creative space, and boom! You've got that grand entrance.

Instructor

Misty Doan

Misty Doan grew up surrounded by sewing and quilting. She loves spending time sharing tutorials each week each week, and when she’s not stitching up one of her fun sewing projects for home decor, most likely you’ll find her hanging out with her husband and three awesome kids or working on a house project.

Common Questions

What is covered in Make a "Sewing Room" Wall Hanging with Misty Doan on At Home with Misty (Video Tutorial)?

Your sewing room is a unique place because it's where your creativity lives, such a space deserves a grand entrance and Misty has just the thing for you! In this tutorial, she shows you how to use applique shapes to make a beautiful customizable wall hanging that would be perf...

How long is the tutorial video?

The tutorial video is 00:16:08.

Are supplies listed for this tutorial?

Yes. The tutorial page includes the supplies and materials connected to this project.

Video Transcript

it is national quilting month and coming up next on at home we're going to make this simple pre-cut pre-fuse applique sign for your sewing room that you can make entirely your own be sure to check it out [Music] i don't know about you guys but when i'm in my creative space i like to surround myself with things that inspire me and uplift me and keep me motivated to work on these projects that i'm working on and so i designed this little sewing room sign which i think turned out so cute i kept it super simple because i want you guys to use your imagination add borders make this your own i can't wait to see what you do with it but i do want to walk you through how this is made this is a great project it comes available in a pre-cut prefuse applique pack which you know that i love but it's also a free printable download for you that you can download those reverse letters to make this your own if you would like so let me tell you how we're going to make this to begin with you want to pick your background and i use this beautiful aruba color and i cut it down to 16 by 26 so i have that ready to go and i always when i'm working on applique projects like this like to iron mine in half both directions to give me some guidelines so i'm going to do that first it just gives me a place that i know should be straight when i go to add the letters later so we've got this folded this way we'll press it in half and then open it up long wise and do the same thing there we go now if you are going to use the printable and you're going to download the letters you're going to take your black fabric and you're going to fuse that to some heat n bond or any type of fusible adhesive that you're going to iron onto the back of that fabric and get it ready to go before you trace out your letters because the pre-cut prefuse already has all of that done i can just pull it out of the pack and it's ready to go so i have my shapes here slide this out there we go here's the first half of sewing there we go room and the little detail lines and here is the banner that goes across the bottom so now the next step if you're working with the pre-cut preview shapes is there's little tabs in between the fabric that holds it together and so i'm going to take a minute really quick and i'm going to snip all of these apart you do want to use scissors because there's enough thread there that if you try and pull it apart it's going to snag the fabric which we don't want to happen so i'm going to cut this all out really quick and i'll meet you back here okay i have these all cut out and ready to go they're trimmed apart and i just kind of left them laid out so i knew where they would go i want to point out on the banner that goes across the bottom there are some very small pieces so be really careful when you're working with those and just kind of keep them together and you do want to go ahead and peel off the little paper that comes off the backs of those and they just pop right off of these little ones so i'm going to do that really quick and you can see how the adhesive side has like a little bit of a kind of a gummy texture you can totally see that adhesive on there and it peels off very easy and so i have gone ahead and peeled off the rest of these and remember we ironed the guidelines onto our background fabric so to begin with i'm going to use my big sewing letters first we're just going to bring this over here and i like to work on my pressing surface so that i don't have to shift this around and worry too much about it and to begin with i am just going to set these in place and then i will come back with a ruler and adjust this here we go getting close and the bottom of the word sewing lines up right with our center line so that is why it's easy to start there and then now i'm going to grab my little ruler and i like to just make sure that i'm close to the same width from either side so i'm just going to slide this out just a little bit so about three inches from the outside went a little far that looks pretty good and then i just kind of eyeball all of this so it looks like my g can come over quite a bit there we go it just takes some figuring but i think that looks pretty good so since i have that in place i'm going to go ahead and press this when you're working with fused applique you want to make sure that you're not pushing your iron and running the risk of flipping up one of those edges and catching that adhesive on the iron so we're just going to press down and hold and work our way across the design just takes three or four seconds to get that first fuse and then once you have it you can go over it again to make sure it's really good and stuck with a nice hot iron that looks great all right so next up i'm actually going to bring in the banner and because i want this to be symmetrical i'm going to use my ruler and measure how far down my letters are from the top and they should be right at two inches which they are and so i'm going to shoot for the same distance on the banner so i just gonna place this here slide it down until i get close to that two inch mark and of course there's a lot of wiggle room here but i found that this works well and then i also want to check the sides and that's about an inch and a half on either side and then i think that looks great so we can press that in place you'll notice i did not put those little pieces in yet i'm going to come back and add those at the end so we're just going to press this down these types of projects are so satisfying because they come together so fast there we go now let's grab those little pieces and we can set them in so here's my p you'll notice that the the p and the r are slightly different shapes and so i just like to pay attention to that and the company that makes these pre-cut fuse shapes they actually have a video where they show you that you can pounce this pattern and it'll tell you exactly where to place your little centers but i find that i have good enough luck with just eyeballing it so that's what i do we're not after perfection here we just want to make cool things so there's that one and this one and then one more the tiny little center of the a make sure that paper's off the back and place that down so again because we're working with these little little tiny shapes we just want to press not slide and then move across there we go now those are all fused so now all that we have left is we're going to add room and these little line details in between the two so we can pull these over just like so and if you want to bring in your ruler and measure this obviously you can i just eyeball a lot of this and find that it is good enough for me i do like to just check those outside lines there's my ruler and make sure that we're close to the same distance here these are just a little over two and a half from the edge so we'll just center that up i think that looks really good so now we can press that down there we go so satisfying how quickly that comes together so from this point you would finish this off with either top stitching or a blanket stitch i went with a blanket stitch but before we jump to that i do want to remind you of these little sections in the banner because most of this is going to be contained and not fly away i did not go around every single one of these letters within the banner portion i came in and i just did some straight stitches on any of these areas that could lift so the centers the little pieces that come in on the e we're just going to do a straight stitch so let me actually turn this back to my regular straight stitch so i can show you what i mean there we go and let's just do right here in this area so we have the little center of the a and we have these lines on the e and so i just put this under the machine and i'm just going to take a few tiny stitches to make sure that when i quilt over this i don't have to worry about these little pieces lifting there we go just a few to tack that in place then we can trim those threads there we go and then now we can move to the e you can backstitch across that a few times if you want and then we can trim that away so i just repeated that all the way across these letters because what i wanted to make sure of as as i use this if it has to be washed when it goes to the quilter i don't want any of those little pieces to lift away and cause a problem and so it worked great i didn't have to go all the way around every letter and then from that point we're just going to move to the blanket stitch which is what i did do around all of these letters and on the banner so on this particular machine the blanket stitch that i'm using is setting 24 so return to that and then i'm going to increase my stitch length to 3.5 and my stitch width to three so i have that done here and then we are just going to choose a letter and make our way down of course i'm using black thread so it just blends right in then we stop in the corner and pivot it goes really really fast and i love the way that the blanket stitch finishes that edge you don't have to worry about it fraying but i am not opposed to raw edge applique either and just doing a straight stitch i do that a lot there we go and i'm just going to continue all the way around this all right so i think that was enough for you guys to get the idea how quickly the blanket stitch goes and how it finishes that off nicely you can see on the finished sign that i went ahead and quilted this using champagne bubbles and i bound it with that black edge to just really make it pop but again i want to remind you that you can add any border you want put blocks around it make it scrappy i just think it could be so cute put it on your favorite print background i went with the black letters because it would pop off of so much and so i'm really looking forward to seeing what all you do to make this your own i hope you have a wonderful national quilting month and that it's full of all kinds of quilty goodness and until next week have a great time see you later hey everyone it's misty thanks for watching at home if you aren't already a part of our missouri star family be sure to subscribe and hit the bell if you want a notification every time we release a new video i'll see you next monday on the newest episode of at home [Music]

More Fabric by Yard tutorials

See all