

Make a Winter Wall Hanging Quilt With Jenny!
 Jenny Doan
- Layer Cake
- Holiday
- Wall Hanging
- Beginner
- Quilt size 48" × 42"
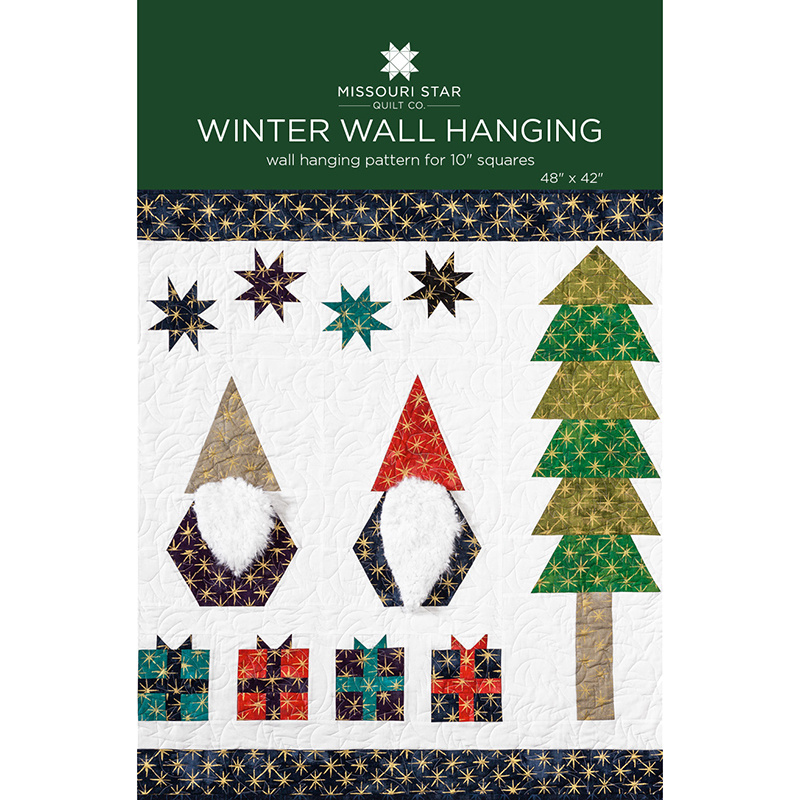
Jenny Doan demonstrates how to make a quick and easy little Christmas quilt featuring present blocks, a Christmas tree, wonky stars, and two little gnomes with real furry beards! For this beautiful holiday quilt project, Jenny used half hexi hexagon template, a simple wedge ruler, and 10 inch squares of precut fabric. The fabric she chose for this holiday wall hanging is the Grunge Seeing Stars Metallic by BasicGrey for Moda Fabrics.
Instructor
Jenny Doan
Jenny Doan is an American quilter, author, and YouTube personality. Jenny started Missouri Star Quilt Company in 2008 and today it is the largest quilting supply vendor in the United States.
Shop this tutorial

Common Questions
What is covered in Make a Winter Wall Hanging Quilt With Jenny!?
Jenny Doan demonstrates how to make a quick and easy little Christmas quilt featuring present blocks, a Christmas tree, wonky stars, and two little gnomes with real furry beards! For this beautiful holiday quilt project, Jenny used half hexi hexagon template, a simple wedge ru...
How long is the tutorial video?
The tutorial video is 00:26:07.
Are supplies listed for this tutorial?
Yes. The tutorial page includes the supplies and materials connected to this project.
Is a transcript available?
Yes. A written transcript is available on the tutorial page.
Video Transcript
So the first thing I”m going to show you is the presents. And the presents are made up of one five inch square that’s quartered. So the first thing I’m going to do here is I’m going to cut a five inch square like this. And then I”m going to cut it into, twice both ways so that we have four 2 ½ inch squares. Because that makes our little present. Just like that. Now we have to put a ribbon. See right here on our presents, we have a ribbon. This is a little inch and a half strip. And so I’m going to find some that pops that is a different color. We’ll go with this red right here. So I’m going to cut an inch and a half piece like this, just like that. And then I’m going to sew, I’m just going to attach two of these pieces to it like this. And clip them across and then sew the other ones. So we’re going to go to the sewing machine and just attach two of these to this inch and a half ribbon. And we’re just going to sew a quarter of an inch right down here. And then I’m going to chain piece and put my other one on here. Just like that. And then I’m going to trim this off right here. I’m going to cut this right through here. I better use my ruler. Here we go, right up here. We’re going to cut that and then I’m going to cut here. Then we’re going to go ahead and press this back. This is one of those projects where because you’re using several different pieces I kind of get all over the place. I’m kind of a mess. So don’t mind me just keep on sewing. Alright we’re going to iron these back like this. And then we’re going to sew the other two squares to the other side this way. Just like that. So let’s do that. Oop, let me get this off of here. Alright now we’re just going to sew a quarter of an inch down here. And a quarter of an inch down here too. Now we need a piece to go across the middle. And so I’m going to press these first. And then I’m going to see if the strip I have is long enough or I need to cut another. Alright so let’s see here. It’s not long enough so I”m going to need to cut another. But I do need two little squares right here inch and a quarter or inch and a half for my little bow. So I’m cutting two little squares out of this end piece and I’m just going to set those aside for when I’m ready to make my bow. And then I’ll cut another inch and a half piece over here. Let me just use my big ruler. And that will be my, my ribbon across the middle of my present. Alright. So now this is going to go in here like this. Just like that. And I’m going to sew this, I’m telling you I get all over the place when I make these fun things. I’m going to sew this both sides to it like this and then trim that piece off. So I’m just going to lay this on there and sew down the side. And then I’m going to trim this piece off right here. And then I’m going to go ahead and add my piece, I’m going to go ahead and iron it back I think first. So we’ll iron it and then we’re going to lay this other piece on here like this and sew it right to there. And it should line up pretty good. Alrighty.
So for the top of our, our little present, the top of the present slips back into the background. You’ll see. So there’s some background fabric on the top. And so look at that. Look how cute that little present is. I’m going to iron these seams flat so it lays nice. Just give it a steam right there. Alright. So there’s our little present. And now we need to put our piece across the top. And the top again, this little background piece right here. So we have a three inch piece in the middle. So I’m going to take a little background square and I’m going to cut a 1 ½ by 3 ½, I mean by three. So 1 ½ first right here. And then three inches. And I”m going to trim up this side over here. It had like a little bit of a curve to it. And then just three inches right here like this. And I’m going to save that because I’m going to need that for the end. And I’m going to need one more. One more little piece for the end. I’m just going to cut one more little strip here. Alright so now on this we have these little inch and a half squares we’ve been saving. We are going to put them here. And they should actually match up pretty close so lay them on your piece like this and make sure they match up. What we’re going to do is we’re going to sew corner to corner here and corner to corner down here on both little pieces. So you can draw your line or iron a line. I’m just going to eyeball that because, well I’ve been sewing straight across for a lot of time. Alright so I’m getting here close to the end. I’m going to set my other square on there right up next to it. Now I’m at the top there and then I’m going to turn this and come down the other side. And I’ll show you closer as we get right here to this other part. Make sure your needle is in the right place. There we go. I think I got it now. And then you’re going to come down. Alright so now once you get your pieces sewn like this you can trim off the little sides right here like this and this. And then we’re going to press that back. And you’ll see how this is going to work for the little bow. Alright, there we go. So then this is going to go on the top right here. See how that works. And then you’re going to need a little square to take over to the edge. And it looks like that may be a little short. You know when I do these, I would much rather cut a little bit longer piece and trim it off than be too short. You can always trim off. And with wall hangings there’s so much kind of left to chance because it’s like I don’t know how this is going to fit in there but I hope it works. Alright I’m sewing a little white piece to either side here. And I think the measurement is actually 1 ¾ or 1 ½ but give it a try and see. I’m going to press these out. And then I”m going to add this to the top of my present. Now I can see that right there is the middle of my bow and right there is the top of my ribbon. And I’m going to lay that right there. I’m going to put a little pin in there and then I’m going to sew across there and trim off those ends that are a little bit too long. Now when you’re sewing these little seams you do want to be pretty accurate with your seams because on the little seams a little bit off can make a difference. Alright so there we go. Now I’m going to use my present as a pattern and just trim these edges off right here and right here. I’m going to press this open, take my pin out. Press it open. I’m going to get right of these threads. There we go.
So what we’re going to do now is we’re going to make the legs of our wonky stars. So I have three made here and I’m going to show you how to make this other one. So you’re going to take your blue. And this is a 2 ½ inch square and we’re going to lay it on here so it crosses over the middle. That’s important. You want to make sure you don’t lose your point. So make sure that your square crosses over the middle and we’re going to sew just right along that edge, right down there. And then we’re going to press this back, right here. So see how this is on here like this, we’re going to use our square as the pattern and we’re going to trim this like this. So I like to trim my first cut all the way across like that and then cut this little point up here, just like that. And then I’m going to come over here and I’m going to use this edge and I’m going to put it on here and cross over the middle again to make our wonky leg. Now you can put that any place on that side if you want a long leg or a short leg. Just anywhere you want along there. You just want to make sure that your piece is going to cover the corner. Alright so now let’s press this back. There we go. And now we’re going to again use our little squares as a pattern and trim this off. Alright. Now let me show you how this goes together because this is really cute. So you’re going to put your legs on all four sides like this. Just like that. And you’re going to put a regular 2 ½ inch square in the corners like this. And you’re going to sew that all together. And you’re going to make four of these to go along the top.
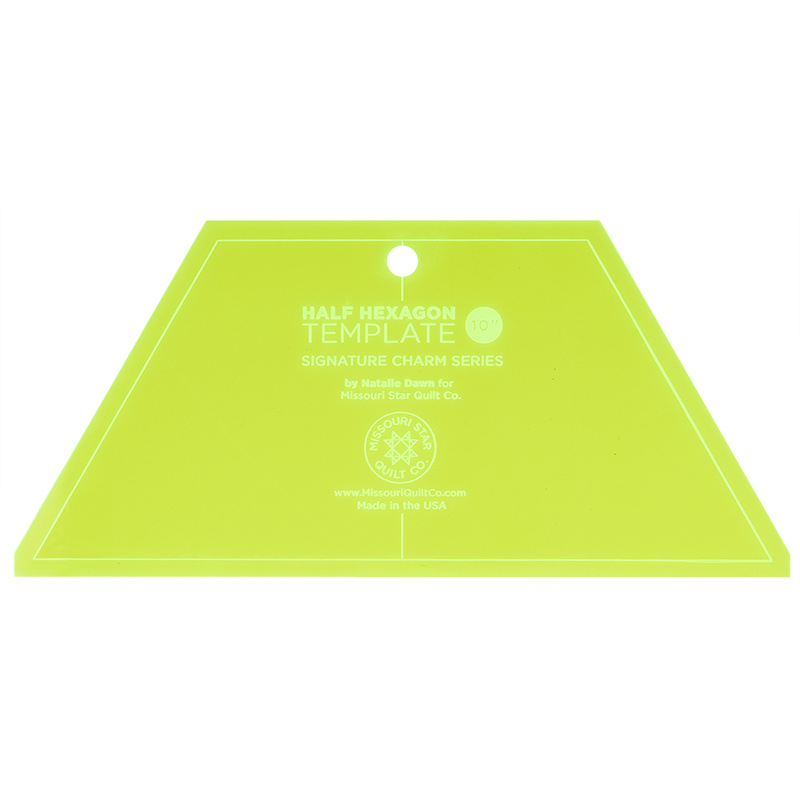
So now let’s talk about our Christmas tree which is just the same as our, as our little gnome body as well. So I’m going to pull one of these out of here and one of these out of here like this. You’re going to need your half hexi ruler. And we’re going to cut some bright green ones and some olive green ones and I’m just going to go ahead and fold this in half like this. And I”m going to lay my ruler just like this. Let me move this so we can get a better shot here. I’m going to lay my ruler on here like this and I’m going to cut out my tree pieces. So we’re going to cut here and I’m going to cut across here and over here. And then I’m going to cut down this side. And then I’m going to turn this and come across the top. So I’m going to line my ruler back up and then just come right across the top just like that. And you’ll need, for the little tree you’re going to need one, two, three, four, five, of these and then this is going to be a flying geese right up here at the top. So how we make the tree is we’re going to take the same, here’s my square. We’re going to cut the same exact half hexi as we did for the tree part and these are the tree sides. And so we’re going to put it this way. And again we’re just going to trim, oop there it is. We’re just going to trim up this side and across. And then I”m going to turn this and trim off this middle part right here. And then I”m going to cut this directly in half. So I want to lay it on here so that my edges line up. And I’m going to cut it right in the middle right here. And then what we’re going to do with these is we’re going to flip these around and these are going to make the sides for our trees and the gnome body. So as we take these, I’ll show you how easy this is to do. You’re just going to lay one of your pieces right like this. And you’re going to lay it back on here like this. I always turn it to make sure it’s going to end up right because it would be really easy to get that a little wonky. So lay this on here like this and then just sew a quarter of an inch down the side. And you’re going to do the same thing to the other side. Now remember your solids don’t have a back or front so you just want to make sure that your, they’re on there the right way. I’m going to open that to make sure. Yep. And just put one on each side. Alright. So now we’re going to press these back just like this. Press them back, press them back. And you’re going to do five of these for your tree. And see how this is a little bit off right here, don’t worry about that. You’ll catch it in that quarter of an inch seam and you won’t need to worry. So you’re going to do five of these for the tree. And you’re just going to sew them together row by row, just like this. Row by row. You’re going to do the same thing for the body of your gnome. This is just two half hexis sewn together, you know, in a fun color.
So now we’re ready to do the topper. On the top we’re going to cut a five inch, we’re going to cut this ten inch square in half so it’s five by ten like this. And then we’re going to cut it to 8 ½. So let me look on here. Here’s 8 ½. And I”m just going to trim off this little part here. Then what we’re going to do is we’re going to take two five inch squares and we are going to iron the line and attach them to each corner to make a big flying geese for the top. So it makes the point of our tree. And so we’re going to sew one on here like this and sew it across. And then we’re going to add the other. Alright so let’s line this up on the corner and sew right on the line. We’re going to trim this off, just like this. And lay that corner back. And then we’re going to add our other corner over here just like that. Just like that. So again when you get it over here make sure it’s still all nice on the corner and sew right across on your line. Then you’re going to trim your line off, I mean your half side. You’re going to put your ruler right a quarter of an inch from your stitch line and we’re going to iron that back. That gives us a nice crisp point for the top of our tree. So here’s the top of our tree. We’re then going to add a couple of side pieces that are going to make this the same length as our hexi parts. So what we’re going to do here, we’re going to take our little hexis and we’re going to stack them up like every other color and we’re going to sew them like this so that they, just right sides together and sew them down. And then this guy is going to come along here and he’s going to cap at the top. And you’re going to have two pieces along the side that you’re going to trim up so all of this matches. And you’ll kind of trim your tree, you know, once you get the whole thing together you just want to make sure it’s all trimmed and nice and straight. This bottom piece, this trunk is just three inches by ten inches. And, and you’re just going to put your side pieces in here to do it.
Now we’re ready to move onto the gnomes. Now the gnome body like I said you make it very similarly to the tree. And I have two of those cut right here. But instead of stacking them like we did with the tree like this we’re going to turn them toward each other just like this. We’ve already, we’ve cut our, our star piece with our half hexi and our background with our half hexi and cut it in half and attached it. And we’re just going to sew this together just like this. And sew a quarter of an inch right down the side. So we’ll do that. And you kind of want to make sure your sides line up. I actually had several thoughts when making these like I thought it would be fun to kind of pull their belly apart and put a fat belt in there and things like that. There’s all kind of ways you can customize these to make them your own which just make them really fun.
So once you get your gnome body all pressed it’s so darling. Isn’t that cute? Really cute. Now we’re ready to do our hat. So we’re going to choose red for our hat. And we are going to cut it. So if we lay this, our little wedge on the edge, you can actually get two hats out of each square. I’m just going to lay mine right along there and we’re going to cut over here like this and cut it out. And I kind of went right off the rails right there but I was able to fix that up. There we go. And now here’s our cute little hat. And let me show you how to set it into a square because it’s easier than you think. So what we’re going to do is we’re going to cut a background piece that is 16 by ten. We’re going to fold that in half right here. And we’re going to lay our ruler right here, our little wedge, see how it has this dotted line? That dotted line shows the middle and we’re going to lay that right on the fold just like that. Alright so what I’m going to do is I’m going to cut right up the side of this just like this and right off and move this out. Now what I’m going to do is I’m going to open this up and I’m going to take my ruler and I’m going to continue on this one side right here and just make it go straight across like this. My side that has this little peak right here, that’s the side I’m going to sew my hat to. And so we’re going to lay that on here and just stitch that in. We’ll get our points as close to the corners as we can and we’re just going to stitch a quarter of an inch down the side. So let’s go ahead and put that on there and sew it down. Alright now let’s press this open just like this. Alright so I’m going to trim off this little edge right here so it just goes straight up from the hat. And we trim off this little piece right here. And then we’re ready to add our other piece back in.And we’re going to look at it and make sure that we have it going the right direction so we don’t end up with something really crazy looking. So I’m going to lay this back on here like this. And I”m going to match up my edges. I’m going to extend this little piece over here just a quarter of an inch and have a little bit of my hat showing down there. So hopefully it will set right in there. If it doesn’t it’s no big deal because we’re going to trim this block up. Alright so let’s sew down the side. Whoops, I’ve got my fabric caught in there. Alright so we are going to start again and sew down this side, make sure this is all lined up real nice. Alrighty. So let me trim these little threads off up here. I’ve got it a little caught in my sewing machine when I started but that’s alright. And we’re going to iron this back.
So our hat block is done and we’re ready to sew it to our body. Now you can trim these individually. They’re going to end up being 13 ½ wide. Or you can go ahead and sew your block together. If you do that you want to make sure that you center up the hat on the body, sew your seam. And then when you’ve got it all together just remember this whole block is going to be 13 ½ wide and so you’re just going to trim it up. And you’re going to make two of those little guys.
And then let me just talk a little bit more about what we’ve got going on here. So on our stars I put a little 2 ½ inch strip on each star block. And then I put one up and one down, one up and one down. That gives them that movement. On this one, this was pretty straight forward. We sew all these together and our trunk is just the one three by ten long piece. On our presents we have a 2 ½ inch strip in between. When you get your two gnome blocks done, there’s a little 2 ½ inch strip that comes right in between there. And we also put a 2 ½ around this side and up this side. But these beards. Can we talk about these beards? They’re so cute. So what we did was we used cuddle fabric. Now there’s, there’s all kinds of cuddle out there. And I just want to show you some. I have a little, one of these finished over here. I’m just going to grab it and put it up here. And there’s a couple of things you can do. So I just tacked these beards on. So these are just tacked on here. So that you can take them off when you’re washing it or whatever you want to do. And then we had another idea of putting, sewing a little button to our gnome right there and then using our fur and cutting a little slit and buttoning it on so this will look like the nose. So you get license to do whatever you want to do with this. And basically, here let me show you some of these pieces of this cuddle that we have. You know, I like, you know, the old gray beard, the gnome, the white beards. My husband has a white beard. And basically we just cut a little beard shape out of here like this. But look you could have a gray. Look how fun this would be. You could have, maybe your gnome is very young and he’s got, he’s got kind of a blonde/brown Viking beard. You think? Anyway there’s all kinds of things you can do. You’re just going to cut a little shape. You’re either going to tack it on. Oh maybe he’s a pirate and he’s Blue Beard. No I don’t think so. Alright. So there’s lots, lots of good options. Lots of good options with the cuddle fabric or fake fur or anything like that. I’ve even gone so far as to get a collar off a coat I found at a thrift store that had a good fur texture to it and made a little beard. So have fun with that. You’ll cut your little beard shape however you want. Ours are a little different. This guy’s is longer. Natalie says he’s a true gnome because his beard is longer than his body and this guy is still in the growing process. So you can do whatever you want on that and have fun. I hope you enjoyed this. I hope it brings you some joy and makes you smile. Merry Christmas and we hope you enjoyed this tutorial from the MSQC.



