Skip to content

Free quilting video tutorials from Missouri Star

Quilting Tutorials
Make a "Wire Frame Tote Bag" with Liz of Missouri Star!

Make a "Wire Frame Tote Bag" with Liz of Missouri Star!

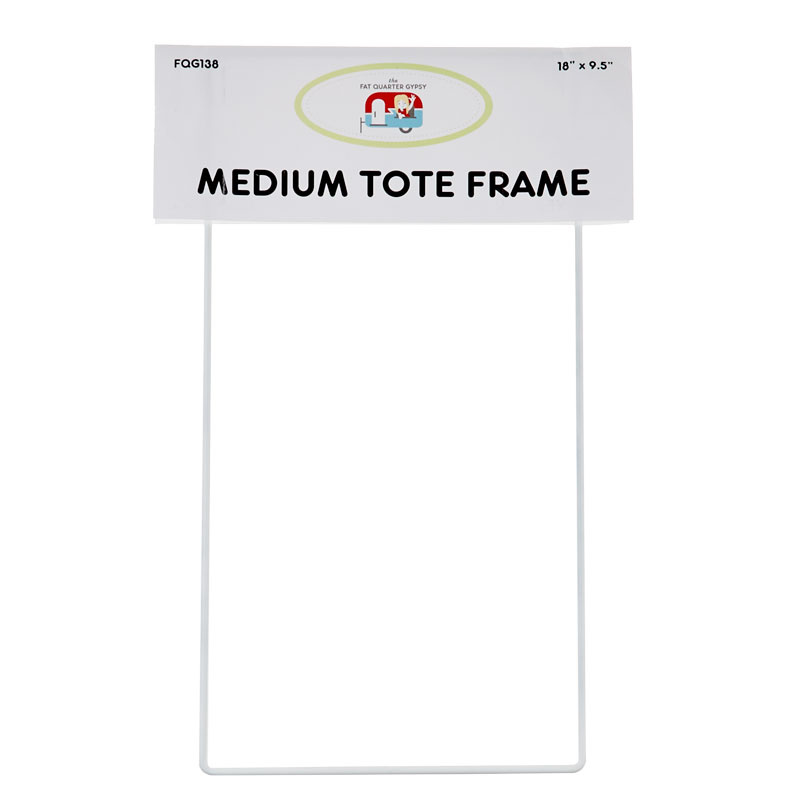
Join Liz as she whips up a Wire-Frame Tote Bag using the Wired Tote Frame and Pattern by the Fat Quarter Gypsy. This pattern and frame makes a cleverly useful tote for carrying groceries, picnics, even quilting supplies! The wire frame at the top edge makes the totes extra sturdy and is designed so the wire frame can be removed to wash when needed. Pattern includes instructions for three different sizes.

Instructor

Liz Gubernatis

Liz Gubernatis is the Senior Manager of Education at Missouri Star Quilt Co. and loves teaching people how to quilt! She is a creative idea generator and champion. Colleagues, family, and friends know her for my creativity, can-do attitude, and common sense.

Common Questions

What is covered in Make a "Wire Frame Tote Bag" with Liz of Missouri Star! (Video Tutorial)?

Join Liz as she whips up a Wire-Frame Tote Bag using the Wired Tote Frame and Pattern by the Fat Quarter Gypsy. This pattern and frame makes a cleverly useful tote for carrying groceries, picnics, even quilting supplies! The wire frame at the top edge makes the totes extra stu...

How long is the tutorial video?

The tutorial video is 01:08:17.

Are supplies listed for this tutorial?

Yes. The tutorial page includes the supplies and materials connected to this project.

Video Transcript

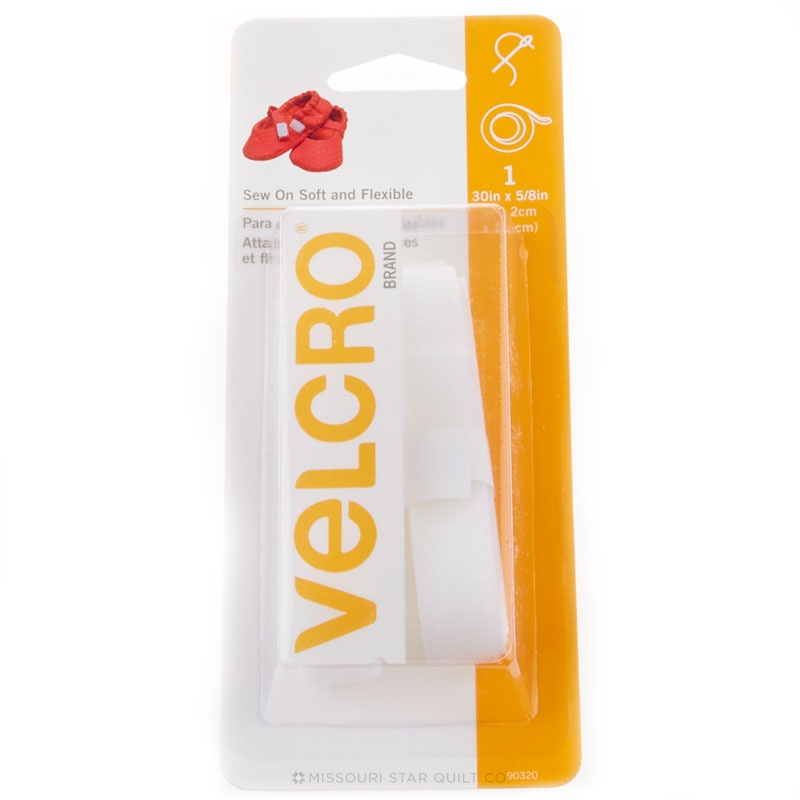
hi i'm liz with the missouri star quilt company today i'm going to show you how to make the wireframe tote bag with this great pattern from fat quarter gypsy the wire frame sits inside this clever pocket and can carry all your favorite goodies let's get started so to make our wireframe tote we're going to need a pattern this is from the fat quarter gypsy and the wireframe tote pattern makes one of three sizes today we'll be using the large tote frame you'll need an outside fabric a lining fabric and a pocket fabric we're going to use a lot of clips today and for our handles we'll be using tula pink webbing by renaissance ribbons you'll need hook and loop tape and we're going to use a unique fusible foam stabilizer from inner foam plus as you can see this one was designed for this project so to make this bag because it is not our pattern i'm not going to give you all the measurements and details but i'll walk you through how we make the bag and there's a lot of steps but it's not hard so the first step is to cut all your pieces and that includes the foam and you can use regular batting for this but this double-sided fusible foam is awesome for this project it gives a little bit more body and so when you cut your size for in this case the large tote you're going to mark your middle and then you're going to mark a crease where the bag will actually stand up and she has all the instructions in the pattern for how to measure that depending on what size tote you're making once i've got this done i'm ready to start the fabric part the fabric is going to be cut a little bit larger than the foam so that we can piece it together and it's going to come in two pieces which we're going to seam right down the center and then press open then she asks us to fold over one quarter inch on each side and stitch that down so i'm going to show you how i do that because you can get in there with the iron but i find that i burn my little fingers so my trick is to eyeball a quarter inch does not have to be perfect it's a very forgiving pattern and i'm just going to run my fingernail along that and if that sound gives you the heebie-jeebies i'm sorry but i found this is a really easy way to set a finger press of that and you can see here i'm going to fold over and make sure that seam lays on top of itself and isn't starting to skew down one side and i'm just going to finger press all the way down the side and then we'll stitch that down and as you can see i've done that on one side already so do this on both sides you don't need to do that on the top and bottom okay so now that it's finger pressed i'm going to come back and i'm going to sew and she says an eighth of an inch that also does not have to be perfect so i'm just going to kind of eyeball the center of this quarter inch and stitch right down the center of that to set this so that they'll be a nice even seam on this other side i'm going to show you a little trick to this too i'm not going to start right at the edge if i start right at the edge i have very high likelihood of that little edge going down into the machine so what i'm going to do is start about half an inch away from the edge back stitch and then stitch forward and since you do that quite a bit on this bag that trick worked for me really well so i'm sewing about half an inch and i'm going to back stitch all the way back and now i can stitch forward [Music] and it doesn't get caught so i'm just going to run down the side of this and then we'll do the next step and you can sew right off the edge and then we're good to go the other thing that i want to point out is that i've used a fabric this really cute fabric with these lemons and this kind of gold sheen you guys know i'm a fan of the sparkly this is a non-directional print or at least it could be argued that there's not a direction because it's got a great toss to it if you have a directional print you want to make sure that when your two pieces are coming together the bottom of both is at the seam so that your direction faces upward correctly when your bag stands up so i hope that makes sense you want to make sure that your top is this open piece for both directional sides of the fabric so then once you have this we're going to press this to the foam and that looks a little something like this i'm going to line this up and then flip it over and press down from the fabric side so remember i said that the fabrics cut a little bit larger even with folding over your quarter inch the quarter inch should overhang past the foam so it should look just like that that means you did it right and it's going to come all the way up to this top edge and this bottom edge those are going to be open in raw and then you'll have finished edges on the sides that overhang the foam so once i kind of press this all out you can add some clips to the corners and sides to hold it in place and then when you flip this over you're smooth it out and you're going to start from the center one more trick to pressing this and making sure it's even and doesn't go one side or the other is because you have this center seam you can line it up with your marked seam so you can see this is off a little bit i'll move this over so that my center seam of my fabric lines up with the seam marking that i made for the center and i'll do the same on both sides so you can see here's my center seam here's my marked center on my foam and then when i start pressing i'm going to press from the center outward so i'll smooth this and then press according to the manufacturer's instructions for your product if you're using batting you can use a fusible fleece or something that helps to attach this you can use whatever works for you and again it's not super long because we're not trying to press all the way through the foam just to adhere the batting or the foam rather to the fabric for the outside so you can see that's adhered really nicely so i'm going to jump ahead for just a second because your next step is to then mark and quilt this outside so once it's all pressed to the foam we marked those creases we marked our middle i then went ahead and marked lines that i'm going to use for sewing the quilting this was a great hack that i had noticed for the first time in her pattern and what she mentioned was that the foams on the inside you can draw all over this and then just follow those lines for any quilting that you like so in this case i did a couple of angles and this will hold together really nicely you can add as many as few lines as you like the only thing you do have to make sure you do is go ahead and stitch on those crease lines because that will again help the whole bag to stand up correctly so even if you do no other quilting which is totally fine too you want to make sure you stitch along both crease lines and then any additional quilting you want to do is bonus so once this is done we're going to the next step so step two is to make the outside pocket there's two parts to the outside pocket there's the pocket itself and then there's a bit of a binding that also finishes the edges and helps you attach it to the bag so its finished product is going to look something like this where you have that binding over both edges so let me show you how we do that you've got the pocket piece and then you've got this that you're going to fold in half lengthwise and press a nice crease and then you're going to fold that and attach that up here right along the edge of the pocket and do that on both sides and sew a quarter inch away on both sides so now you've got this nice little flap once you have that flap you're going to press that away so the whole seam is going away from the pocket body and i'm going to use the iron to do that so pressing it away and then i'm going to fold it over and we're going to stitch that down again and that encloses the seam so it gives you a really nice clean pocket edge and you do it on both sides so when you do that i found the easiest way is to flip it back to the front and stitch about an eighth of an inch or eyeball just close to the edge of this piece and that's how you get this bottom edge for the top edge i went ahead and top stitched again so you've got the same stitch i just showed you and then another stitch right across here because when we attach the pocket to the bag we're going to go ahead and use that same space on the bottom so what we like to do is make it look symmetrical and really intentional so you finish the top edge to look like the bottom edge will look so now we can attach this to the bag so this is the quilted bag you can see my marks and i quilted it i'm going to choose one side doesn't matter which one and then i'm going to find my crease line which is right here and about a quarter inch away from that i'm going to place the bottom of this bag and i'm going to center it up so again this is very forgiving you can kind of eyeball this or you can measure specifically from either side and there's some instructions in the pattern that are really nice and clear one other thing i love about her pattern is that she puts in a red font when there's something that's like a big important hint so here's how you'll do that and then you can pin that down i'm going to put one pin up here close to the top and then you can stitch so i'm going to show you what i meant about the stitching here or top stitch right along here say top stitch but it's gone on the bottom so maybe it's a bottom stitch and that will be our pocket attached slide this in to your machine line it up and just stitch one nice row across the bottom all right then we can baste up the sides so i'm going to turn the whole piece and really close so not a quarter inch it's going to be much less than a quarter inch right along the edge i'm just going to stitch this down the sides will be held on properly when we put the handles on in a later step this just holds it in place so it doesn't flap around on us while we're doing other parts of this project and then one more time and sometimes people ask like how do you work with this the foam is super flexible super soft you can just roll it up scrunch it up and get it out of your way and i like to go from the bottom of the pocket to the top because i don't want to create any puckers so that's why i'm not going to flip the whole thing around i want it to still go from the bottom to the top all right so that was super easy that's our outside pocket attached and basted so i can take this pin back out and that's all set to go next we're gonna work on the lining okay for the lining we're gonna do a very similar setup but it's going to be ever so slightly different so here's where to pay attention you're going to take your two lining pieces for the body and you're going to seam them just like before and press that seam open but we're not going to right away turn the edge first we need to add the inside pocket and that is going to be a larger piece you're going to fold in half lengthwise so hot dog fold not hamburger and then once you've got that pressed you're going to stitch really close to the edge and this light backing or sorry light fabric it's really hard to see my stitches but it's just right close the edge and it can waver a little bit this is not perfection but it's pretty close and so i just followed the edge now that i've got that the other part is that we are going to have again in the pattern really clear instructions for how to measure this you're going to make a marking on your lining on one side so this is where the bottom of our pocket is going to be i did this wrong the first time and i put that marking on the inside of my lining and i stitched my pocket to the inside of my lining so do as i tell you not as i did flip this around to make sure your seam is clean here and then we're going to use that marking to line up the bottom of our pocket so i'm going to show you here there's the bottom of our pocket i've just made a little tiny sharpie mark in the edge that's never going to show anywhere you can use your favorite marking tool i'm using a sharpie partly so that you can see it because again this is a very light fabric once i've got this down i'm going to stitch a quarter inch away all the way across and this is where i find that pins are super helpful so i'll go ahead and pin all the way down this edge but one other tip i have for you is don't pin right at the edge if i pin about an inch away all the way down i can leave all those pins in when i stitch i don't have to take them out which holds everything nice and stable on this kind of weirdly spaced edge so now i can go all the way down this edge with all my pins intact about an inch away and my machine won't go anywhere near them my needle is totally safe so we'll stitch down this edge and then i'll show you the trick to close that off and make that seem really nice so now my pocket is sewn step one and i'm going to press it away towards the top but i don't want this raw seam to be raw so once i have pressed this away i'm being gently and finger pressing it first coming back along the edge and just kind of press it away now to enclose that seam i'm going to stitch again just on the outside of that so a little more than a quarter inch away we'll enclose that seam on the inside and that pocket will never ravel okay so let's take a look some nice finished edge on the outside of the pocket and when we peel this back now all of that seam that was raw is encased so it's not going to ravel when you go to wash this so that's that part of the pocket again just like on the outside pocket we're now going to baste up the side right on the edge and then once that's done that's when we'll finally do the fold of the quarter inch on both long sides all the way across i've got that done already here so you can see what that looks like so we basted up the edge and then when we turned it over to turn that quarter inch you can see i kind of followed that same basted edge when i stitched a second time and pins are also going to be your friend here in these bulky spots because your machine may want to catch this pocket like mine did and pull it down so i want to you see it's again very forgiving and it's not going to be a problem but if this happens to you it's okay so i want you to see what it looks like my pocket caught here on the edge when i was stitching down the quarter inch this is eventually going to be caught in another seam so it's not a big deal and if it really bothers you you can pick it out and have that stitched down again what i did was clip right there to hold it in place and i stuck a pin right here to hold that so that the pocket didn't try to flip down so once you've got both edges of your lining all cleaned up now it's time for us to attach the two pieces main body pieces together so we're going to take this lining and fuse it to the foam this is important to where the pocket is so this pocket wants to be on the opposite side of the lining pocket so my pocket is on my left on this then this pocket is going to be on my right on this side so that we have a minimal bulk now you can choose to add as many pockets as you want to your project if you would like your bag to have both inside pockets and both outside pockets go for it this is just following the pattern as it's written so once again we're going to line this up so where the quarter inch overhang is on the side on both edges and the top and bottom is lined up nice and even and then we will use our iron and fuse from the center and again one more time now this is even easier to line up our center seam with our drawn line so you can see they're off just a little bit so just kind of maneuver that into place and start adding some clips this is another spot where you might think wow this is a little bigger than the other side or this is a little funkier it's it's super forgiving i can't say that enough because the project is going to work and come together into a really easy bag regardless of whether that works the way you think it should perfectly and so here's one thing that i'm trying to show you so you can see my lining is actually slightly larger than the main body fabric of the outside and why that happens is because when we quilted it actually scrunched up just a little bit that's fine don't worry about it don't try to trim anything there's nothing wrong with that we're just going to kind of center it on the side make sure our center seam is going to be even and then we're going to press from the center out so we'll smooth this and we'll take extra care to hold that iron over the pocket area because it needs to go through three layers of fabric to get to the foam and not fusible so once we've got that done i'll meet you back here and we'll do the next step okay so once you've fused the lining to the foam we're going to start with attaching the soft parts of the hook and loop tape so i've done one side already and i'm going to show you how we do this it's a half inch hook and loop tape and it needs to be about a half an inch away from the raw edge so you can kind of eyeball like i've done here roughly the width of the tape then away from the raw edge and i've pinned this down several spots along the way and again this is the soft side we're going to work with the scratchy side later so i've centered this about a half an inch away from both of these edges as well and we're just going to kind of stitch that down and what i'm going to do is come along this side pivot come across the short side and then i'm going to come along this side and again this is all foam so it's going to roll up and squish up and shove itself right through the throat of the machine no problem very easy let me show you how we do that take a few stitches and make sure you don't go over your pins i'm kind of holding the extra weight of this so that it doesn't drag my needle right off my hook and loop tape and i'm right along the edge maybe an eighth of an inch again i'm not measuring it doesn't have to be super perfect and this soft edge is like butter it is so easy to sew through i'm going to give you a couple tricks for the scratchy side when we get that far but this part's nice and easy so needle down pivot take about five six stitches and then i want my needle down again to pivot and i'm gonna scrunch all this up and just kind of shove it right there and then again hold it and guide it through the long side needle down pivot and just a few stitches and then i'm going to back stitch here at the end to lock that into place and voila so now that i've done that on both sides this part is done we're ready to do the handles and then when we attach the handles to the outside of the bag they will finish off this pocket and we'll be ready for the sides so first up handles inner pattern fat grower gypsy shows you how to make fabric handles and you can follow that instruction and it's beautiful works great and you can make them out of any fabric you like what i'm going to do though is a little bit of a hack i'm going to use tula pink webbing by renaissance ribbons and it is the right width for me and it has that great handle quality and i don't have to do any extra stitching to create the handles because they're really cool already so i'm just going to show you how i'm going to attach these pieces to each other in the pattern you're creating something that's about 135 inches ish and that's for this larger bag but the thing about handles is they can be a little bit larger they can be a little bit smaller so you can customize that to your size these are each two yards long so when i put 72 inches together twice it's 144. that's not a big deal to me i'm a little bit taller i like a little bit more handle to my bag if you want to trim them down to something smaller what i'm going to recommend is that you trim both sides or both pieces the same amount so that eventually you don't have one that's longer than the other because what we're going to do is use the seams as the center points for the handles so i'm going to go ahead and leave these at their full length but if you wanted to trim them down again you could trim a section just make sure you trim it off of both sections okay so now we're going to attach these together there's not a right and a wrong side so i'm just going to decide which was which and i'm going to put my right sides together and then about two inches away i'm just going to stitch a straight line this is where it's going to help to have a really nice sharp needle i swear by the microtex sharp needles because they will go through anything and everything and a nice sharp needle at this stage and for that scratchy part of the hook and loop tape is super helpful so here we go and again it's not a perfect system it's just going to be a nice straight line and you can back stitch and now i've got this funky piece funky is my word of the day so we want to clean up that edge by pulling one away and then we're going to stitch again on this to hold that down and it's okay if it ravels a little bit what i'm going to do is kind of finger press i don't want to take an iron to this but i want to kind of just finger press and give that a little bit of a crease and then i'm going to stitch about a quarter inch away from this fraying edge you can use a product called fray check and also if you want to help this kind of clean up that edge but it's going to be sewn to the bag so it won't be a big deal and this time i'm going to backstitch across the whole thing there's a lot of layers there i'm going to take it nice and slow and now i've attached these two together and i can trim up all my threads i want to do the same on the other side but i will make sure that both sides are now the right side out because i now have created a right side to this so the trick is that we're going to make one big loop i'm going to hold that down with my wrong side up so that i can find the wrong side here and the wrong side here and that way i make sure i'm putting my right sides together and i'm going to confirm that so now my right sides are together i'm going to smooth the whole section of strap and it should have my right sides together on the inside and it does so now i know i can do the same process on this side so again i'm about two inches away i'm going to make a straight line stitch seam and then i'm going to skip the iron but i'm going to kind of finger press that seam open and i'm going to do the same direction so if i went to the left before i'm going to go to the left now if i've gone to the right before i'm going to go to the right now so since i went to the right before i'm going to go to the right now and again that's so that both seams will actually be symmetrical when we go to attach them to the bag so it's a little brain hack so now i'm going to stitch about a quarter inch away from that back stitch all the way across and now i'll just trim my threads and any fraying bits okay so those are maybe the easiest straps i've ever made for a bag and now we're going to use these seams that we've made to center our giant loop and create two handles as we attach it to the body of the back let me show you what i mean so once again we've got the outside of our bag when we attach the handles it's going to attach the sides of the pockets firmly but before we get started we're going to flip back to the inside because we don't want this one to get all funky so what i'm going to do is pin close to the edge and away from where the handles will be and then somewhere in the middle again away from where the handles will be kind of eyeballing to keep this pocket away but give me room to stitch so once that inside pocket is pinned away and is safe come back to the outside and you can see i've got clips here because i want you to see where my center seam still is because that is now where we're going to line up our handles okay this part's kind of magic i super love when things just suddenly have that aha moment so we're going to do is take that seam we created and we're going to center it over the center seam so you can kind of see here and we're going to center the yellow part of this or the center of this over the pocket and if you want to get out your ruler there are measurements in the pattern for exactly where this should fall and you can kind of pin or clip this in place the fabric straps are very easy to pin these are a little more complicated to pin so i'm going to take my time and go through all the layers and try to bend my pen while i'm at it and i've also found that safety pins can be super helpful for this step with this material when we go up to sew this we're going to need to know where to stop and that is going to be the handy lines you can kind of see my stitching that we used to attach the soft part of the hook and loop tape we're going to stop below or before that line so as we stitch up about a quarter inch away we're going to stop we're going to form an x a box with an x and that will hold that strap with a lot of security and stability i'm going to show you how that works but first we need to make sure we've got both sides of the strap attached and pinned so again i'm going to take the other side and now you can see it's mirrored and i'm going to center that over this center seam and center that over the pocket so i'm gonna get this all pinned up and then i'll show you how we stitch it and create the x so now that i've pinned my handle in place we're ready to stitch it i want to be extra careful about the bulk over these seams because there's quite a bit of fabric and material here and make sure i stop and make the x and inside the box to add stability to the handles of the edges so let me show you real quick on a piece of paper how that's going to work as i'm stitching along as i come to the space that i want to make the x i'm going to stitch up and over and then i'm going to aim for a spot and make a diagonal and then come back across and then make a diagonal up to the top again this will get stitched twice across the top which just adds a little extra stitching and stability and then i can come right down the edge and i've stitched down the handle so i'll show you that now with the sewing machine [Applause] i like to start somewhere here so that i can go over this space and finish on the long side as well so i'm going to slide all this bulk under the machine and pick a spot and again just right along the edge about an eighth of an inch but you never see me getting on a ruler it's just kind of eyeballed along the edge and start sewing nice and slow as i go over this bulk you can hear my machine's not complaining i'm taking it nice and slow really sharp needle and we continue down this now i'm going to kind of hold this taut and let the machine pull it through as i'm coming up to this row of stitches which represents that soft part of the hook and loop tape about a quarter inch away i'm going to stop and i'm going to turn and pivot with my needle down and make a nice straight line and then with my needle down again we're going to pivot we're going to aim for a spot about an inch inch and a half away down here so right here i'm going to decide that i'm going to aim for where this leaf and flower are coming together and i'm going to make a diagonal line of stitching so i'm going to fold all this up again it's foam it's fine it's not hurting a thing pivot all right i'm going to aim for this spot and once i've hit my other line of stitching needle down pivot the whole thing back around now we're going to make a straight line back towards us and one more stitch and again needle down to pivot and now i've got all the room behind my machine to move my fabric i'm going to aim for this spot up here this corner that we've already established and stop when i hit that needle down swing it around and we're going to come right back across the top again so back across the top and then we're going to coast all the way down the side so with the needle down i'm going to take one more stitch needle down we're going to turn the piece make sure the handle is out of your way and you can roll and fold the foam as needed and then we're just going to keep an eye on this pocket we don't want the foot to catch it so i'm going to kind of hold that in place there we go and we're off as we come up to this bulky seam we're just going to take it nice and slow not bad at all you can see because i pinned in the center of this i don't even have to remove those pins to keep stitching but now we're coming up on this other edge so we need to make the box again so i'm going to stop about a quarter inch away with my needle down i'll show you this one more time we're going to pivot or stitch across the top and then with needle down we're going to choose a spot about an inch and a half away i'm going to now choose this spot here where this leaf meets the handle this is the foldiest part so my aim for that spot and then with needle down turn it back so i can stitch across the bottom when i get to the edge and throw the whole thing behind me and i can aim for the corner we already made and then with needle down pivot across the top again so that strengthens that top edge and now we're going to sail down the other side to where we started i'm just kind of holding the bulk away letting the feed dogs pull the project through so you can see from my thread here this is where i'm going to stop i'm going to cross over that just a little bit and back stitch and that's why the handle is done so i'm going to do the other side of the handle and i'll meet you back here so we can make the sides of our bag it's the outside of our bag main body of our bag is done so now i'm going to put this away to the side i want to make the sides sides of our bag are made a lot like the front and back of our bag instead of putting the two pieces together and seaming them down the center though we're going to do is simply put that quarter inch fold over and stitch on three sides leaving the top open on the outside fabric and again on the lining fabric when we do that we can take the same step as before if we'd like to quilt the foam so you'd press your foam piece to your lining lining it up flipping it over and pressing through the fabric to adhere that fusible foam to this outside then you can draw right on the foam just like before any kind of quilting lines that you want to make and stitch along those lines once those quilted lines are on there you're going to line up your lining piece and fuse that so that's how you'll get these pieces so you can see i've quilted when i had the outside and the foam together and peel that back so you can see that i drew my lines and stitched right along there then i fused my lining piece to the foam and then last step just like before we attach the soft part of that hook and loop tape about a half an inch from the top of that exposed edge and we can stitch it one big rectangle around and that holds it through and quilts through all the layers so you do that for both sides of your bag then it's time to assemble it we're getting really close so this is the part where there's a bit of a bravery test bob ross is one of my favorite creators and makers and at the end of some of his projects he says you know you got to be brave and you got to just take that step that you think is going to ruin the whole thing but actually makes it awesome and that's what we're going to do right now we are going to snip through our nice folded edges along the crease on both crease lines on both sides of the main body of this bag it's bravery test but it makes it so much easier to sew together so to do that i'm going to put the tip of my scissors where i want the snip to stop and voila again here put the snip where i want to stop and i want it to stop basically where the foam is inside so you know we have that quarter inch overhang just gonna peel this back a little bit more than you will want to so you can see so i've got that quarter inch overhang i'm going to stop at the foam i'm not trying to snip through the foam i'm snip to the foam through the fabric okay do that again on this side and not at the center over here and again sometimes like the lining here is a little bit bigger it's not a big deal i'm just going to hold these together and snip to the foam not through the foam okay big bravery test is over now we can take the side panels and we're going to find the center of them just going to fold and make a crease and lay them right sides together with the seam of the center and they should overhang the snip right where the foam is you can see this here so here's my snip and you can see the foam stops at the snip but there's overhang of the fabric that's perfect same over here the foam stops at the snip but there's overhang of fabric and i'm going to use a few clips because there's lots of layers and i think the pins won't help me as much i'm just going to pinch all the layers together and clip them in place and we're going to sew these down snip to snip so i'm going to do the other side here and what's also fun and easy check for yourself is these should line up pretty close so as i turn this around and line this up again snip to snip and top edge to top edge and we're pretty close so you can see here's my snip and the foam there's my center i know that's my center because i've got that crease then i made that folded in half and then here i've got the overhang the foam stops here okay so if you sew from this side it's going to be really hard to tell exactly where to stop so one of her great tips in the pattern is to flip this over and a stitch from the main body part of the bag so what i'm going to do is tuck this handle into this pocket here flip this tuck this into this pocket here and that way i'm not going to stitch over my handles and they're safe so as you can see here now i can see my clips so i'm going to stitch from clip to clip snip to snip and i can see everything on this side so take this to the machine we use again a quarter inch seam so we should be sewing kind of right along the edge of the foam if you get a little bit of foam not a big deal but you're not trying to catch the foam exactly i hope that makes sense so right along the edge of the foam and i'm going to start with my needle down right in the snip i'm going to take a few stitches and then back stitch and then we're gonna stitch along i'm just going to kind of help it because there's a lot of bulk and then i keep an eye on it so i'm stopping at the other snip that i made so hold this with my fingers right up to that snip and then we're going to back stitch and that will have attached one side of the bag so i'm going to stitch the other side needle down take a few stitches back stitch and we're off [Music] and then keep an eye on this snip all right so now the sides are attached there now we're going to work on how to attach these sides to these sides so i'm going to show you one and then we will repeat on the other three so where it starts to become a 3d flopsy bag of craziness and that's totally what it's supposed to do right now so remember we have our handles tucked out of the way and we're going to line up the tops of the bag so even if there's a little extra at the bottom don't worry about that we're going to ease that in so i'm going to find all of the tops and pinch them together and add a clip because with the top edge to be relatively even we're going to sew down this edge grabbing all of the little fabric flaps that have stuck out past the foam and because the inside pocket which is the side we're working on now has that extra bulk i'm going to also add an extra clip there to help hold everything in place again because i don't want to catch that pocket now that i'm stitching the sides together okay you're going to come down here then to the snip so see how the snip helped the fabric to turn the corner and basically you're going to pinch this together and stitch right off this edge so we're start at the top edge and stitch down backstitch at the beginning and again i'm going to keep an eye on this pocket i want to make sure i don't catch it so let me use my fingers to hold everything and guide it under the foot just take your time and kind of adjust adjust the bulk as you need to so that everything's comfortable and gravity's not working against you and then we get down to this corner snitch stitch right off that snipped edge and then back stitch a couple of times and voila now we have one corner of the bag so i'm going to repeat that on the other three sides let me show you one more time how that works and then i will meet you back here to finish the bag so again we're going to measure from the top and make sure that is clipped in place and then extra clips at the pocket fold and i've got a pin in here because that again holds that pocket so it's less likely to wander just clip down the edge and then we'll sew right off the edge and back stitch flip all the bulk away back stitch at the beginning and then sew along the edge of the foam down the side and i'm just holding it i'm not tugging it but i'm holding it because the bulk of this is trying to pull it back towards me let me get to the end and back stitch and now one half of our bag is attached so i'm going to touch this other half and then we'll come back for the last couple of steps okay so now you have what she affectionately calls a big floppy bag mess and that's okay that's exactly what we're supposed to have at this stage what we're going to do now is create the last piece that creates the pocket for the wire frame at the top that makes this wireframe tote so let me show you how that part works so the last step of our bag is to make the pocket that the wire frame actually sits in and this has a couple of interesting steps i can't give you all of the measurements you'll want the pattern for that but let me show you how it works because this is pretty great first thing we're going to do is add a layer of fusible stabilizer to the back of this fabric that we're choosing to use for that pocket flap and then on the short sides there's two long sides and two short sides we're going to do some interesting measuring so there's a diagram and instructions for how to measure this out but you're going to create a different stitch line so when we seam these together they're going to create a seam that actually has this kind of crooked leg in it and that helps it hold really securely when it goes around the wire frame so to do that we're going to draw that on and then when we apply that here we're just going to follow our stitched line instead of just taking a regular quarter inch seam so let me show you how that works it's even easier than it sounds i'm just going to follow along my drawn line and i will pivot and kneel down and pivot and you do that as you attach each short side to each long side and that's it so it's really easy i'm going to show you one more time on this side and sometimes that stabilizer doesn't stay fused that's okay it's still going to do its job really well we want to make sure there's a loop it doesn't have any twists and turns in it and then we're going to follow that line to make a big circle this was so snazzy and your love you're going to love this because as we trim and press this flat it forms a really great shape okay so now to trim this i'm going to kind of aim for the center i'm going to clip away the excess so just got a quarter inch seam so i'm kind of trimming that little triangle away and now i'm going to clip in on the corners so again i'm going to put my scissors where i want it to stop so i don't clip through my stitches and here here and here i'm in a clip so i'll show you again clip clip clip and do that on all four of them now here's the real fun trick is how do you she says press open as best you can okay here's the trick i'm going to open these up and it's not flat anymore right but i'm going to put one side flat at a time and using my fingers to peel this open the clips are going to help me let this lay flatter than it would and i'm just going to kind of rub the tip of my finger or my fingernail up there then i'm going to kind of turn this and now it's okay that it's it's totally okay it's doing that we want that to do that i'm going to peel this open and do the same kind of flatten that seam open so that's a super weird shape but it's perfect so we're going to bring these two ends together like this and where the seams meet we're just going to clip and go all the way around the circle because when it's done and it's pressed in half like so it forms that little hook and that is perfect so i've already done that on this example and then this is where we're going to add the hook and loop tape scratchy side so just like before you're going to stitch around the outside of it in a ranked rectangle this time instead of half an inch away from the raw edge you're going to stitch it about a quarter inch away from the folded edge so again you're going to look at this you can eyeball it and it's about half the width of the hook and loop tape and you're going to center it between the seams and you stitch it down again this is where you want a nice sharp needle and if your thread breaks at all blame it on the hook and loop tape sometimes that will happen it will get caught in those hooks so i also recommend making sure you have plenty of bobbin thread because you don't want to get around this and find out you lost bobbin chicken so once you get the long pieces on the long pieces the short pieces on the short pieces and make sure that they're all on the inside right or the outside but they're all on the same side of the circle now we're ready to do the last step and that's to attach this to our back okay this is another exercise in patience so this may be ever so slightly bigger than this it's all going to ease in so don't worry about it again this is super flexible it's going to work what you're going to do is start with either a long side or short side i like to start with a long side i'm going to take these two seams and line up the raw edges with the bag i want the hook side the sticky side scratchy side of the hook and loop tape outside so it's right sides together with the outside of the bag so i'm going to line up this seam here and the corner of the seam is going to travel a little bit so we're just going to worry about the top and i'm going to put clips on both sides of the seam and then go on here and do the same on this side just at the seam and then we'll ease it in okay so this is the part where you can see there is more bag than there is pocket flap that's actually perfect we're going to ease it in a little bit i know i keep saying that but here's how we're going to take the center or roughly center line them up with a clip make sure we get all layers and then we're going to kind of scrunch this together i'm going to add a couple more clips and we're going to sew with the inside of the bag on the bottom as we stitch because the feed dogs will help us take in this little bit of extra material so we'll do the same thing all the way around the bag and i'll meet you back here and show you how to sew it down now that i've clipped all the way around we're going to start do one big circle of stitches and that will complete the project you can if you want to at the end also add some bias tape to finish that edge it's not a part of the pattern but it can create an elast finished edge but we're going to just sew about a quarter inch away from the edge and again i'm going to kind of smoosh this as i need to technical term i know but we'll smoosh this away and line this up under the machine and about a quarter inch away again does not be perfect take a more generous seam rather than a less generous seam if you're nervous about it and away we go because the larger fabric is on the bottom the feed dogs are taking in a little bit more of that material for us so it's just easing it right in i'm just going to take my time and just kind of adjust the smooshing of the bag so i have a nice flat edge to stitch along and again you want to keep your handles out of the way i'm just kind of pivoting a little bit at the corners and letting the bag know it's not the boss i'm the boss it's gonna go where i tell it okay so we get back to where we started i'm gonna backstitch and secure the stitches and the fabric part of our bag is done now we just have to add the wire the wire tote so i'm going to go in here and make sure i've snatched out all of my pins so i don't want to poke myself anymore all right so the last part then is attaching the wire it's going to sit into this tote and then the hook and loop tape closes in on itself and we're good to go so i have the large tote bag wire frame it also comes with this super cute tag which you can trim and stitch into any of your seams on a pocket on the handle it's super cute to add voila all right so i'm gonna try to do this in a way that works for you to see it and for me to not fling it at you but you're going to set this inside your bag and then you're going to find the corners and you're going to just kind of fold that hook and loop tape over and you set it into the corner fold that over and secure it on one side and then you kind of turn and do the same on the other so you're going to set this into the corners fold your hook and loop tape over so i'm going to set it there it's easier to do if you're looking at it see that and voila we made a wireframe tote bag with it's super cool handles super cute pocket and this will hold all your favorite goodies we've used this one to hold our quilt and our picnic goodies so we can go anywhere we'd like and have a lovely retreat so i hope that you do make this bag show us the bag that you make using hashtag msqc show and tell remember this is the wireframe tote from fat quarter gypsy hope you enjoyed this tutorial from the missouri star quilt company

More Fabric by Yard tutorials

See all