

Make an "All Stars" Quilt with Jenny Doan!
 Jenny Doan
- Layer Cake
- Modern
- Lap / Throw
- Beginner
- Quilt size 63" × 72"
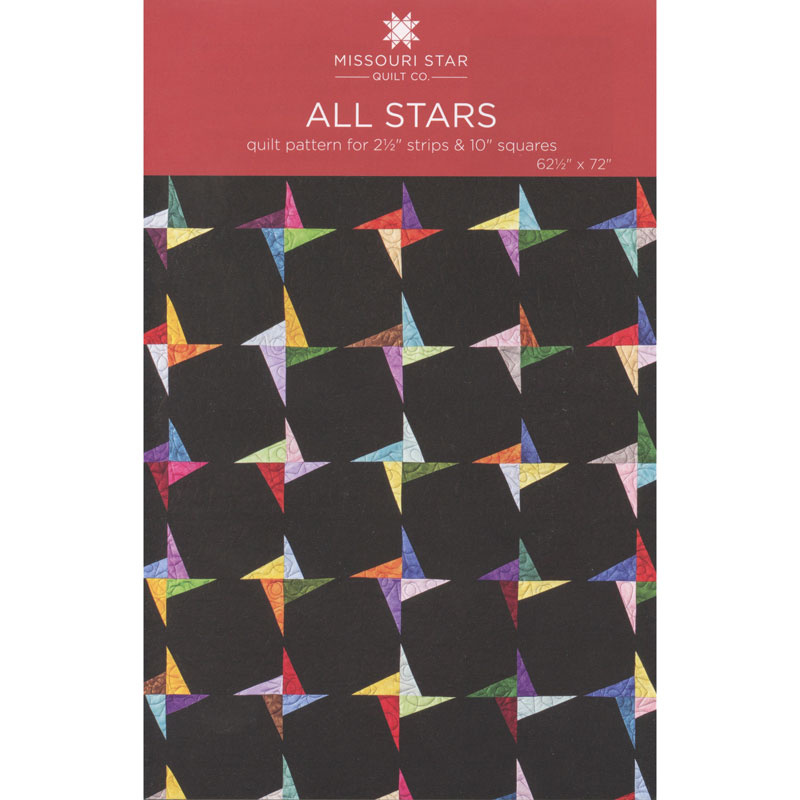
Jenny Doan demonstrates how to make a bold, modern star quilt using precut fabric: 10 inch squares (layer cakes) and 2.5 inch strips (jelly rolls). The strips she chose are Toscana 2.5" Strips by Deborah Edwards for Northcott. This simple quilt pattern is constructed by snowballing corners, but don't worry! It's a freestyle technique with no exact angles required!
Instructor
Jenny Doan
Jenny Doan is an American quilter, author, and YouTube personality. Jenny started Missouri Star Quilt Company in 2008 and today it is the largest quilting supply vendor in the United States.
Shop this tutorial
 Digital Download - Here Comes the Sun Quilt Pattern by Missouri Star$4.95Shop →
 All Stars Quilt Pattern by Missouri Star$6.95Shop →
 Olfa Splash Aqua 45mm Rotary Cutter$18.75Shop →
 Olfa Splash 24" x 36" Cutting Mat Navy$68.95Shop →
 Missouri Star 2.5" x 8" Ruler$10.95Shop →
 Missouri Star 5" x 15" Ruler$15.95Shop →
 Exclusive Missouri Star Jenny TG1600 ProPlus Oliso Smart Iron$199.99Shop →
 Elan 8" Dressmaker Scissors$20.95Shop →
Common Questions
What is covered in Make an "All Stars" Quilt with Jenny Doan!?
Jenny Doan demonstrates how to make a bold, modern star quilt using precut fabric: 10 inch squares (layer cakes) and 2.5 inch strips (jelly rolls). The strips she chose are Toscana 2.5" Strips by Deborah Edwards for Northcott. This simple quilt pattern is constructed by snowba...
How long is the tutorial video?
The tutorial video is 00:07:57.
Are supplies listed for this tutorial?
Yes. The tutorial page includes the supplies and materials connected to this project.
Is a transcript available?
Yes. A written transcript is available on the tutorial page.
Video Transcript
And what you’re going to do is you’re going to take your block just like this. And you are going to add your little strips. Now when Ron did his, his strips are like the full length of the square. We’re going to make ours come a little bit shorter so that, and if this helps you what you can do is you can like make a little crease halfway on all four sides, you know, so that you know when you hit that half mark. And then you’re just going to want to come over here and you’re just going to want to lay your strip just like this and sew down a quarter of an inch. We’re going to do one of these on all four corners. So let’s go to the sewing machine and sew our first one. You want to, you can pull it over it a bit but you want to make sure that when you fold it back, it covers that corner. So just don’t get it past the 2 ½, 2 ½ inch width of the strip. Alright. So I’ll show you how I do this because I literally made this in a couple of hours because, I mean it’s just big ten inch squares. And it’s a lot of fun. So basically I just cut that off. I grab from another strip right here. And I’m just going to turn my block and do it again on the corner. So here’s the next one. And I’m not, I’m not making these all the same length or the same width. I’m just putting them on there. So here’s this one. Let’s add one of these right here. And I just turn my block and go again from the top down. Sew that one on. And I cut off these pieces because I’m going to use these for another, for another little star legs somewhere. And let’s go with, how about a green? Alright so now we have a little green one right here. And you can see I’m not being careful. I’m not measuring anything. I”m just putting a strip on here. This makes me think this would be an awesome scrappy quilt because it’s, you know you don’t really have to pay attention. It’s just going to go together so fun. Alright. So then I’m going to trim this off like this.
And I know this looks kind of weird right here. You know you’ve got all these pieces on here. But we’re going to head to the ironing board. And we’re going to put these together, or we’re going to iron these out. And I’ll show you how it works. So basically set your seam, then press your pieces back. So just roll them back like this. When you’re rolling them back make sure they actually cover the edge of your block. Just like that. And then we’re going to bring this back over here. And we’re going to flip this over. Now the block now becomes our pattern for cutting. So what we’re going to do is we’re going to take our ruler and we’re going to lay it right along the edge and trim off these pieces like this. So just trim them off and then turn it and trim them off. And we’re going to do this to all four sides. Turn it and trim them off like this. And one more. There we go. Now when we flip this over, it’s all clean and it’s got these cool little triangles on the corners.
So when you go to put these together, this is really fun. This is so fun to me to make this one. Alright when we go to put this together, you’ll see right here. I need to get some more room here. I”m just going to move things out of the way. Put away everything so we can show you this quilt. Alright. So now when you put these together, watch what happens here. I am going to start here, and oop we want a red over here. See how when you get the four blocks together it forms that star in the center. And so as you go along you’re going to make all your blocks and it’s going to start forming these stars. Well then we need to finish this outer edge right here. So these outer edges right here. So one of these blocks, actually you’re going to pull 11 blocks out of all your stars, pull out 11. And then we’re going to cut those in half. So I’m going to lay, this is a ten inch square so I’m going to lay my five inch ruler right along the edge and cut them in half. And this is going to make the border. This is going to finish up all your border stars so you don’t have the little squares on the side. So let me show you. Like that and then like this. So see how as you put those pieces around it, it’s going to make the border piece for your star blocks. So pull out 11 and cut them in half.
Then you’re going to take one and you’re going to cut one into fourths because that makes your corner blocks. And I just love how with this one pack we were able to do the whole thing and finish the corners and the borders. So now I’m cutting one in half, I mean one in fourths like this. I’m sorry if I said in half. I meant fourths and like this. So now let me show you how this corner one fits in on all the corners. So we’re back here with our star blocks like this. We’re adding our half blocks to the outside edge like this. And so we’re going to have one going, oop wait, I’m going to have to get this closer down here so you can see it better. So we’ve got our border blocks on the outside. And it leaves this opening in the corner. And any one of these blocks you put in the corner is going to go the right way. And it’s going to finish that star in the corner. So here, this is a little corner block right here. And these are all half blocks. So pull out 11 for your borders, one you’re going to cut in fourths and it just makes this darling quilt. And then we just added the three inch border on it. And we have stars on the corners of all our blocks. So we’re calling this All Stars and we hope you enjoyed this tutorial on the All Stars quilt from the MSQC.



