

Make an Easy "Out Of Time" Hourglass Quilt with Jenny!
 Jenny Doan
- Layer Cake
- Civil War
- Queen
- Beginner
- Quilt size 86" × 86"
Jenny Doan demonstrates how to make a quick and easy hourglass quilt using 10 inch squares of precut fabric (layer cakes). For this easy sewing project, Jenny used a pack of Wit & Wisdom 10" Squares by Kim Diehl for Henry Glass. This quilt pattern starts out with simple hourglass blocks, but when Jenny snowballs the corners of each block, magic happens! And when all those dog eared blocks are stitched together, a whole new set of mini hourglasses appears.
Instructor
Jenny Doan
Jenny Doan is an American quilter, author, and YouTube personality. Jenny started Missouri Star Quilt Company in 2008 and today it is the largest quilting supply vendor in the United States.
Shop this tutorial
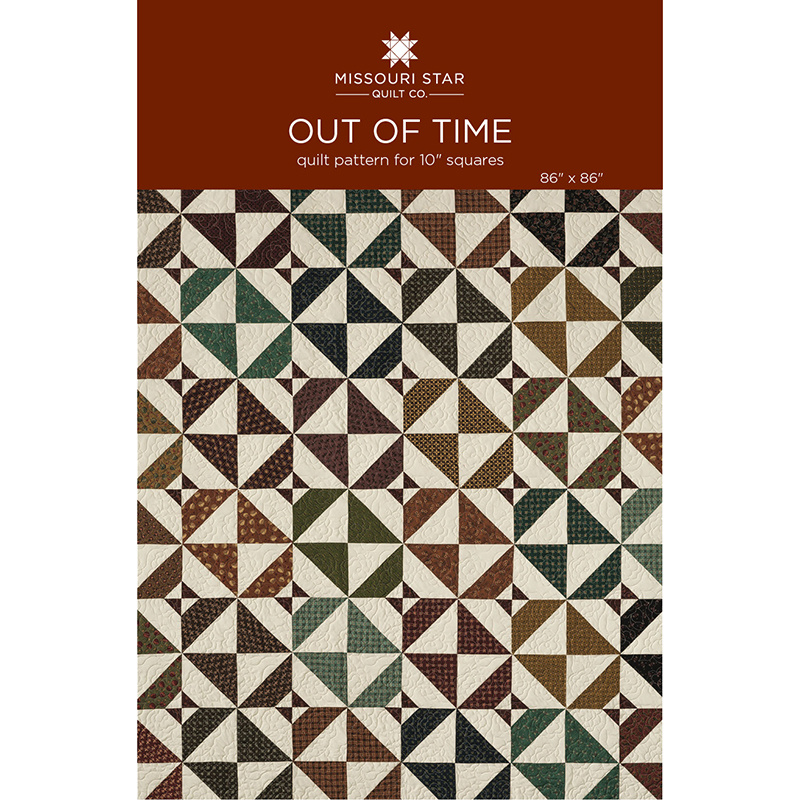 Out of Time Quilt Pattern by Missouri Star$6.95Shop →
 Digital Download - Out of Time Quilt Pattern by Missouri Star$4.95Shop →
 Olfa Splash Aqua 45mm Rotary Cutter$18.75Shop →
 Olfa Splash 24" x 36" Cutting Mat Navy$68.95Shop →
 Missouri Star 2.5" x 8" Ruler$10.95Shop →
 Missouri Star 5" x 15" Ruler$15.95Shop →
 Elan 8" Dressmaker Scissors$20.95Shop →
 Exclusive Missouri Star Jenny TG1600 ProPlus Oliso Smart Iron$199.99Shop →
Common Questions
What is covered in Make an Easy "Out Of Time" Hourglass Quilt with Jenny!?
Jenny Doan demonstrates how to make a quick and easy hourglass quilt using 10 inch squares of precut fabric (layer cakes). For this easy sewing project, Jenny used a pack of Wit & Wisdom 10" Squares by Kim Diehl for Henry Glass. This quilt pattern starts out with simple hourgl...
How long is the tutorial video?
The tutorial video is 00:11:29.
Are supplies listed for this tutorial?
Yes. The tutorial page includes the supplies and materials connected to this project.
Is a transcript available?
Yes. A written transcript is available on the tutorial page.
Video Transcript
So when we did this quilt at the birthday bash, I had an idea in my head of what I wanted to do. I knew I was going to have to make a quilt on the fly. And I had this little idea. And so I started making these blocks. And I have this team of people who’s helping me and one of them was my husband. And he, in his mind he saw it differently. So he’s over there, I’m finishing the block and he’s over there having somebody else set it together but differently than I pictured it. And so, so the quilt we got was a combination of both our minds which means there’s a whole other quilt in there waiting to come out in the other direction. But this was kind of fun because I was like, Oh, oh look at that. That wasn’t at all what I was thinking. So let me show you how to make this because it’s really fun.
Alright so what we’re going to do is we’re going to take our squares like this. We’re going to take a print square and a background square. We’re going to put them right sides together . We’re going to sew a quarter of an inch all the way around the outside. You can see I’ve done that on here. Nope you can’t see any better on that side. But I’ve sewn all the way around. So now what we’re going to do is we’re going to cut this diagonally both directions. So we’re going to lay our ruler on here diagonally corner to corner. Sometimes when you sew around these you’ll get like a little, a little pinch here at one of the corners. It doesn’t matter. We’re going to cut right through it. And then we’re going to come over here like this and cut it again.. So don’t move your fabric, don’t move your squares. Just cut it both directions. Make sure I got that edge right there. Alright so when you do that you get four half square triangles. We’re going to open these up and press them right now. And I’m going to go ahead. I’m going to lay them over here, dark sides up every one. And then I’m going to set the seam just like that. Now the reason we set a seam is because it relaxes the thread. And then we’re just going to roll this back. So we’re going to press open all four. Now for those of you who are squarers and you want to square your blocks to make sure they’re the same, when you sew this way it is important to lay them up and see if they’re the same size because that is determined by your quarter of an inch around the outsides. So it doesn’t have to be perfect, it just has to be the same on all four sides. If it’s not you’re just going to want to square your blocks. So mine comes out pretty close.
And what we’re going to make now is an hourglass and that’s where the time part comes in. So we’re going to have two white squares to the middle and two colored squares to the middle like this. And that makes our hourglass right there just like that. Now if your blocks are close but not lining up exactly, well that one lines up exactly. But if they’re close, the benefit of sewing this way is that you have a little bit of give in your blocks so you can do that. You don’t want to make it give too much or it will come out all wonky but you’re going to do that. So then what we’re going to do is we’re going to lay these right sides together like this and we’re going to sew a quarter of an inch right down the side. So we’re going to come over here and make sure these are lined up. And make sure my seams are nested. And we’re just going to sew a quarter of an inch. And then I’m going to line these up the same and sew those as well. So I’m matching my corner and I’m going to start sewing. And then I’m going to come down here and make sure these two pieces nest together really nice. Alright. Now what we’re going to do is we’re going to sew these together. We’re going to open them up like this. They’re going to work. All we’re lining up is this center seam right here so that’s going to be easy. We’re going to nest these seams right up here at the top, sew a quarter of an inch and I like to get a couple of stitches in and then I’m going to just lay this back. And I’m going to make this seam go, the top seam go forward just like that. And then I’m going to come down here.
Alright now what we’re going to do is press this open just like this. Give it a nice press. And then I like to, I always like to press from the top. And then I’m going to flip it over and make sure my seams are laying the way that I want them to. And I want this center seam to lay this way and so I’m just going to make it, make it work. If anything, actually my rule for the seams is however they want to go, they can go. Because some of them have a mind of their own. And as long as they’re nice and flat, that’s ok with me. Alright so now we have this nice hourglass and that’s our time block because it’s the hourglass. And then we have a bunch of 2 ½ inch squares that some we’ve cut off of our border fabric and some we’ve cut off of our background fabric. And what we’re going to do is we’re going to put the background fabric on the colored corner like this. And we’re going to put one on each corner. So 2 ½ you can see I’ve drawn the line on those. And then we’re going to put the colored square on the background square like this. Now so that I can get this over to my sewing machine I’m going to grab a couple of pins and just put them in here so I don’t have to replace them every time I go over. So we’re going to do this right here. And here’s our last little corner right there.
Alright now what we’re going to do is we’re going to sew right along this line on all four corners of this block. So we’re going to come over here and make sure our block is still lined up. Take out your pin and then sew straight on the line. And then I’m going to clip it and just turn and rotate my block like this. And so I’m going to take a few stitches, take out my pin and just sew right across, flip and do that on all four sides. And one more right here. And I’m going to get started and then take out that pin. Now one of the things to test how good you’re doing with your corners is you can fold that corner over and see if it matches up. It should match up pretty close. It shouldn’t change the size of your square and so because I drew the line, and you can draw the line or iron the line, mine are going to be pretty close on all four sides. And I’m just going to trim that off now. So I’m going to go trim a quarter of an inch on each block on that side of the seam. You don’t want to trim the other side or you’re going to cut right into your block. So we’re going to cut this right here. Just go all around just like we did. Now what’s fun about this block to me honestly is that just by adding this corner you get a whole different look. It changes the block from, from really ordinary to extraordinary. And so I’m going to iron these little corners back and lay this one down. There we go. So see how this looks now.
Now let’s look at how we set these together because we did them, we did them opposites. So we put these together so that a white block intersected with a color block. And it made an additional hourglass right there in the middle. And that makes it really fun. So let me show you how to lay these out. Now I did this quilt six by six. And the reason I only made it 36 instead of 42 because there are 42 blocks in a ten inch packet. But the reason I did that is because there were some that didn’t have a lot of contrast. When that happens, when you buy a pack and it doesn’t have a lot of contrast, there’s two things you can do. One, you can leave them out or two you probably, you may have a square in your, you know in your fabric stash somewhere that will work just a little better. Because I liked the high contrast look of this quilt. So when we go to put these together, we’re going to put them together and we’re going to put them like this. We’re going to turn them like this so that this is going to make a hourglass in the middle. So let me, actually let me move this so I can get a better, a better handle on showing you this. I’m going to pull these down here like this. And I’m going to add two more up here and you see how that hourglass is formed. So we know when we see the light one we’re going to put a dark one like this. And then over here we’re going to put a light one in that corner. Isn’t that cool? It’s so cool. I mean it’s just fun how it goes together. So we’ve got six across and six down. And again that makes a pretty good sized quilt. I think like like 86 by 86, pretty good size. And so we hope you enjoyed this quilt. It’s called Out of Time because I didn’t quite finish it in the time allotted but I did finish it. And now it’s a fun tutorial for you. So we hoped you enjoyed this tutorial from the MSQC.



