

Triple Play: 3 Fabulous Pieced Sashing Ideas with Jenny Doan of Missouri Star
 Jenny Doan
- Layer Cake
- Queen
- Beginner
- Quilt size 82" × 98"
Triple Play is a favorite tradition here at Missouri Star. Once a month, Jenny, Misty, and Natalie each demonstrate their own, unique take on a favorite block, technique, or template. In this episode, the talented Doan ladies show off three adorable ways to spice up your quilts with decorative sashing. (And, just for fun, all three projects are made with the same 10" precut squares: La Vie Bohème Layer Cake by French General for Moda Fabrics.)
Instructor
Jenny Doan
Jenny Doan is an American quilter, author, and YouTube personality. Jenny started Missouri Star Quilt Company in 2008 and today it is the largest quilting supply vendor in the United States.
Shop this tutorial
 Half-Square Triangle Sashing Quilt Pattern by Missouri Star$5.95Shop →
 Digital Download - Half-Square Triangle Sashing Quilt Pattern by Missouri Star$4.95Shop →
 La Vie Boheme Layer Cake$46.95Shop →
 Bella Solids - Brick Red Yardage$7.24Shop →
 Bella Solids - Fig Tree Cream Yardage$7.24Shop →
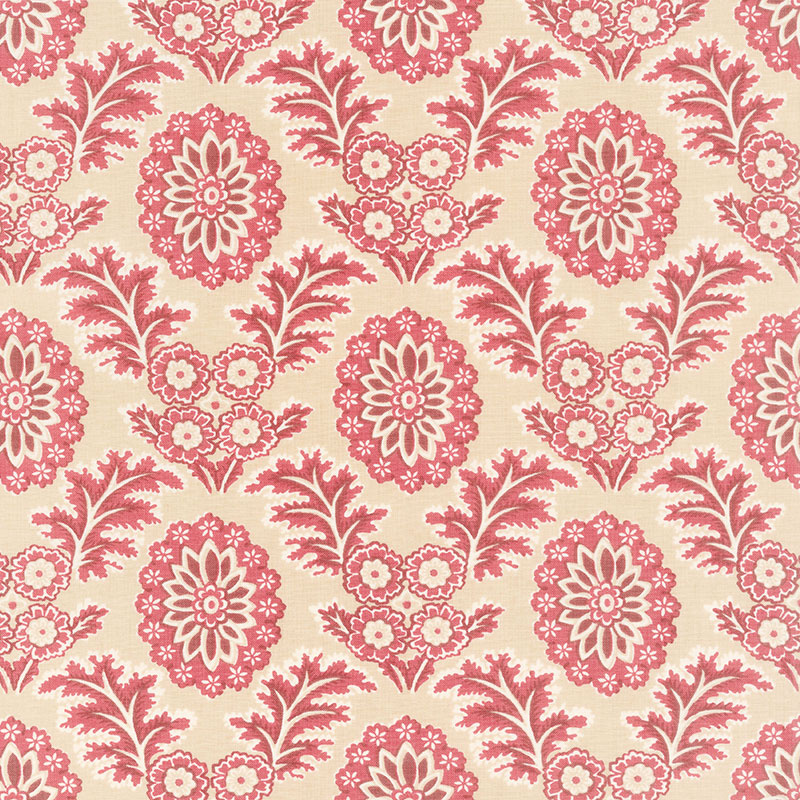 La Vie Boheme - Corsaire Oyster Yardage$10.76Shop →
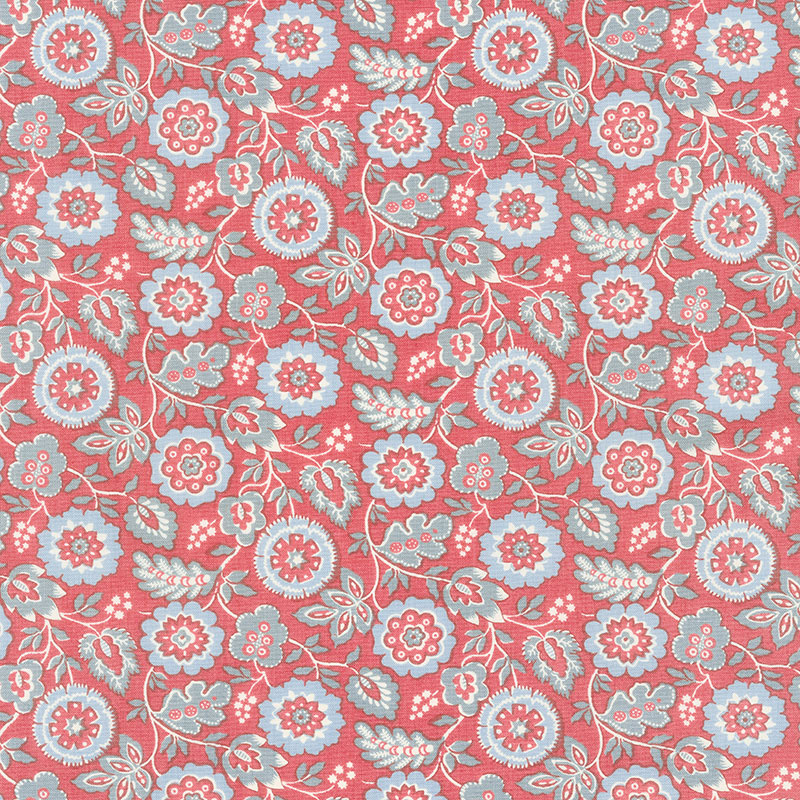 La Vie Boheme - Roma French Red Yardage$10.76Shop →
 Hourglass Sashing Quilt Pattern by Missouri Star$5.95Shop →
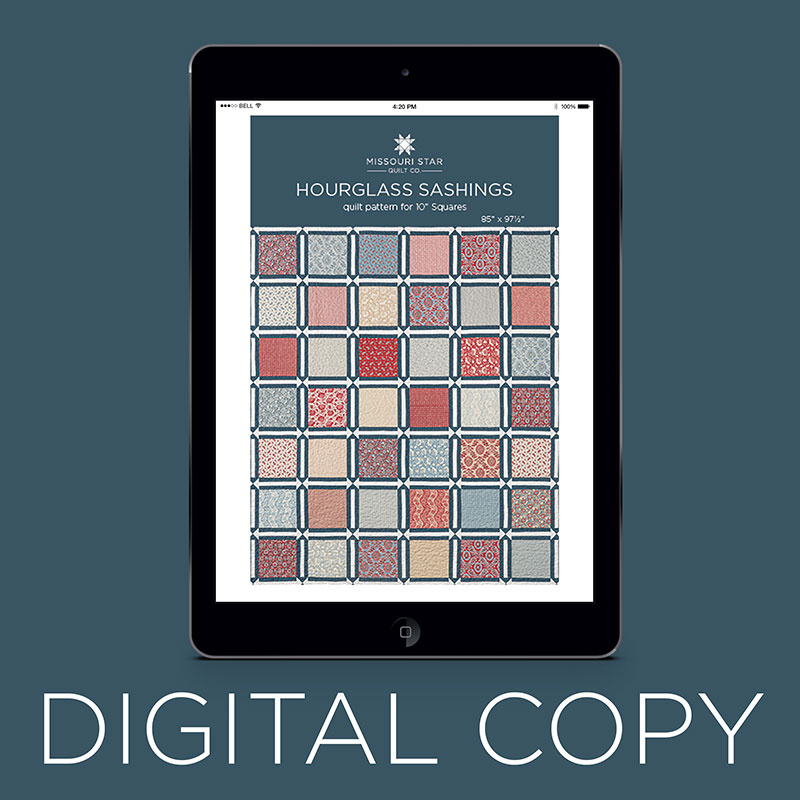 Digital Download - Hourglass Sashing Quilt Pattern by Missouri Star$4.95Shop →
- La Vie Boheme Layer Cake$46.95Shop →
 Bella Solids - Galactic Yardage$7.24Shop →
 Bella Solids - Off White Yardage$7.24Shop →
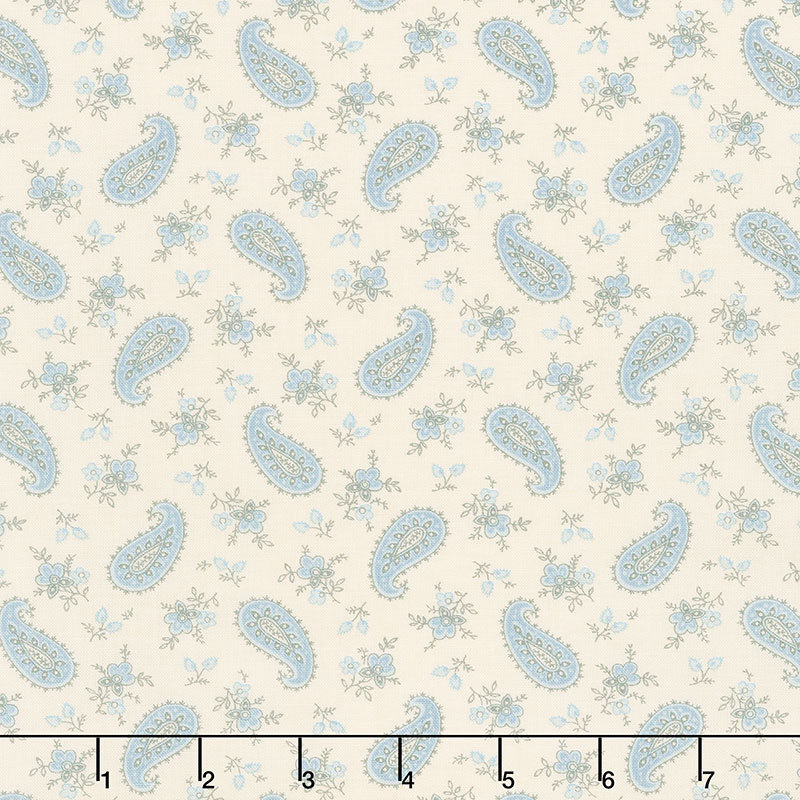 La Vie Boheme - Marcel Pearl French Blue Yardage$10.76Shop →
 Diamond Sashed Squares Quilt Pattern by Missouri Star$5.95Shop →
 Digital Download - Diamond Sashed Squares Quilt Pattern by Missouri Star$4.95Shop →
- La Vie Boheme Layer Cake$46.95Shop →
 Bella Solids - Flint Yardage$7.24Shop →
 Bella Solids - Glacier Yardage$7.24Shop →
 Bella Solids - Snow Yardage$7.24Shop →
- La Vie Boheme - Marcel Pearl French Blue Yardage$10.76Shop →
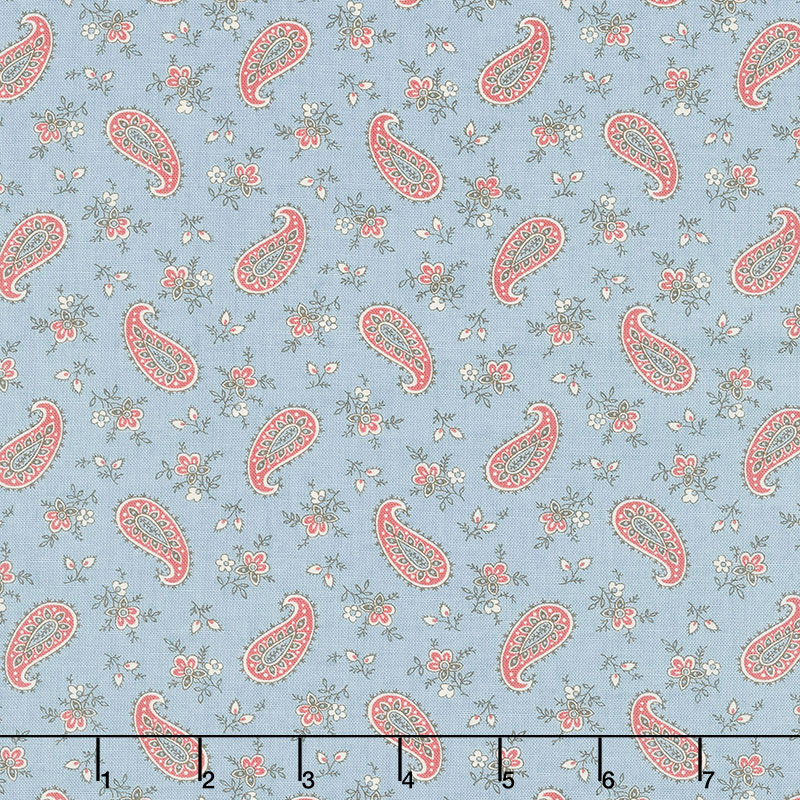 La Vie Boheme - Marcel French Blue Yardage$10.76Shop →
 Clearly Perfect Slotted Trimmers$31.95Shop →
Common Questions
What is covered in Triple Play: 3 Fabulous Pieced Sashing Ideas with Jenny Doan of Missouri Star?
Triple Play is a favorite tradition here at Missouri Star. Once a month, Jenny, Misty, and Natalie each demonstrate their own, unique take on a favorite block, technique, or template. In this episode, the talented Doan ladies show off three adorable ways to spice up your quilt...
How long is the tutorial video?
The tutorial video is 00:49:04.
Are supplies listed for this tutorial?
Yes. The tutorial page includes the supplies and materials connected to this project.
Is a transcript available?
Yes. A written transcript is available on the tutorial page.
Video Transcript
Misty: Yes we did.
Jenny: Actually we often show up in clothes that are the same color which always cracks me up. But these are from our Christmas line and it says Sew Yourself a Merry Little Stitchmas.
Natalie: Merry Stitchmas!
Jenny: And of course mine was a little plain for me so I just blinged it up a little with some pom poms.
Natalie: So cute.
Jenny: The girls laughed at me when I came in this morning but you know I didn’t do the whole neck and the bottom, you know, so.
Misty: It’s not too late. You still could.
Jenny: I could have, yes. Anyway these are those little tiny red pom poms and I just think they’re adorable. Anyway, fun, fun. So what we have today for you is we have created three quilts all made out of the same fabric, all using the same fabric but we are having a what if day. So the what if is what happens when you put different sashings with the same quilts or with the same fabric, but use different sashings. So this is basically an idea tutorial for you. It’s for you to just try some new things, figure out some new ways to do things because once you have a block, and we’re counting this as a block, but once you have that block you can put anything around it and that will completely change it up. So this is my quilt back here. And while I don’t really intend you to make it like this, my goal was to show you how many things you could do with half square triangles . So to make my quilt you’re going to need one package of ten inch squares. And we have used La Vie Boheme by French General for Moda. And you’re going to need some background fabric for your sashes. And so I used 2 ¼ yards of cream and 1 ¾ yards of red. My outer border is 1 ½ yards. This is my outer border. And a nice six inch border back here
Misty: Five inch?
Jenny: I’m sorry, a nice five inch border, thank you girls. These girls keep me together. Also our backing is 7 ¾ yards of vertical seams or you know, 2 ¾ yards of a 108. But look at the backing. Isn’t this a beautiful piece?
Misty: It’s really pretty.
Jenny: It’s really fun to see some backings on some of the fabrics big. You know, we always deal with ten inch squares or five inch squares. And when you see them big they’re just like pretty oh, ah!
Misty: Well especially because generally we cut them up more. So they get smaller with less detail
Jenny: The quilting on this is Drop of Paisley which we like, that’s a favorite pattern. And I have created for you, well actually also, this will be helpful, the clearly perfect slotted trimmer B. You can also use any squaring tool. You’re just going to need to square your little half square triangles. So let me show you how to make this.
Jenny: So for my quilt what I did was I took this beautiful fabric that’s all the reds and beiges and blues, really typical French General fabric and gorgeous. You can see here I sewed them together in one long row. And then I just started making half square triangles like crazy. You guys know I love half square triangles. You know there’s a ton of ways to make them but because I was dealing with sashings I wanted them to be smaller. So the biggest I wanted to go was three inches. So for all of my sashings I used two ten inch squares and we did them the easy 16. So I’ll show you how to do that. But I have several pages of ideas for you here. And if you know my brain at all you know that is a true thing.
Misty: It’s fun to see these all made up because you played with all of these versions on the design wall.
Jenny: I did and I just couldn’t fit them all on one quilt. So my thought process was that when you make this quilt you will choose one of these to be the sashing. This was like a sampler showing all the different ones. But in my brain you were going to choose one and this one would be the sashing and this would be the border and this would be in between every row. And in between every block. You know, I did this so you could see all the different things you could do. I didn’t necessarily in my mind that wasn’t the outcome. The outcome was going to be, you’d have like 45 quilts made with cool sashings. You know.
Natalie: I kind of like the sampler
Misty: I do too.
Natalie: I think it’s fun.
Jenny: I wasn’t sure I liked it at first but once it got quilted and it is really interesting, you know how that happens, once something gets quilted then you’re like, oh that’s not bad. So since we’re dealing with yardage here for our sashings there’s still ten inch squares so if you have ten inch squares out of the color that you like, use that. If not you just take your fabric and we’re going to cut this into ten inch squares. So I do that by opening up my fabric. You know, I leave it folded at the one fold and I fold it in half. I do not like to cut long pieces of fabric because I feel like I’m not as careful with that. So I fold it in half. I’m going to trim off my selvedge right here. And when I fold it in half I make sure that this is lined up evenly, that this is lined up on a line, this also lines up on a line. That will keep you from getting bowed. If you’re cutting your strips into squares, if you do happen to get a bow it won’t matter too much. So I’m going to go ten inches in like this. And then Natalie you can move that away. Then what we’re going to do here is we’re going to, I’m going to leave this folded in half and I’m going to cut off the selvedge and this fold because I know I can get four ten inch squares out of a strip. And so I’ll just trim that off. Misty, I’ll put you in charge of that pile of stuff there.
Misty: You got it.
Jenny: Here comes a little more. Alright. And then we have our ten inch squares right here. So we’re going to do the same thing with our red. And then Natalie, it looks like these you’re even going to have to press once we get them. I’m wielding the rotary cutter with a blade open. Sorry about that everybody.
Misty: Well I think it’s good for people to see this and remember that you can cut any fabric into a pre cut size.
Jenny: Any fabric can be a pre cut size. You’re absolutely right. Give me a little more room there, girl.
Misty: So if you can’t find a layer cake in what you’re looking for you can just cut your own.
Jenny: That’s absolutely right. And we do that a lot. Alright, let me see here. I’m going to cut this. I don’t always have a sewing machine sitting on my table.
Misty: Do you want me to take this off?
Jenny: That’s alright. It’s alright. It will work. Alright, here we go, five and ten. My ruler is five so I know that if I do it twice it will be ten inches. You can take that. I’m going to pull this, oh good thing I looked at that. Ya that selvedge was folded down I might not have gotten four ten inch squares. Can you iron those little fluffs out of the middle of there?
Natalie: Sure
Jenny: The fluffs out, you know.
Natalie: All the fluffs.
Jenny: There we go. And then if you will re iron that end crease too for me. We don’t have to have that ironed but. Whoosh! Oop, I was trying to be a magician right there. Alright, let’s see here. You want to make sure you have ten inches in between, 14 to 24. We’re going to trim off this little side right here. And then Natalie if you will grab me a pencil or a pen or something to draw a line because we have to draw lines on our block for the easy 16.
Natalie: Maybe this will work.
Jenny: It sure might. Alright, so what we’re going to do for the easy 16 is we are going to draw lines vertically and horizontally like this and just lay your ruler. If you have a five inch ruler just lay it on the edge. Alright so now what we’re going to do is we’re going to match this up with our red square and put the lines on top. And Misty get comfortable in that chair, turn that sewing machine on.
Misty: You got it. I think we are ready to rock.
Jenny: I want you to sew on both sides of both of these lines. And then all the way around the outside too.
Misty: And is there one that you like to do first? Do you do around or do you just do sewing?
Jenny: No I just do whichever one I want.
Natalie: I usually do the middles like you’re doing.
Misty: You do?
Natalie: Yes.
Jenny: I probably don’t do it the same two times.
Misty: That’s funny.
Natalie: I just get in the habit. I usually will flip them around without cutting that, without using the thread cutter because I just sew off the edge and flip it
Misty: Gotcha.
Natalie: You’re just in the habit.
Jenny: So the other thing about this when you do this method you’re going to get 16 half square triangles. So just remember you can do this on any size square, you know.
Natalie: I think if you get down to a 2 ½ inch square it would probably be a little difficult.
Misty: It would be so tiny.
Jenny: You couldn’t get them out of that.
Natalie: Well challenge accepted.
Jenny: If you do it, I want to see it. I don’t think you can.
Natalie: I’ll work on it later. In my free time.
Misty: All four sides, all the way around, right?
Jenny: Yep all the way around. There are also several ways to cut this and you cut this differently than I do which, I’ll show you both ways. She’s almost there guys, one more side. 16 half square triangles.
Natalie: Do you use a rotating mat for this?
Misty: Now one more seam.
Jenny: No, I don’t need it.
Misty: There we go.
Jenny: Alright now once you have your squares all sewn, she’s sewn on both sides of this middle line and all the way around the outside, there are two ways you can cut this. Natalie’s way is to start here and cut here and here and then come back and do it the other way, here, here, here and then in between like this. Do you think they got all that? That was pretty fast ruler work right there?
Natalie: I just leave the whole thing down and cut all the cuts. It doesn’t really matter what order.
Jenny: So what I do because what makes sense to my brain is I’m going to cut this into fourths. And then I’m going to take a quadrant and cut it into fourths. It’s probably a little more cutting for the way I do it but, you know, if you’re one of those who, you know, you can cut this way and then move it. And then every diagonal place you can cut on these edges you’re going to cut. And then you’re going to switch your ruler and do it this way like this. And then you will cut it this way and this way. So I actually just cut mine into fourths and it does take more cutting my way but
Natalie: Not if you stack up.
Jenny: I’m afraid to stack.
Misty: Are you afraid they’ll get off?
Natalie: But you’re going to square them up later. So there’s not really any danger. All you have to do is match these cross sections here.
Jenny: I know, I know it’s your way but it’s my brain way.
Natalie: And you could stack them up and do it your brain way.
Jenny: She makes me do hard things.
Misty: Natalie is living on the edge today.
Jenny: She’s living on the edge. There is a little room in squaring. These aren’t real tight but.
Natalie: You’ll survive
Misty: It’s going to be alright.
Jenny: It’s that whole measure twice, cut once, you know. Alright so once you get all these cut. I’ll just go ahead and cut this one. You’ll see very quickly that you get 16 of these like this.
Misty: So satisfying to get all those little triangles.
Jenny: It is. It really is. And we’re going to square these to three.
Natalie: But depending on your squaring tool you’re going to square before you press or after.
Jenny: So if you use the bloc loc you’re going to press them open and then square. I’m going to use the clearly perfect slotted trimmer. And when you do that, you’ll be able to see this better, you match your seam line to their seam line and I’ll match mine up here to the three inch. And I’m just going to set it on here like this. And then just like that that is squared. So that’s why I love this tool. It makes sense to my brain. Oh someone asked me the other day if, let me trim both sides of this one, what the little slots were for. The little slots are so you can cut off your dog ears. And you can cut into them or out. But it cuts off the little dog ears. But I just never remember and I’m always in a hurry, you know. My brain is always ahead of and I’m like, three, good, we’re done, golden.
Natalie: I am typically also in a hurry but I found that I really like having those little things trimmed off. I’ve started trying to make a habit of it.
Jenny: I would suggest cutting away from yourself on those. The last one I kind of cut toward me, that could be a little dangerous. And we have had a few, I mean I had a little rotary nick.
Natalie: We keep bandaids on hand.
Jenny: Not just to you, it happens to us too. We just get in a groove and get going and they are very sharp. Alright so I’ve got a bunch of these already cut up. I made a bunch because guess what I made all of those. What I want to do is I want to take some of these and I want to show you how to make each one of these blocks. Now I have a printable for you guys. This is the actual printable for the quilt that is behind me and each block is listed out here and you can follow the diagram. But of course I couldn’t stop there but I actually have another one with more blocks and another one with more blocks and I could have gone on and on but to save paper and all the trees in all the world.
Misty: Three was enough.
Jenny: Three was enough. Alright so we’re going to start with this top row right here. And this is a herringbone pattern. And so you’re going to start with your
Misty: This is actually a bonus. Oh you’re alright. I just don’ t want you to follow it and have it be wrong.
Jenny: I would get totally messed up. Alright. So because I’m angley challenged but I do love half square triangles, I love having a picture to look at. And when I make that one block I will leave it right there and make every one just like that. So make your one block, make sure it’s right otherwise you’ll get it wrong 40,000 times, you know. So what we’re going to do here is one goes up, one goes down and then this one makes a full on diamond. And then on the other one, the white makes a full on diamond like this. And then you can continue putting these opposite like this. Oh here. And so we’ve got this one makes that diamond. So you’re always matching up, you’re always making the long red, the long white. And they swap sides and it becomes the long red, the long white, like that. So that’s the herringbone just like that.
Misty: Now did you sew these in long rows or did you make blocks like this?
Jenny: No, I sewed two together and two together and made blocks.
Misty: Ok
Jenny: Because I have a hard time, on this one, I had a hard time keeping everything straight.
Natalie: I feel like you could just make two piles where you have sets of two of this and this.
Jenny: That’s actually a really good idea.
Natalie: And then you could just kind of
Jenny: I wish you had been there when I was doing it.
Natalie: Everything.
Jenny: That’s actually a super great idea. You know, it’s one of those things. Every brain works differently. And everybody does it differently. Alright, so the next row right here are the square in a square or the diamonds. And that’s just a matter of putting your colors together like this. And then the next one you’re just putting like this. And then this one, again, I did in blocks. Natalie, easier way?
Natalie: Well I would still start by piecing two because these are all the same. And so I would just stack my whole pile and piece sets of two and then flip them around to make blocks.
Jenny: Perfect. The next one is half square triangles
Natalie: Well they’re all half square triangles
Jenny: You’re right. The next one is pinwheels. And so this is the pinwheel block like this. So here’s my mantra for pinwheels because they also, you know, mess me up as far as being angley challenged. So it’s light, dark, light, dark, light, dark, all seams to the center. You want to make sure all are going to the center when you do that. And I don’t care how you did it better.
Natalie: Just like that. I did it exactly like that.
Jenny: But you want to make sure that they’re all going the same way so all of your pinwheels are rotating this way. I can’t talk, I can’t do one more thing.
Natalie: No tricks this time.
Jenny: No tricks. And then this way. Now because when you put pinwheels all together you kind of lose the pinwheel, I have a 1 ½ inch sashing in between mine. I wanted them to stand out and be able to see them. And so that’s what I did on this one. So the next row is a chevron but a chevron is something. You put two reds together and you put two whites together like this. You know, and only we’re going to, yep we’re going to do this one going up and down aren’t we?
Natalie: Ya it’s the same. All the blocks look the same.
Jenny: All the blocks look like that. And so we have two reds together and we’ve got two whites together like this. And you’re just going to make a whole long row of those. The next row that is way down there. So down here, this is the flying geese row.
Natalie: Very cool.
Jenny: And flying geese are just this part right here
Natalie: Turned sideways.
Jenny: Ya turned sideways. Now you can do it so they’re going the same but I did mine sideways. So always the reds together. Let’s see if I can do this. Now the little dog ears are getting in the way and they never have before but I’m noticing them. So red to the middle, red to the middle, red to the middle, red to the middle. And just like that you get that whole long flying geese look. My outer border out here, this is what they call a sawtooth border. You know you’ll hear in quilting, we hear terms we’re not quite sure what it means, a sawtooth border. And it’s where all the half square triangles go the same way. They can go any way that you want them to go. I put my color, so I bordered my quilt with a little 1 ½ inch border out here so it set everything apart from the sawtooth border. And then I put my color next to the little border and so it’s just a matter of stacking these this way, this way.
Natalie: So are all of your half square triangles the same size?
Jenny: They’re all the same size.
Misty: Every single one.
Jenny: Every single one.
Natalie: It’s kind of a trick to the eye because some of them look a little smaller than others and it’s crazy. Well, I mean, I know out here they’re not squared but in the quilt it looks kind of like these ones would be a little smaller than these but I think because you put all four together it looks bigger.
Jenny: No it’s actually the same way. So on these other papers, you know, the alternative ones, so we have this block where it is a little bit like a herringbone only it is a little more diamond looking. We have the same squares but they’re opposite. We put the white color in. This one is a fun block as an alternative. This is a little hook block. This is the You’ve Got Mail block and we’ve put
Natalie: Ya it’s upside down.
Jenny: And then on the outside we’ve used the flying geese again so you’re doing this. So it’s all the same amount of triangles, all the same thing, they’re just arranged differently.
Natalie: That’s really cool.
Jenny: And then for the last one here, so we’ve got this first one right here where we’ve taken
Natalie: That looks like half of a ribbon block.
Jenny: It is half of a ribbon block, that’s exactly what it is. And so this one, we go up, down and then up, up and down like that. So that’s that block. The next is a herringbone but it’s stacked straight up. And then there’s diamonds, then there’s two rows of the geese right here but stacked differently. So I also made a row of diamonds here that, these are just the two together. So you’re going to make, these are going to get made like this, just by putting your colors together in the long way. And so hold this up here so they can see what it would look like.
Misty: I love it.
Jenny: Isn’t that fun? So there’s just so many options with half square triangles, things that you can do. And we’re always coming up with some new different way. It’s like, oh I didn’t see that before. I do want to point out this border on the alternative number 2 because it’s an up, down, up, down you know placement of them. Again it’s a completely different look just by changing the way you lay those out. So I love how fun this border is here. And the point is that anything you do, it’s all going to look great. My idea was actually to use one row and do that on the whole quilt, you know, and then you just make 30 quilts. But you know we can do this too. So this makes a quilt that is 82 by 98. That is a pretty good sized quilt. And no matter which method you choose it’s going to make that size of quilt. And so all of the amount you need.
Natalie: So in all of these layouts and
Jenny: All of these layouts
Natalie: Whatever combinations you want to use?
Misty: That’s so great. That’s so great.
Natalie: Pretty cool.
Jenny: Alright, who’s next?
Natalie: I think I’ll go.
Jenny: Alright. Alright Natalie, you are up.
Natalie: Alright.
Jenny: Alright, Natalie, you are up.
Natalie: Alright. So this is my quilt. I added some strips and some hourglass blocks so I called it Hourglass sashing.
Misty: I love it. It gives it an arrow look.
Natalie: I think it’s very cool. It has arrows going side to side and then this is kind of like a diamond with a dash in the middle
Jenny: Oh a diamond dash
Misty: I love it.
Jenny: And again, it’s the same layer cake.
Natalie: Exactly. Exactly. So to make my quilt you’ll need one layer cake of La Vie Boheme by French General for Moda. And I used some solids for my sashing strips. You’ll need a yard and ¾ of the light. 2 ¾ of the dark, a yard and ¼ of the outer border and nine yards of backing. And that is because this quilt is enormous. It measures 85 by 97 because we used the entire layer cake. It’s six by seven. And then these end up being three inches I think. So it’s just a lot of extra.
Misty: Is this a four inch border you added?
Natalie: Four inch, ya.
Jenny: Let’s look at the back on this. Let me pull that back. Ooo, look at how pretty.
Natalie: So it’s the same beautiful paisley print. It’s really soft and peaceful and I quilted it with Cotton Candy quilting. It’s kind of fun
Jenny: That’s French cotton candy isn’t it?
Natalie: Spun Sugar
Jenny: I love it.
Natalie: Ok, so let me get started teaching you how to do this. So from your accent fabrics or your sashing fabrics you’re going to cut some strips and first we’ll start by cutting our 1 ½ inch strips to make our strip sets because those go in between every single block and they measure ten inches. We’re going to match them up to our layer cake size so I will just go ahead and stack these up because I’m going to live on the wild side too.
Jenny: This back piece right here is a little crooked. I just didn’t want you to end up with a wonky one.
Natalie: Thank you. I thought I sorted this out ahead of time.
Jenny: It’s alright.
Natalie: Not so much.
Jenny: Well that’s like, you know, you open it up and it was nice and flat when you put it in the bag.
Natalie: Yes, that happens.
Jenny: Because we put those things in a bag
Natalie: Before you stored it, it looked great.
Jenny: We can iron. These guys don’t mind if we iron.
Misty: I was going to say, here I can press whatever you need.
Natalie: For sure.
Jenny: Pressing matters. That was a little pun.
Natalie: Ok. So puny.
Jenny: Natalie was like, please, Mother!
Natalie: Hilarious. Alright. We’re doing an inch and a half on these strip sets. So let’s see. I’m just going to cut two and then cut them in half so we can make a set of eight. I’m going to do that up here.
Jenny: All the little halves. Here’s your scissors. Or were you going to rotary cut?
Natalie: I was going to rotary cut but I’ll scissor cut.
Jenny: Sometimes it’s just faster for me but I’m pretty old school.
Natalie: It can be. Alright so you’re going to make strip sets and one of them is going to have, oh they’re all going to have, nevermind. I got a little distracted. So they all have cream in the middle and two blue/gray strips on the outside. I’m not sure if this is blue or gray. It’s called galactica. It’s a very fun color. I think it works perfectly with the line.
Jenny: Alright so we’re just sewing a quarter of an inch down the side.
Natalie: Um huh.
Jenny: Just like that. And then we’re going to open it up and add a blue to the other side?
Natalie: Yep. So as you go along you can
Misty: Oop, blue.
Jenny: Blue.
Misty: Yep.
Natalie: You can piece these all up and then cut them all into ten inch sections and you are ready to go on that part of the square. It’s very fast.
Jenny: Now wait. I haven’t even sewn this. You can’t go ahead.
Natalie: I’m not going ahead I’m just thinking out loud and letting people know this is probably one of the easiest quilts that you make especially if you have a layer cake that has a beautiful print that you don’t want to cut up
Jenny: You know there are a lot of those. It’s like, this fabric is so pretty.
Natalie: Or if you want to just whip something out over the weekend or in a day, it’s very fast.
Jenny: It would be great for fussy cutting too. You know, if you had a certain thing in the center.
Misty: That’s a great idea.
Jenny: Alright, there’s that.
Misty: So we’ll press these.
Jenny: And then you have some sewn together over there already over there, don’t you?
Natalie: I do. I have a bunch sewn together but we can still go ahead and cut those into ten inch and then we’ll just have a few extras to play with. They’re not, the layout, I mean, you can see it’s not too complicated. Your hourglass blocks are always up and down with the dark blue color and side to side with your cream color. And so it’s just not complicated.
Misty: There we go.
Natalie: Alright. So these just get cut into ten inch segments and I will go ahead and trim off this edge right here. I’m just going to cut it straight. And then as I go along cutting these I like to use my ruler.
Jenny: I was going to say, I love to use my ruler like that.
Natalie: Turn it around and then measure over ten, yep every ten. And just cut them just like that. And then you’re good to go. And this is actually super versatile because if you had a 12 ½ inch block you just cut your strip sets to 12 ½ and then all of a sudden this exact thing works for that size block. It works for any size block. Because your cornerstones and your sashing remain the same size regardless because these are the same width and then this length is the only part that changes. These could be five inches or six inches or eight inches or 12 or 15.
Jenny: Whatever size you want.
Misty: I love that.
Natalie: Whatever and this sashing will work with any size block that you want.
Jenny: That is awesome.
Natalie: Alright. We’ll make our hourglass blocks, we’re going to do five inch squares to start. So I’m going to cut my background fabric into five inch strips and then I’m just going to go along and make sure I’m missing the selvedge. And cut out a bunch of five inch squares
Jenny: Perfect. You should get eight out of a strip
Natalie: Yep, easily with plenty of space for those folds and those selvedge edges.
Jenny: With a little bit leftover for some crumb piecing.
Misty: Little tiny crumbs.
Natalie: I mean that’s a decent size. Alright so you’re going to draw a line corner to corner on your light colored square and pair it up with your dark square.
Jenny: So on both sides?
Natalie: And you’re going to sew on both sides, oops I already did it. You’re going to sew on both sides of that line to make two half square triangles. And if you have print fabrics you’ll put those right sides together so that the seam is on the inside when you flip them open.
Jenny: That is super nice about the solids because they just don’t have a wrong or right side.
Natalie: Yep, pretty simple. Ok, then we’re going to cut these apart and press those open.
Misty: You bet.
Natalie: And if you just press them back you’ll have your seam hidden underneath the dark fabrics. Then we’re going to slam those seams together and draw another line.
Jenny: You want to draw the line before you have two?
Natalie: Sure.
Jenny: You can do it any way you want to, you’re a grown woman.
Natalie: Thanks, Mom. Either way is fine. You want to do them before or you can stack them up and do it after. And then what you’re going to do is make sure they’re opposite and that that seam nests right in the middle. You want to make sure that it is pretty tight because that will affect the look of the section in the middle. Ok and I think that feels pretty good and now you’re going to stitch on both sides of the line again.
Jenny: Alright.
Natalie: Super simple.
Jenny: Ya hourglasses is one of those block that looks like it’s a lot harder than it is. Oop, I’ve got my thread around my foot. It’s all going to squeeze up. It won’t hurt it. A little twist.
Natalie: Alright then we’re going to go ahead and cut this apart. And I love that our two blocks or our two little squares that we started out with gives us two complete hourglass blocks at the end. Now we could open and press it open and square using a traditional square but I actually really love to square hourglass blocks using the clearly perfect slotted trimmer. And because I have a half inch on these I’m going to use the A triangle. The B is for whole sizes. Use whichever is most comfortable for you. My strips sets being 1 ½, 1 ½, 1 ½ equals 3 ½ so 3 ½ is the size of my cornerstone or hourglass block. Alright so to do that you’re going to line your seam line on the dotted line here. And then I’m going to make sure that the seam line going down the middle lines up with the straight line.
Jenny: This ruler is particularly good for anything that is quarter square triangles, hourglasses because you can line your block up both directions.
Natalie: Ya and that slipped just a tiny bit as I was switching so I’m just going to realign it and hold a little tighter this time. And I am going to trim off these little dog ears because I’m learning how to do that. Alright so you can go ahead and trim that or press that open and I’ll trim this second one.
Jenny: For a sashing that looks this complicated it’s so simple.
Misty: Very simple.
Jenny: I love that.
Natalie: Well and it’s all the same. You’re just going to do the same thing over and over as many blocks as you have and in what size you want.
Jenny: Well and I’m thinking about, you know, the stacks of blocks, like I’ll do a set of blocks for a project like the block of the month but you don’t ever put them all together.
Natalie: Ya because you’re not really quite sure what to do with it.
Jenny: Because again if I had a 12 inch block I would just make a 12 inch sashing.
Natalie: Exactly. Your strip set length is the size of the block side and then the cornerstone is just the width of your sashing strip set.
Jenny: Ya that’s perfect.
Natalie: Even if you did these with 2 ½ inch strips then you would want to make sure that your block measured whether, if you put two together it’s 4 ½, if it’s three together it’s 6 ½. Whatever width your strip set is, that is the size that your cornerstone needs to be. And then to assemble it, super easy, you decide on your layout. I’m just going to grab a couple here. I have a lot of red, that’s ok. So for mine I decided I thought it looked really cool to have the whole thing completely framed so you have your sashing strips. And you can just sew a strip set to every single square that you have and then you’ll join those together this way. And then you make your long sashing set that goes across the middle with your hourglass and your strip blocks, strip set blocks. Whoops, and they always go, the way that I put it together, so this, it’s cool because you can do it either way. But I decided for consistency that I would put all the darks at the top so that it would be easier for me to remember. And then I made sure that my white was touching the white strip in the middle. And just continue sewing your sashing strip and your strips of blocks and it’s literally that easy. There’s nothing else to it.
Jenny: I love it.
Natalie: And I think it turned out really good. It’s huge
Misty: It’s gorgeous Nat.
Jenny: Alright well Misty you’re up.
Misty: I’m ready.
Jenny: Alright, Misty you are up.
Misty: Ok. So this is my quilt. Mine is much smaller than Jenny and Natalie’s.
Jenny: You used half a layer cake.
Misty: I did, I used half the layer cake and I called this Diamond Sashed Squares.
Natalie: It’s so beautiful. I love it.
Misty: Thank you. I really love it too. I made a project using a very similar method to this on my show awhile back and I decided
Jenny: What’s it called?
Misty: Well that project was called Diamond Ring Runner but it’s inspired by Seminole piecing from the Seminole tribe.
Natalie: That’s very cool.
Misty: Ya they use this method of piecing for their traditional clothes and it’s just incredible all of the different patterns that they create.
Jenny: I’m anxious to learn how to do it.
Misty: Ya and so this is the most basic version of that. So I encourage all of you to look into all that they do because it’s really, really inspiring. But I think you’re really going to like this. So to make this quilt you’re going to need one package of ten inch squares. I’ve used that same La Vie Boheme by French General for Moda. And I just used 20 squares like we mentioned. You’re also going to need ¾ of a yard of a light accent fabric, that’s this cream, one yard of dark accent fabric and three yards of background which I used the dark gray for mine. I love it.
Natalie: The colors came together so nicely.
Misty: I like it a lot. And then for the backing you’re going to need 3 ½ yards. Let’s show that.
Jenny: Oh that paisley is pretty.
Misty: Paisley and the quilting pattern I believe is Variety.
Jenny: I love Variety. That’s one of my favorites.
Misty: I do too.
Jenny: And so what size does the quilt end up?
Misty: It ends up
Jenny: Oh there we go, 49 by 60
Misty: Yes, 49 by 60. So a nice little lap size for watching TV. So let me show you how to do this.
Jenny: Porch size.
Misty: There you go, perfect.
Jenny: I can use it for my porch.
Misty: It is, that’s great. So this is what we are going to create. This is the sashing section that goes in between our blocks here. And so it’s all made using strip sets. So from our dark background fabric I cut a bunch of four inch strips which I have here. And from both of our other accent colors you’re going to cut 2 ½ inch strips. And so we’re going to make strip sets and I actually already have these sewn.
Natalie: Ya because that part is pretty self explanatory.
Misty: It’s pretty tedious. And so you’re just going to sandwich the four inch on either side of your accent color in the middle. And then we’re going to cut this into 2 ½ inch strips.
Natalie: And you do that with both colors?
Misty: Both colors, all the same measurements.
Jenny: Can you stack them?
Misty: I didn’t just because I worry about them being wonky.
Jenny: I’m the same way.
Misty: I don’t know where, oh there’s the ruler.
Jenny: I stack them when I can, you know.
Misty: But for this one I just laid it out and made my way across the strip set. And so just made one cut after another.
Jenny: I have to say I’m really intrigued by how you’re going to do this. I did not see her make it. I do not know how this goes together. So when I say I’m excited to learn how to do this, truly I haven’t done it before.
Misty: Well it was so fun to learn how to do because it was actually much easier than I expected. I was afraid it would be challenging. I was kind of up for the challenge but it’s really not hard because you’re still doing straight sewing. You know, and making strip sets which is really familiar to all of us. So I’m going to cut some 2 ½ inch of this color so we have both options. And you’re just going to do this with all of your sets until you have enough to do the whole quilt. There we go. And that should give us enough to get started. Alright so then for the pieces in between, every single time you’re going to have blue, white, blue. So you’re going to make a bunch of sets of three. So let’s go ahead and press this Nat since that one is kind of wonky.
Natalie: Sure.
Misty: Because we do want them to lay nice and flat
Natalie: You just want to make sure you have no creases
Misty: Ya you just don’t want any crazy rumples or anything like that. And one thing that is also helpful on this is that I always press my seams in the same direction and so when I go to put these together it makes it easier to nest them because these are all pressed the exact same way but when I flip it and line it up then they’re going opposite. If that makes sense.
Jenny: That makes sense.
Misty: And so you’re actually staggering these so instead of lining them all up straight across you’re going to slide it up one and then now this seam is what you’re trying to nest.
Jenny: Ok
Misty: So you’re just going to fold that over and it’s going to lock just like a normal four patch would there and you’re just going to start and you’re going to sew a quarter of an inch straight down.
Jenny: And so you just, you don’t really have to start at the top, you can
Misty: You can start kind of back at the midway.
Jenny: Ok
Natalie: It just has to catch both sides.
Misty: Exactly.
Jenny: Alright. Ope, hang on. My thread came un-popped when I lifted that up. Alrighty, so let’s make sure this is still nested. It is.
Misty: So this is actually your nest right here is that point.
Jenny: Oh ok. Well thank heaven it worked. Alright.
Misty: There we go. And so this is one of those that it’s helpful to have an iron close by. You can go ahead and press that back. They’re not really nesting but because they’re at different angles and staggered I found pressing in between did make it easier. And so now we can add our next piece. And so same idea. You can line it up and we’re just going to slide it up from there and add one more to it.
Jenny: Alright.
Misty: There we go.
Jenny: Now if you’re going to make a long chain of these, I don’t know where to start, hang on, let me look. There we go. Just peeking under there. Does it just keep going up like that?
Misty: It does, yep.
Jenny: Oh interesting.
Misty: Yep, you just keep adding and adding.
Jenny: This would be a little bit of work for an angley challenged girl.
Misty: It is except for literally all you do is line it up and slide it up. It’s the exact same motion.
Jenny: Well I guess once you get used to it
Natalie: You just have to be, ok this is what I’m going to do next.
Misty: Exactly. So once you get used to that repetitive process of it, it goes really, really quick. And so this is the three that is going to go in between our blocks. Now because I had tested out the measurements before on another project I didn’t want to make it hard on myself so I actually did trim my ten inch squares down to nine. So let’s go ahead and cut one of these down so that these will line up before I forget.
Jenny: So that’s actually really cool to note is that sometimes the block has to match the sashing. You don’t want that odd little half block appearing somewhere and so
Misty: And you could very easily add, you know, one more to this piece here but then you’d have a 12 inch block as opposed to a nine. And so to work with these ten inch squares I just needed to cut mine down which is not a problem at all. And so we’re just going to trim this to nine so it’s ready. And then let me show you how we’re going to add the ends. So I have some 3 ½ inch squares of my background. And we’re actually just going to go ahead and cut them in half corner to corner. And then I’m going to finger press these in half just so I have a center mark on both of them. And then we’re just going to eyeball that center right in the middle of our squares on either side. And we are just going to sew those on.
Jenny: Ok
Misty: You can do it. It’s really forgiving. I promise.
Jenny: Alright.
Misty: That was one of the things I really enjoyed about this is every time I was worried about it working out, it just did.
Natalie: That’s awesome.
Misty: So I was like, ok.
Natalie: That’s so good.
Misty: I think I’m worrying too much
Jenny: Well we’re so used to matching this up to this and matching that up.
Misty: Ya so and when you see this it looks kind of all over the place but it just works out really nice in the end. Alright so if you want to press those back. There we go. Alright. Now let’s trim this up. So because we don’t really have any straight lines to match yet this is all going to be in our ruler. And what we’re going to follow are these intersecting points of our diamonds. And so we want to measure over 1 ¾ inches from those points. And that number gives a generous quarter of an inch on the edge of these points so when we go to sew this together we’re not going to lose the points of our diamond.
Jenny: Now could you, say you did it two inches over from the middle, could you do that?
Misty: So the only reason that you wouldn’t is that when you go to sew these together if you have too much you’re going to have a really big gap here and you’re not going to have the chain.
Jenny: Oh ok, that makes sense.
Misty: So you really want it to be as close to a quarter of an inch as possible. So just use your ruler and make sure that it’s running 1 ¾ out this way and now we’re just going to trim off this side. Now we can turn it.
Jenny: Oh look how slick that is.
Misty: Yep and we’ve got a nice straight edge. And so this should measure total 3 ½ but again you can still just check your 1 ¾ and it’s working out perfectly. So now I can just trim off this side and it looks just like that.
Jenny: That is really fun.
Misty: And now it’s pretty amazing, isn’t it?
Jenny: Now my brain is on fire with some ideas.
Misty: Now you just, again, you want to make sure you’ve got at least a quarter of an inch from the end of your point. And then when you turn it this should end up exactly nine and it will give you all of your quarter of an inch. Just like that.
Natalie: That’s very cool.
Misty: So now you’ve got this great neat sashing block and it just sits right with it. And so you can see you would just alternate between your sashing block and your nine inch square and your sashing block. And then I did go ahead and make a long row. So this is how the long sashing row looks and you just sew end to end to end all of them together and then you add your triangles on the end just like I showed you on the short one. They’re the same size, nothing has to change. And you can just take your ruler
Natalie: I was going to say, how do you cut something that long and make it super straight.
Misty: You’re measuring the middle here and so that’s not disappearing. And it’s just super forgiving. And you just take your time and measure over your 1 ¾. And occasionally one of them might be, you know, just slightly off. But you can see in the quilt behind me, I didn’t lose any points. It’s super forgiving.
Natalie: Ya you had plenty of room and it all lined up.
Jenny: It looks amazing.
Misty: And it worked out great. And you could very easily use your whole layer cake and just continue this process.
Jenny: Oh ya I think you should have made a king
Natalie: For her bed.
Misty: I know. Well and honestly I really loved making it so I will probably come back and make another one. It was really, really fun.
Jenny: That is awesome. I love how different everything is and it just makes it so cool and it’s the same fabric. It’s beautiful.
Misty: And it’s fun to learn a new method.
Jenny: So fun. I really did learn a new method.
Jenny: Well I think this was really fun. So many ideas about things to do with quilts. We hope you filled your head with what if ideas about what to use with your ten inch squares or nine inch squares as the need may be. You know, or like Natalie’s said hers can be cut any length and be any size squares. So this is a really fun one. Did you guys like it?
Natalie: I did. I think it’s a great start to the holiday season.
Jenny: Oh my gosh yes, it would be a great way to make an easy quilt. And I loved, I learned that new method from you on the Seminole quilting. It’s very fun. So we hope you enjoyed this Triple Play on Pieced Sashings from the Missouri Star Quilt Company. See you later.
Natalie: Merry Stitchmas!
Jenny: Hi everybody, it’s Jenny from the Missouri Star Quilt Company. And I am here with Natalie and with Misty and we hope you enjoyed watching our latest Triple Play. You can find us together on the third Friday of each month as we hit another tutorial out of the park. If you aren’t already part of the Missouri Star Quilt Company family be sure to subscribe and click that bell to be notified each time we release a new video. See you next time.



