

Triple Play: 3 New "60 Degree Triangle" Quilts with Jenny Doan of Missouri Star
 Jenny Doan
- Layer Cake
- Holiday
- Table Runner
- Beginner
- Quilt size 49" × 51"
Triple Play is a favorite tradition here at Missouri Star. Once a month, Jenny, Misty, and Natalie each demonstrate their own, unique take on a favorite block, technique, or template. In this episode, the talented Doan ladies show off three adorable ways to use our handy dandy Missouri Star 8" Equilateral 60 Degree Triangle Ruler.
Instructor
Jenny Doan
Jenny Doan is an American quilter, author, and YouTube personality. Jenny started Missouri Star Quilt Company in 2008 and today it is the largest quilting supply vendor in the United States.
Shop this tutorial
 Hexi Stacks Quilt Pattern by Missouri Star$5.95Shop →
 Digital Download - Hexi Stacks Quilt Pattern by Missouri Star$4.95Shop →
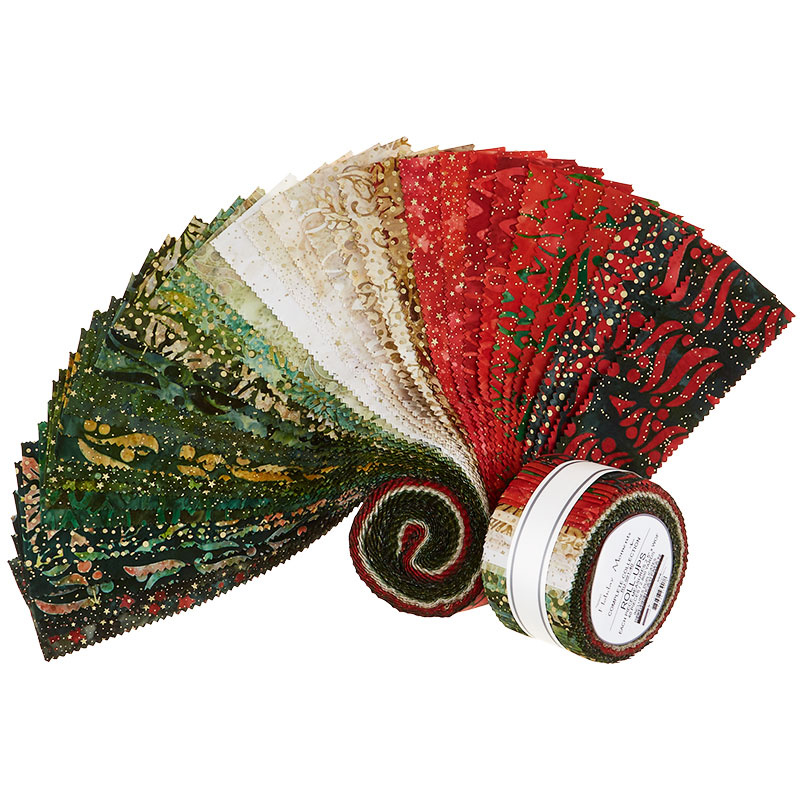 Artisan Batiks Holiday Moments Metallic Roll Up$40.95Shop →
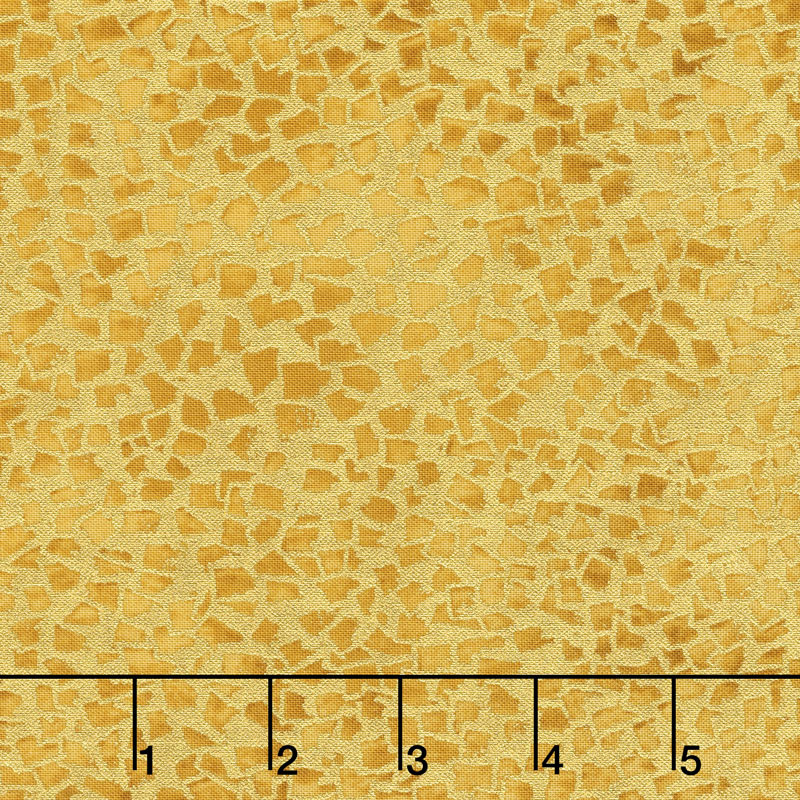 Gustav Klimt - Tile Gold Metallic Yardage$10.96Shop →
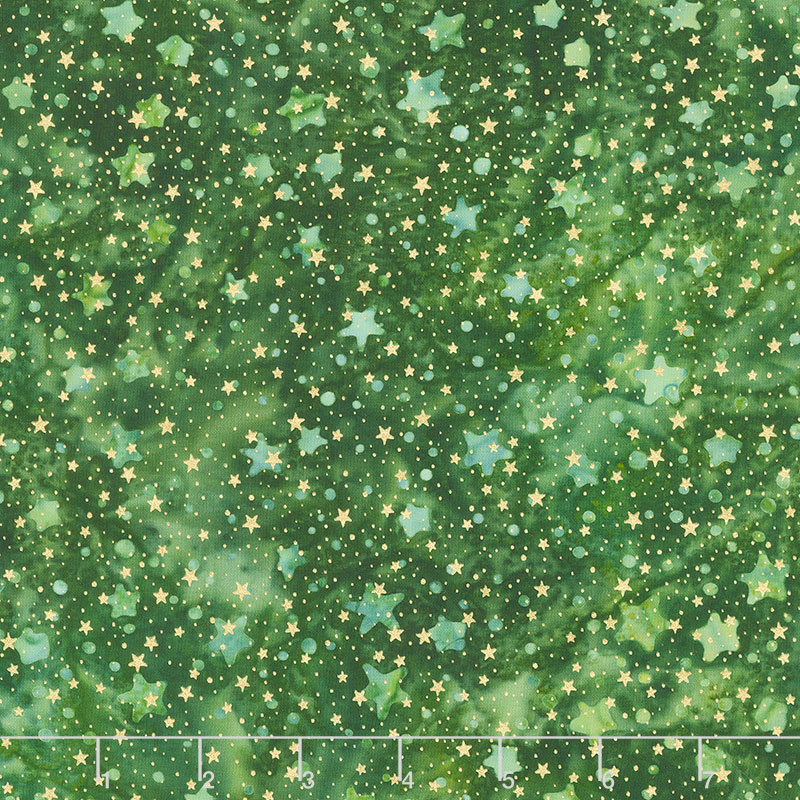 Artisan Batiks Holiday Moments - Stars Evergreen Metallic Yardage$12.44Shop →
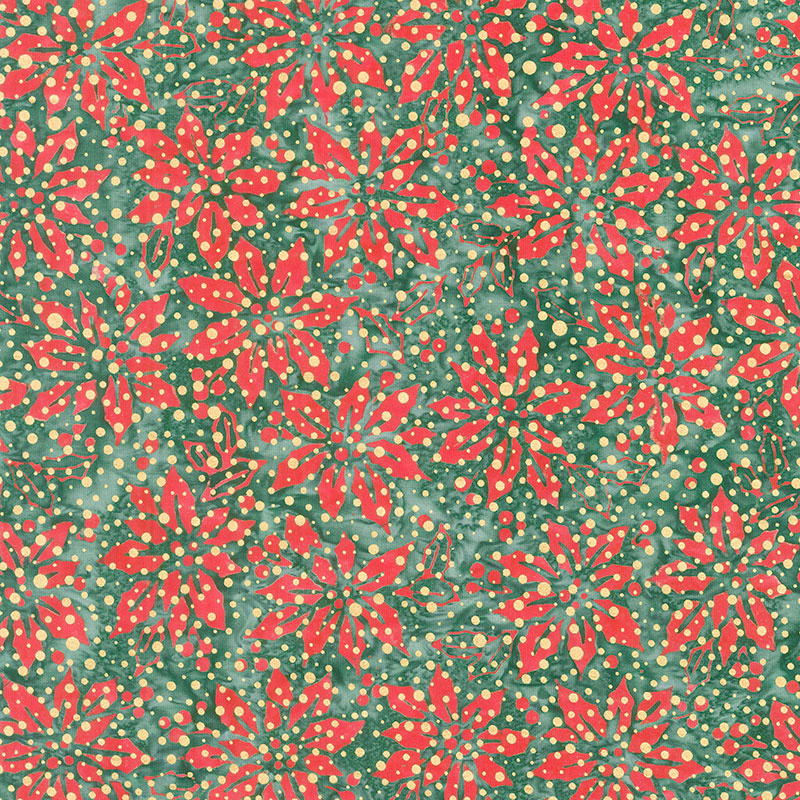 Artisan Batiks Holiday Moments - Flowers Holiday Metallic Yardage$12.44Shop →
 Gustav Klimt - Squares Tan Metallic Yardage$10.52Shop →
 Missouri Star 8" Equilateral 60 Degree Triangle Ruler$13.95Shop →
 Mountain Magic Quilt Pattern by Missouri Star$5.95Shop →
 Digital Download - Mountain Magic Quilt Pattern by Missouri Star$4.95Shop →
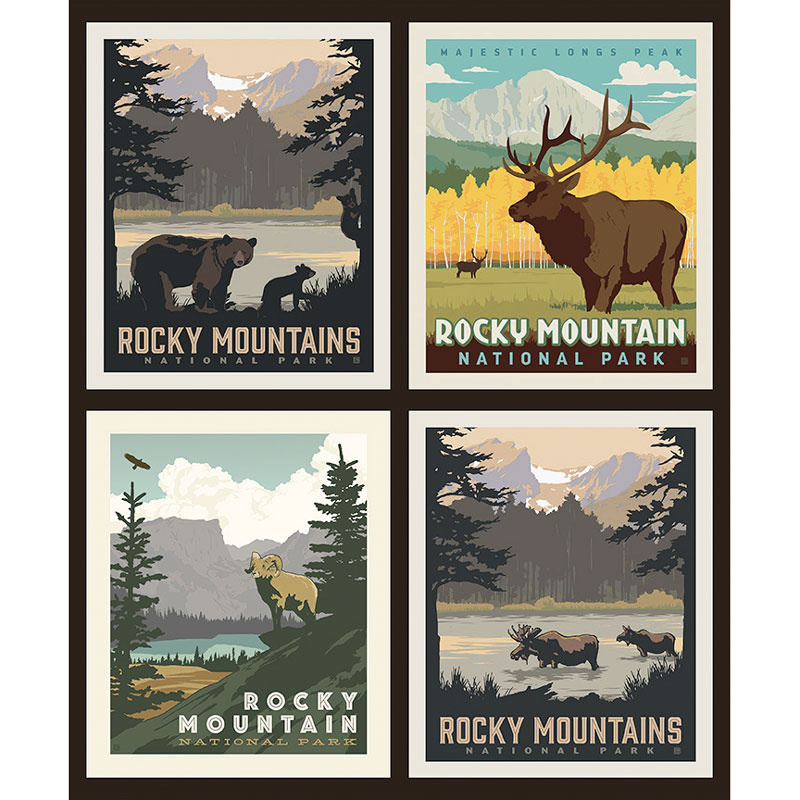 National Parks - Rocky Mountains Pillow Panel$10.45Shop →
 Kona Cotton - Scone Yardage$6.76Shop →
 Kona Cotton - Azure Yardage$6.76Shop →
 Kona Cotton - Medium Grey Yardage$6.76Shop →
 Kona Cotton - Seafoam Yardage$6.76Shop →
 Kona Cotton - Canary Yardage$6.76Shop →
 Violet Craft Modern Classics - Lines Citrus Yardage$10.44Shop →
 Kansas Troubles Favorites - Tan 108" Quilt Backing$15.96Shop →
- Missouri Star 8" Equilateral 60 Degree Triangle Ruler$13.95Shop →
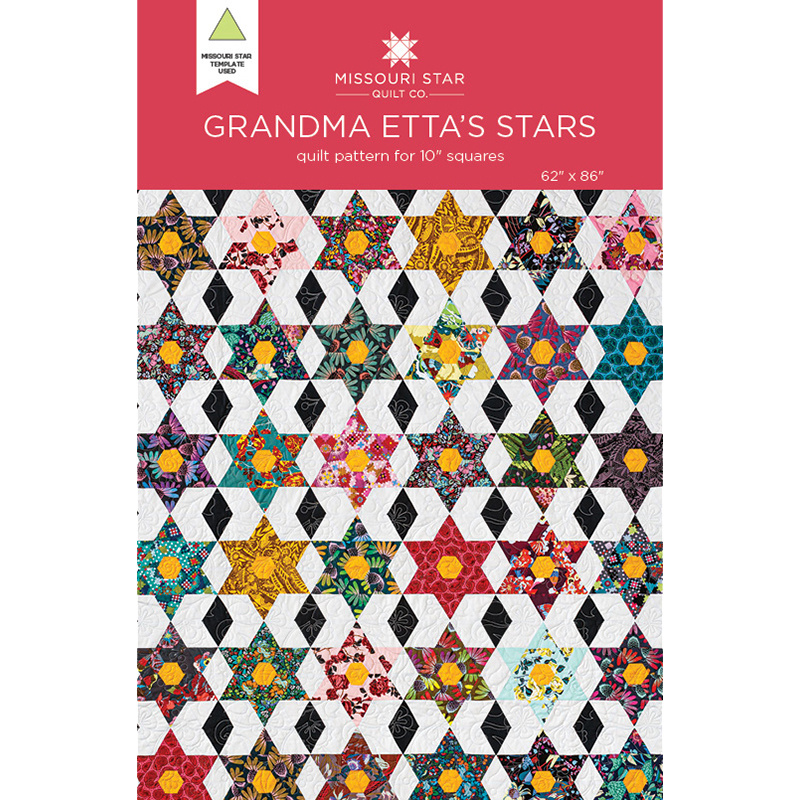 Grandma Etta's Stars Quilt Pattern by Missouri Star$5.95Shop →
 Digital Download - Grandma Etta's Stars Quilt Pattern by Missouri Star$4.95Shop →
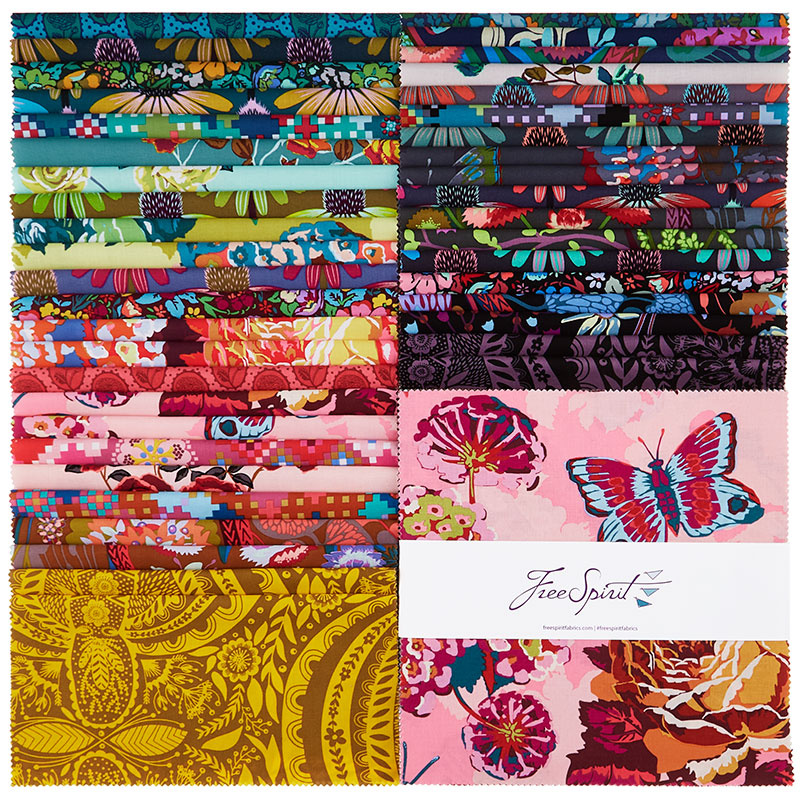 Love Always, AM 10" Squares$36.95Shop →
 Bella Solids - Marigold Yardage$7.24Shop →
 Bella Solids - Peacoat Yardage$7.24Shop →
 Bella Solids - Ash Yardage$7.24Shop →
 Love Always, AM - Clippings Charcoal Yardage$10.96Shop →
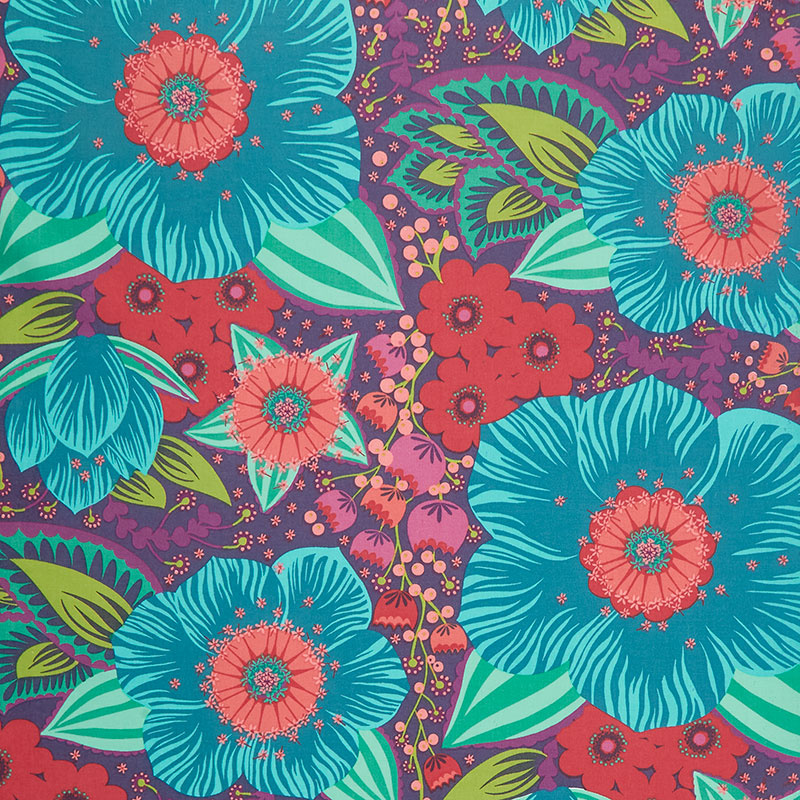 Love Always, AM - Honorable Mention Turquoise 108" Wide Backing$17.52Shop →
Common Questions
What is covered in Triple Play: 3 New "60 Degree Triangle" Quilts with Jenny Doan of Missouri Star?
Triple Play is a favorite tradition here at Missouri Star. Once a month, Jenny, Misty, and Natalie each demonstrate their own, unique take on a favorite block, technique, or template. In this episode, the talented Doan ladies show off three adorable ways to use our handy dandy...
How long is the tutorial video?
The tutorial video is 00:42:02.
Are supplies listed for this tutorial?
Yes. The tutorial page includes the supplies and materials connected to this project.
Is a transcript available?
Yes. A written transcript is available on the tutorial page.
Video Transcript
Natalie: So my project today is fun. I used a panel which I think is great because you can fussy cut and get all the little pieces that you like. I love it.
Jenny: I love how you captured all the animals. It’s so cute.
Misty: So cute.
Natalie: It’s a fun way because you, it doesn’t look like a panel, you know, so it’s not like your typical here’s a panel in the middle with a border around it. And so that was kind of fun for me. It’s called Mountain Magic because, you know, totally reminds me of the mountains and I used the Rocky Mountain panel. You guys can use whatever panel you want. There’s so many options out there. And just use the pieces that you want. The other thing I did is I used large and small sizes so I was able to capture a lot of the panel and not have a lot of waste.
Misty: I love that.
Natalie: So, you know, whatever pieces you like. It’s totally up to you. The quilt is 46 by 58 and I quilted it with Sticky Buns which is obviously one of my favorite patterns. I think we use Sticky Buns a lot and Loops and Swirls. They’re just pretty good standards.
Jenny: So I think this is a great size because this is a great size for a car quilt or a picnic quilt and especially if you’re using a traveling panel. I think that’s awesome.
Natalie: It works perfect. It’s a great one for just for people who have things like hobbies that are more of a novelty print rather than your standard lines that you’d get from Moda or Riley Blake. This is a Riley Blake panel but it’s just more unique to whoever you’re making the quilt for.
Natalie: To make my quilt you’ll need two fabric panels and I’ve used the National Parks Rocky Mountain pillow panel by Anderson Design Group for Riley Blake. You’ll need ¾ of a yard each of five different solid fabrics. Your backing is three yards of horizontal seams or 1 ¾ yards of a 108 wide. And the other tool that you’ll need is the Missouri Star eight inch equilateral 60° triangle ruler.
Natalie: Ya so this one is fun. It’s actually a pillow panel which is intended to just make into pillows. But I thought that it had some really cool graphic designs and I liked it.
Jenny: Let’s look at this.
Natalie: So it has these four things and you can see in the quilt there’s different parts. So like this section here would be the front of the moose. And then there’s another part where it’s like these are his legs and these are his antlers. Does that make sense?
Misty: Ya. I love that.
Natalie: So you take your triangle tool, and this is a great tool. It’s our equilateral 60° triangle.
Jenny: Which by the way, you can use any 60° triangle. They’re going to be pretty much the same.
Natalie: Yep and equilateral just means all three sides are the same length. . So you just set it wherever you want and fussy cut. So I used a combination of large and small triangles because I wanted to use more of the panel pieces. I thought it would be cool to put together sets of four that match the same size as my larger triangles. So the larger triangles are eight inches and the smaller triangles are 4 ⅜.
Jenny: Perfect. So how did you do it?
Natalie: Alright so first thing I did is I pretty much just cut all of the pieces out of the panel that I wanted.
Jenny: Now did you get it all out of one panel?
Natalie: I used two panels because I wanted a lot more cute little animals.
Misty: Look at the little bear.
Jenny: It makes me want to look and find them on the quilt.
Natalie: It’s actually kind of a fun little iSpy because you can see
Jenny: The little bird up here and the little tiny deer.
Misty: I love it.
Natalie: And so this guy shows up in this corner but then I focused in on him in this tiny little triangle. So he became the little center point.
Jenny: I love it.
Natalie: It’s really fun. That was part of it, you know, because I can cut up here and then down here I can turn it so then depending on how you put your little sets of four together, your triangles can be sideways where you can get the triangle top so it’s horizontal. Or you can have, you know, the triangle facing the opposite direction. Does that make sense? So you can cut them out in different directions based on what part of the panel you want to get. And then arrange them in the little sets of four.
Misty: Well and some of these I see you have the panel on the outside and the accent in the middle and you have some the opposite ways.
Jenny: Ya like this one up here has all the accent with the one. I was just noticing that.
Natalie: Ya and these and this one and this one, the colors are all three different.
Jenny: I’m pretty sure this quilt would entertain either one of us.
Misty: Clearly
Natalie: Tons of creative possibilities. You really can just do whatever you want. Have fun with it and use, you know, whatever colors you want, whatever combinations of colors but
Jenny: And I know lots of people they see these panels and we like them but we’re just like, what do we do with this? So, you know, this is awesome.
Misty: So great.
Natalie: Alright so I think I’ll go ahead and cut this guy out first. Now because I’m using the eight inch line I’m going to line it up so this line down the middle is great because you can see through and know exactly how it’s going to look. But you have to remember that you’re going to be cutting it here
Jenny: On the eight.
Misty: On the eight, ok.
Natalie: So to get to do that
Jenny: It’s nice that the seam allowance is in there so you know what parts
Natalie: You know what’s going to show. Ya. So to do that I just cut right out of the middle. And then what I’m going to do is turn it so that I can cut that last cut that’s on the line up in here. And you wouldn’t be able to cut in the middle of the tool obviously. So I’m just going to turn it. And I think it needs to go this way.
Jenny: Well it’s always helpful to turn, anytime you get into a position where it feels weird, just rotate that.
Natalie: Ok, so one of the things that worked really well, I can’t do it on this setting but if at home you can put your cutting mat at the end of a table, you can use both sides at that table. And I’ve, I did, you know, one cut in the middle and then I walked to the side. So I didn’t actually have to rotate it that much. So you can see where it’s been cut. You’re going to line up one of the cut sides with your eight inch line.
Jenny: Oh that’s a great trick.
Natalie: So that is how you’re going to make them all eight inches.
Jenny: Oh, that is cool. I didn’t know how you were going to do that.
Natalie: So now these are all my eight inchers. And what I did, I pulled out the ones I wanted large pieces first. And then I went back, because you’re going to do the same thing up here. You’re going to take this and say I can cut, I’m going to come down here and look at this little guy and line him up inside my 4 ⅜ section. And again I’m going to cut the two sides that I have available. And I’m going to turn it and I’m going to use this flat edge. And this one is a little bit tricky because it’s 4 ⅜. You kind of just
Jenny: It’s just a smidge under four
Natalie: What I would recommend is taking one of your other tools, so here. And we’re going to put a little piece of tape where the ⅜ line is. That will make it a lot easier when you’re going through the whole thing and cutting a bunch. I kind of just eyeball it because I’ve made a bunch of cuts now.
Jenny: Ya once you do a few you get pretty used to it.
Natalie: So then you’ve got all of your, oops I’m going to go straight across there. I didn’t go quite far enough. But then you’ve got your little guys cut out. And you’re going to do your whole panel, picking every part that you want and set them into piles and get ready to go. Background is way easier to cut. So I’ll show you that real quick. So you’re going to cut a straight, what do we think, because these are eight inches we’ll only need eight inches.And you don’t have to start with super straight edges because you’re going to cut everything with your triangle ruler anyways. So I’m just going to go one, two, three, four, five, six, seven, eight and cut that. And then
Jenny: And what’s your cut for these little ones?
Natalie: 4 ⅜
Jenny: Oh 4 ⅜, that’s right. So you cut a strip that was that size.
Natalie: Yes.
Jenny: Perfect.
Natalie: So you can cut these folded but I found that I actually got a few more if I unfolded it because
Jenny: Do you want me to press this?
Natalie: Nah
Jenny: Alright.
Natalie: So and when you’re doing these you can start with the eight line up there. You just have to pick a place to start. And it doesn’t really matter because they’re all the same length. They’re equilateral.
Jenny: All the sides are the same.
Natalie: That’s right. So I’m going to cut this one. And I’m going to turn,
Jenny: You want to cut that one?
Natalie: Oh ya. That would have been easier, sorry.
Jenny: I’m a left hander.
Natalie: I flipped it real quick before you got there.
Misty: Perfect left handed cut.
Natalie: Yep. So you just go along and cut these. And you can use, as long as you keep one side on the eight, they’re going to be great. Eight is great. Ya whatever size you’re cutting. You know, oops, went a little off there but that’s ok. So you’ll do that with all of your background pieces. And because it’s such a freely creative thing, you don’t have to cut all of your fabric before you start laying it out. You can cut enough to where you can get an idea of how many you want. But if you want more blue and less yellow or maybe you want to add a green or a purple or whatever you want. You can just cut a few, see how it looks and then cut a few more if you want them in different places.
Jenny: So it leaves it like clearly open for whatever you want to create.
Natalie: Totally. Ya and this way, you know, with whatever panel you’re using whatever colors you want to pull out. It’s a great way to use college colors. It’s a great way to use people’s favorite colors like whatever.
Jenny: What is this color called?
Natalie: I believe it’s medium gray.
Jenny: Oh it has a purple look to it. Like purple mountain majesty. I was like, oh my.
Natalie: Well I took my color card and I lined it up to my panel and picked the ones that I thought were easiest and
Jenny: That’s a great idea.
Misty: It worked out great.
Natalie: And really the next step is just learning to sew the triangles together. So we’ll start with a little one because we’ve got to make a bunch of those to match our larger triangles.
Jenny: Let’s do it all three colors too. I think that will be good.
Natalie: Ok, cool. So Misty you’ll just start by sewing these two. I like to start with the piece that I want in the middle. And if you’re doing a bunch of colors it doesn’t matter but you want to, the reason I start with the one in the middle is because I want them to face a certain way. And so if I’m worried about directionality, it’s easiest to get that one settled.
Jenny: Here, let me fold this up.
Natalie: Treat the panel with care. There’s a lot of cutting left on that guy.
Jenny: There really is.
Misty: There’s that one.
Natalie: Alright. Now I would just finger press this real quick and then add the other side.
Misty: Ok
Natalie: And what you want to do with this is line up the, actually if you finger press it the other direction, hold on. If you finger press away then you can line up the triangle on top of the other triangle right here. So then when these points match you know that you’re going to have a good, your seam will be good and you’ve got it lined up the way you want it.
Misty: Alright.
Natalie: And you can just kind of push that one way or the other to make sure you’re lining it up right and it’s not going to be off.
Jenny: And I would have to lay it out and make sure it’s facing the right direction because I’m pretty angley challenged and so, you know, I’d have to. Oh here let me just give that a little press.
Natalie: Sure. Great.
Jenny: There we go.
Misty: It’s so cute.
Natalie: And then this guy just goes right on the top. He’s just a cute little lid. And you lay it right on top of the other pieces and see how it matches those points from your side.
Jenny: Oh it’s perfect.
Natalie: And you go straight across.
Misty: Ok. There we go.
Natalie: And that’s the most complicated part of this whole quilt.
Jenny: There we go.
Natalie: So now, what you want to do then is just get all your triangles made and we just put it together in rows. So, you know, I just did these two side seams and this is a row. And then you add your next row. So it’s very easy to put together because you don’t even have to worry about this whole, like what we did here, where we did two and then added one on top. That’s not, you’re not going to do that again.
Misty: Right.
Natalie: So super easy assembly once you’ve got all your triangles made. And yes,
Jenny: I just keep adding one and adding one. I want to see what it’s going to look like.
Natalie: So you just lay it out and figure out where you want things.
Misty: I love it. It’s so cute.
Jenny: It is. How many rows?
Natalie: Ok so the one thing to remember, I did add full triangles on the side and then trimmed it straight. It’s just way easier for me to do that rather than trying to figure, you know, that measurement. I’d rather just square it up at the end. So that’s how I did that. And I’ve got one, two, well one, two, three, four, five, six, seven, eight, nine, ten, 11, 12 by one, two, three, four, five, six, seven, eight. So it’s just a little bit
Misty: Because of the angles
Natalie: Ya. So 12 by eight.
Misty: It’s great. I love it Nat
Natalie: And that’s it. And I decided not to border it. You absolutely could put a border if you wanted to but I just.
Jenny: Would you have enough panel pieces left to kind of put that in the border?
Natalie: I don’t think so.
Jenny: No. Ok.
Natalie: Because I pretty much cut out every little bit that I could get. You’ll see, I’ve got just a little top of a tree here. And I don’t even know what, but it’s part of a mountain maybe with a little antler in it. I kind of tried to get every inch that I could. And there’s just not a lot of panel left after that.
Jenny: It’s super cool.
Misty: It turned out great.
Jenny: Alright well it’s time for me I guess.
Natalie: Alright.
Jenny: So this is my project right back here. And I really love it. I’m calling it Hexi Stacks because they just kind of build on one another. I made this completely round hexagon shape and I put it in different places. I just made three of them, put them in different places. Now the size of this quilt was determined because in this roll I only had this many light strips. And so I used the light in the middle and sewed together my strip sets like this and I only got that many strips so that’s what I did. So I had a bunch leftover and so I made two other projects that I’ll show you as we get toward the end. To make my quilt you’re going to need one roll of 2 ½ inch strips and we have used Artisan Batiks Holiday Moments by Lund Studios for Robert Kaufman. You’re going to need ¾ of a yard of accent fabric and that includes the inner border. The outer border is ¾ of a yard. For the backing you’ll need 3 ¼ yards of horizontal seams. You’ll also need a Missouri Star eight inch equilateral 60° triangle ruler. Interestingly when you sew three 2 ½ inch strips together they should measure 6 ½, should being the operative word. When you are dealing with rolls like this, you know, I just go with the flow because that’s what I do. I sew them together. I don’t even actually measure them. But when they go to make the pattern that matters. So because they have these pinked edges on them different fabric companies measure different ways. If you’re to lay a ruler across the top of this one, it is over 2 ½ inches wide. That’s because they have a large pinked edge and they measure from the inside of the peak to the inside of the peak. And so if you measure inside here it is 2 ½. But I count the peak in my fabric as I’m sewing them together. And I tend to have a little bit smaller quarter of an inch, a little bit smaller because I sew with a foot that’s a little bit smaller. And I don’t ever measure it, I just sew along the edge. So mine ended up actually coming out about seven. If you’re using a regular jelly roll, again, yours will be 6 ½. But I just made it work with what I was doing.
Misty: And that’s a great tip. Just measure what yours ends up, right?
Jenny: Right
Natalie: And then cut all your triangles to the same size.
Jenny: Yes and so and I also like to cut on the line. I don’t want to have to make a line that I don’t know what it is. Do you know what I mean? I mean I just want to be ok this is what we’re doing. So anyway I have this cool little thing right here and I want to show you because, you know, it looks like it’s a little bit of work, doesn’t it?
Misty: Ya
Jenny: But it’s really the three strips sewn together and we’re just going to cut the triangles out. And we’ll cut a few in a minute. But I want to show you where some of these are. Here’s our triangle right here, you know. Here’s a triangle right here.
Misty: And they’re just going back and forth.
Jenny: And they’re just going back and forth. They just go around this way like this, you know. And we set them up on there. And I just think it’s fascinating how many different ways you can use these equilateral triangles. So I did try folding my strip in half and cutting two at a time. That’s living dangerously. It’s not always quite accurate. So I would suggest going ahead and opening yours up. Now I made sure that my tip was right at the top. My seven was right at the bottom of the peak. And when you go ahead and make these cuts you’re going to get one where the green is at the tip, and we’re going to flip our ruler, and the next one the red will be at the tip. So I’m going to go ahead and cut these. And this is a great time, if you want you could use a rotating mat, you know. We’re pretty good at going back and forth like this but don’t ever cut dangerously. So then on this one the edge is already there so you’re really only cutting one side. And so I’m going to line this up again. This line goes on the seven and this line goes here. So out of one strip set you’re going to get two pieces that look like this. They actually look completely different.
Misty: They’re opposites.
Jenny: I actually think it’s kind of fascinating. So as I started putting these together I matched my middles and so this whole little target here has just all green in the middles. And so you are going to need, we’re going to need three of those and we’re just going to keep adding these around. And you can switch out. So like mine, I didn’t have enough of one, you know, the same outside color to keep all of mine together. I wanted to go green. I wanted to go red. And I wanted to keep those together but I didn’t have enough of each one. Now just like Natalie did hers, when we go to sew these together, you match them up exactly and you just lay them on there like that. And you’re going to sew a quarter of an inch right down the side.
Misty: So when you did this you laid it all out first though?
Jenny: I did lay it all out first. So and that’s because I’m very angley challenged and so
Misty: I can imagine. It would be hard for me to just pick pieces up and get this right I think.
Jenny: And I actually sewed them together, once I got them laid out, I sewed them together in rows like this.
Misty: Just like Natalie.
Jenny: And so we’re going to go over here to the design wall and I’m going to take you two girls with me who are not so angley challenged and we are going to lay some of these out. So I just wanted to show how easy it is, how nicely they match up. You didn’t look for the seams to line up or anything?
Natalie: No, not particularly.
Jenny: She just sewed that seam. And look how well it matches. You know, she didn’t line them up. It’s three strips sewn together and it just comes together so it just looks great.
Misty: So did you just start sewing or did you lay this all out first?
Jenny: Oh I laid it all out first
Misty: I was going to say, I would have to lay this out
Jenny: I’m so angley challenged, I laid it all out first. So I’ve got a bunch here
Natalie: It’s even tricky as you’re sewing it together
Jenny: It really is
Natalie: You could say ok, these two all go this direction but once you get down here you’ve got this last one that goes the opposite direction
Jenny: Right. And
Misty: I’m like how did you keep this right in your head?
Jenny: And so you can see that, you know, if we go here you’ll see we have this one that is sewn to this one but then this one is set in here this way. It’s all the same block but just set in here differently. So let me finish cutting these and girls if you want to start laying these out. Make a little target and then run off the sides. And I’m going to finish cutting these.
Natalie: You want to start with these two, they’re sewn together
Misty: Sure, ya.
Natalie: And do you have enough reds to complete this one?
Misty: Um there’s a lot of green but maybe. We might be able to do this.
Jenny: Alright so here’s two more. Now also you guys, while they’re putting this together, this row right here, I literally sewed together a row. So I did not, I didn’t make this whole thing. I sewed them together as a row. So if you look over here.
Natalie: Do you have another red? An outer red
Jenny: And you’ll notice, on the reds I didn’t have enough to make a full circle of all the fabrics and so there’s different fabrics but it gives it the red look. You know, it gives it that whole look of being red.
Natalie: Once you have your circle together then each one is just a round of four.
Jenny: Right, it’s just a round of four.
Natalie: It goes whichever direction you’re going
Jenny: Because see these two right here how this is the bottom of my triangle and it lines up with the side. I literally would pick up two and sew them. And pick up two and sew them because I get turned around really fast with these things. That’s just my brain. I went along, I have a red and then I have a green, green and then a red, red. So it just works together really easily and really fun. Now while we were talking about this earlier Natalie had some fun ideas. She said it would be really fun to do this in solids or like ombres and go from light to dark or do a rainbow or something like that. Also you can move these things wherever you want. You can also, that looks awesome girls. You can also line this up so it forms an X. I mean there’s just so many ways you can lay this out. And it was just really fun. Now again because I had just a few of the whites and there’s so many more reds and greens in this roll, of course I wanted to keep making them. So I decided that I needed an accent color other than white to show you some things. And so I actually used this gold. And you’ll notice on the edges of my rows here I actually put a gold triangle here to finish off my row to pop it because I didn’t have anymore of this white. I used all my strips in my strip sets. And I did the same thing Natalie did, I started and ended with a triangle and then just trimmed that off and added the border and popped it.
Natalie: Can I say something really quick about this?
Jenny: Yes, yes.
Natalie: So this is a cool trick to know when you’re working with these hexagon shape edges. If you use all the same fabrics it will create that border. And then if you want your top and bottom borders to match, you just measure this. So this is three inches which means that this top and bottom border also needs to be three inches.
Misty: Great trick.
Natalie: And that way you can have this really cool little frame that looks nice on the inside of your quilt. And then you can put whatever border you want outside of that. But that gives you that cool, like the center of your quilt is floating a little bit. Just a cool tip.
Jenny: And since I had, this is exactly how this happened, since I had a bunch of these three inch strips cut, you know, for the top and the bottom and I ended up only using one with the fabric across here, I had several of these cut and so I’m like, well I’m going to stick this in the middle of my strips. So I sewed a red strip on the outside and a green strip out here. And I did the same thing again and made these other quilts. So these are runners. And if you know me at all you know, I mean, I have a lot of children so I love runners because, you know, you can get a lot of runners and I have a lot of children and I gift them.
Misty: Super great gift, absolutely
Natalie: We love it, by the way. We’re not complaining at all. I use all the runners on all my tables on all the holidays
Misty: Exactly right.
Jenny: So this one right here, you can see, we have a wider gold in here which means that, you know, our little measurement is going to be a little bit different. And this is one full circle. So then your triangles are going to be a little bit different because you’re using a bigger size because we put this 3 ½ inch strip in here and you’ll cut them out. But it goes together exactly the same way. And so for these right here we put six together, let’s see. One, two, three, four, five, six, I had to check that to make sure. And then again the four around the outside edge and four around the outside edge. And just made this great runner.
Misty: I love that you get to keep the point on this.
Natalie: I like that too. And then I also like, it’s kind of an odd shape, but having these run together into here it makes like a totally different look.
Jenny: It really does. And also when you do these little corners it’s not like 45ing it or anything like that. I mean, you just, I just, you know, made it work around the edges and you know, I don’t worry about that. Now this one is really fun because it’s the same triangles but again it’s a completely different layout. So look at that. Isn’t that so fun? Completely different layout. And so again, let’s look where the triangles are. So if we’re
Misty: You changed the order up.
Jenny: Yes. Gold is at the top. And so here’s this one and then over here, here’s this one and here’s this one. And we just kind of rotated them around, you know, so they made this kind of whirly gig looking thing.
Natalie: And then this kind of more looks like a chevron and then these ones are then opposite to create this little
Jenny: Like a finishing edge
Natalie: Each of these individually, you could make an entire quilt of that design.
Jenny: Oh absolutely
Natalie: And create endless layouts.
Jenny: Well Misty in the last Triple Play that we did where we used this, I think you did a quilt that had the whirly gigs in it.
Misty: I did, yes. That was with hexagons
Jenny: Well I think this is much easier
Misty: It is easier but it was a good way to learn the Y seam
Jenny: So anyway it’s just fun to see how these go together. It’s a great way to play with a design.And you know you can do all kinds of different things with it. So Misty I guess you’re up.
Misty: Absolutely
Misty: Ya so I am really, really excited about this quilt. When I saw we were going to be doing the 60° triangle I knew it was the perfect time to try and recreate this antique quilt that we have. It lives at my mom’s, at my mom and dad’s. But it was made by my great, great grandma Etta and so I brought it to show you the inspiration.
Natalie: It’s so beautiful.
Jenny: You get in front of this. And we will hold this up.
Misty: Behind me. And so you can see her stars are much bigger and it was all hand sewn and hand quilted and there are quite a few Y seams in here.
Natalie: It’s gorgeous. It’s so pretty.
Misty: Isn’t it pretty?
Jenny: I’m pretty sure this is lives at my house, Misty.
Misty: No, no, no!
Jenny: It’s gorgeous.
Misty: It’s an absolute treasure and I wanted to recreate it.
Jenny: And great great. Do you have an idea of the year?
Misty: I don’t. I believe she died in 1956.
Natalie: So probably 30’s or 40’s.
Jenny: Or a little bit earlier. It has that neon in here. 20’s maybe
Misty: Ya it could be. I am not sure. I would love to know for sure.
Natalie: I would love to know how to date quilts also. I want that knowledge
Misty: Me too. So let me show you how we do this. To make my quilt you’re going to need one package of ten inch squares. And I used Love Always from Anna Maria Horner for Free Spirit Fabrics. You’ll also need one yard of Bella Marigold accent fabric. ¾ yards of Bella Peacoat accent fabric. Three yards of background fabric. 1 ¼ yards for your border and 5 ¼ yards with vertical seams for your backing. I started using layer cake squares so to begin with we are going to cut 3 ¼ inch strips out of our layer cake squares.
Jenny: So can I also say this layer cake is gorgeous.
Misty: Isn’t it beautiful? I love it. I love it.
Jenny: She’s so talented. This is Anna Maria
Misty: Ann Maria Horner, yes. So gorgeous. Alright, so 3 ¼ and we’re going to cut three of those strips. So one, whoops, I got one little thread stuck.
Natalie: The nice thing about 3 ¼ is you use that layer cake really well.
Misty: Exactly
Natalie: That’s perfect.
Misty: You don’t have hardly any leftover. Two and make sure we’re all straight. There we go. And that’s all our waste.
Jenny: And you do that to all your layer cakes?
Misty: All your layer cakes. You’re going to cut them all exactly the same way. And I did go ahead and stack them, once I had my strips cut.
Jenny: Cuz why not
Misty: Cuz why not
Natalie: Ya if you don’t have to worry about seams then you stack up your fabric and cut it.
Misty: Exactly. And so then we’re going to use our template and we’re going to cut 3 ¼ inch triangles. And you should be able to get four across. So we’ll make one cut. There’s that one. Ok. And now we can just rotate and cut across. Just making sure we’re on that 3 ¼ inch line.
Jenny: And there actually isn’t a 3 ¼ inch line on here.
Misty: There is
Natalie: There is. It’s just a tiny one.
Jenny: It’s a tiny one, ya.
Misty: Yep, so it’s in between the big solid lines
Jenny: So if it bothers you at all, you could put a little piece of tape or draw the sharpie line or something like that.
Misty: But there is the little mark on the edge
Jenny: There is that little mark on the edge. I didn’t see that when I started that comment.
Misty: That’s ok.
Jenny: And how many do you get, four?
Misty: Four, yep. All the way across. So you don’t have a whole lot to waste. That’s all your waste there. And then we can just set that aside. And so now, I like to keep, like I said you’re going to cut all your layer cake squares but I like to keep them kind of together in sets so that all of my fabrics stay together. And then we’re going to take half of these, so six of them because you’re going to have 12 triangles total. And we are going to put the little middles on them.
Natalie: So each flower uses all of the pieces from the layer cake.
Misty: Exactly.
Natalie: Because you have one, two, three, four, five, six, seven, eight, nine, ten, 11, 12. That’s very cool.
Misty: 12, yep.
Jenny: That’s very cool.
Misty: Exactly, so it makes it really easy as long as you keep those cuts together to manage all of your fabric and then the magic really is in the layout. So initially I thought, oh before I cut these I can just sew it to a strip and cut it. Well like we learned from yours, you get the opposite.
Jenny: It only works on one cut. It doesn’t work when you flip the blade.
Misty: Exactly and so I was like, that’s not going to work for this because I just need my middles. I need them all to go the same way. So what I did is I picked this accent fabric. I went with this gold. And I cut a two inch strip. And so what you’re going to do, or what I ended up doing, what I found easiest is I actually lined my two inch strip up on my big long straight side. But then I sewed it on this edge
Jenny: Oh genius girl.
Natalie: Strip piece a whole bunch?
Misty: I did. So because I, remember you need six of each and so I just put them through there and just sewed one after the other. So if we want to do a few of those. I thought we could show how that turns out.
Jenny: That’s actually really genius, Misty. I would be measuring from the top, trying to figure out.
Misty: That’s what I did at first. So once I finally figured this out, I was like, oh this is so much easier. So much easier. There we go. Yep. And just sew across. And you can kind of overlap them a little bit on the back side.
Natalie: Oh ya because you don’t need all of that.
Misty: And if this is confusing to you, I think it’s two inch squares you can actually cut and just lay the square on each individual one but for me this was so much faster. You’re still going to have to do a lot of cutting so.
Jenny: You’re going to cut either way. You’re going to cut the square or you’re going to cut the strip. It’s actually really cool.
Misty: One less step. Exactly.
Natalie: And I just keep sewing straight across even though there’s nothing to see
Misty: That’s exactly how I did it.
Natalie: You don’t have to raise and lower your presser foot
Jenny: Great idea.
Misty: Ya I was pretty pleased with myself when I did that because
Natalie: So six is the right number? I didn’t want to sew too many.
Misty: You’ve got four so two more.
Natalie: Ok perfect. Just double checking.
Jenny: It is interesting to me how many different ways there are to do a thing.
Misty: I know. And as you’re working on certain things new ideas come and you figure out ways to make it quicker and easier.
Jenny: Now is it easier to cut them off individually or did you iron the strip up and then cut them?
Misty: So I had better coming through a trimming in between. So I just, you know, kind of slid my scissors in here and then you fold them up and press.
Jenny: Ok so let me press that while you’re cutting them.
Misty: That would be perfect. Just make sure you don’t cut off any of your tips there when you’re cutting in between these. That would be a sad day.
Natalie: I mean then you just have to go do it again.
Misty: That’s true. It’s true.
Jenny: It does feel kind of weird just ironing this one little one up.
Misty: I know. And then we can come back and use our ruler again and just trim off those tops. That’s what I did. Because we want it to still finish up at that 3 ¼. So we’re just going to keep trimming these and three more.
Jenny: I’m just making sure I got them all ironed.
Misty: I think so. Now I do want to point out when I picked the gold I thought it would be really beautiful in the centers which I am very happy with it, but if I did this again I would probably pick a darker color for the center. And the reason is because on some of these prints you can see them through the gold. So you just have to fold it back and trim these off.
Natalie: Trim these off.
Misty: Yep, absolutely. And so once I trimmed off the triangle, I just, you know, used a straight edge and trim all those off. But if you used a darker fabric I wouldn’t do that. And so that would save you that step.
Jenny: That makes sense
Natalie: I feel like it’s not a big deal.
Misty: It’s not.
Natalie: I thought I had, how many do I have left?
Jenny: Not everything needs to be done at hyper speed
Misty: It’s true
Jenny: I tend to do a lot of really fast things but I enjoy a project that, you know, you can put a little time and effort into it
Misty: Ya and this is definitely one of those that is a labor of love. It is more time consuming. It’s not hard. It’s just going to take you a little more time. But it is totally doable. Ok, so then let’s talk about how this lays out. Natalie actually helped me come up with a layout on this which I am so grateful for.
Natalie: The design process is really fun. We go through a lot of ideas and a lot of different tries and what if we do this and what if we do that?
Misty: Ya when I first started laying this out I had them just in individual triangles. And you can imagine all these little pieces. It was very overwhelming. And Nat suggested well what if you make these little units and so let’s show you how that comes together. I’ll go ahead and lay out one of our stars here. So you can see all of our middles point towards one another, just like that. And then we can go in and add the points. If I can get them apart here. There’s that one and that one just like so. And so how I actually did it is I went ahead and sewed these sets of five together just like they are here.
Jenny: In a row?
Misty: In a row.
Jenny: Like this, ok.
Misty: Yep.
Jenny: So one, two, three, four, five?
Natalie: Then if you have those sections, you can lay your quilt out and still decide I want my pink flower here, that flower there.
Misty: So I have some of these already sewn
Natalie: So it’s a lot less pieces to deal with
Misty: Exactly. It’s so much easier on the layout. I can’t even begin to tell you. So you can see just how all of theirs went together in rows. You’re going to sew these little segments in the exact same way. You don’t have to worry about that. You just make all of these middle sections of your stars exactly the same. So it’s really one of those things that kind of becomes rote as you’re working through it.
Jenny: So you have some of those done.
Misty: I have some of those done.So let me show you the layout of that. So then you can see these segments just like so. And you can set them together.
Jenny: The yellow is kind of the guiding star because you know those come together. And it’s going to make more sense to your brain.
Misty: Exactly. That are the points. And so now the magic in getting these diamonds in between is we actually make units using our background and our other accent fabric in the exact same way. And so you can see we have two background triangles, one accent and two background. And so we’re going to have a stack of those ready to go just like our flowers
Jenny: And it’s the same size
Misty: The exact same size
Jenny: What size is that again?
Misty: Well each of our individual triangles is 3 ¼ inch. And so for these you just cut a 3 ¼ inch strips and cut out a bunch of your triangles and then we are going to assemble them like this. And then now for the layout you can see this is going to go here and then this drops in between. And on these pieces we just have a background triangle in between them.
Jenny: And each one of these is a row? So this is a row here, this is a row here?
Misty: Exactly.
Jenny: But you are going to want to lay it out to make sure that everything lines up and matches and that your pattern forms.
Misty: Exactly. You, I mean, layout is the key. There’s really no way around it on this one. Where did my little? Oh there’s the tips. There’s that.
Jenny: I’m hanging onto it.
Misty: That’s ok. And then you can just see how quickly this starts coming together. And then we can put our next star in here. And these pieces just meet like that. And then once you have it all laid out you can just start assembling. And you’ll notice on the ends here you might have some odd little like, here’s two backgrounds and an accent. And here we end with two backgrounds. But I did the same thing where I have a full triangle on either end and I just cut everything straight. And so I just had, you know, the pattern tells you exactly how many of each one you need. It is a lot. And you just go through and you fill it in. And the body of the quilt, by doing this method, comes together so so fast.
Jenny: Now on your grandma’s quilt those triangles are a lot bigger.
Misty: They are, ya.
Jenny: And is there a reason you didn’t do them that size?
Misty: The only reason I didn’t is because I was working with a layer cake. I think this would be an awesome fat quarter quilt. You could use bigger triangles out of your fat quarters which is a great option.
Jenny: And all your measurements come on this ruler
Misty: Exactly.
Jenny: So you can do whatever size you want. Because all the triangles are the same size.
Misty: Exactly.
Jenny: That’s awesome.
Misty: Ya love it. It has so much meaning to me. And I hope you guys enjoyed it and I can’t wait to see it in other fabrics. I’m really excited.
Jenny: Ya all kinds of different fabrics
Misty: I went ahead and put a little inch and a half inner border and I believe this is a five inch outer border on that.
Jenny: And this quilting pattern, this is also one of my favorites.
Misty: Yes.
Jenny: I love this Bow Dangles
Misty: Bow Dangles, I thought it was perfect for it.
Jenny: Well it’s just so whimsical and fun with these little, you know, just the cute little flowers.
Misty: Oh and the backing on this is so fun too. So we better that. Nice big print
Jenny: Flowers.
Misty: Isn’t that awesome? She does such a great job. So anyway this is Grandma Etta’s Stars.
Jenny: That’s awesome.
Misty: Thanks
Jenny: So anyway, that’s it for our Triple Play today. We hope you enjoyed all these new, fun ideas. We’ve got so many things going on. Don’t forget that you can download our app and actually search equilateral triangle and it will give you all the different ideas for this one template.
Natalie: And many more to come.
Jenny: And many more to come. And we hope you enjoyed this Triple Play from the Missouri Star Quilt Company.
We hope you enjoyed watching this video. If you’re not already part of the Missouri Star quilt family you can hit the subscribe button below so you won’t miss a thing. And if you click that bell it will notify you every time a new tutorial comes out. See you next Friday.



