

Triple Play: 3 NEW "Baby Stars" Quilts with Jenny Doan of Missouri Star
 Jenny Doan
- Layer Cake
- Heirloom
- Baby
- Beginner
- Quilt size 45" × 53"
These pretty baby quilts are made with precut layer cake squares and fussy cut panels or yardage. Watch to the end of the tutorial for two bonus projects: A burp cloth and a curved nursing pillow adorned with that sweet little patchwork star.
Instructor
Jenny Doan
Jenny Doan is an American quilter, author, and YouTube personality. Jenny started Missouri Star Quilt Company in 2008 and today it is the largest quilting supply vendor in the United States.
Shop this tutorial
 Baby Stars Quilt Pattern by Missouri Star$6.95Shop →
 Digital Download - Baby Stars Quilt Pattern by Missouri Star$4.95Shop →
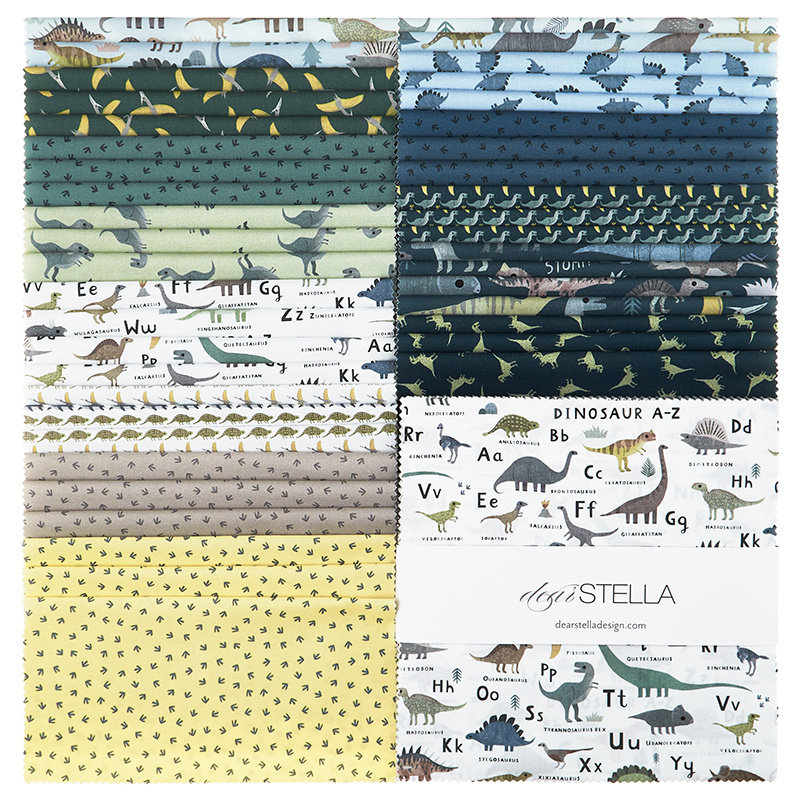 D Is For Dinosaur 10" Squares$38.95Shop →
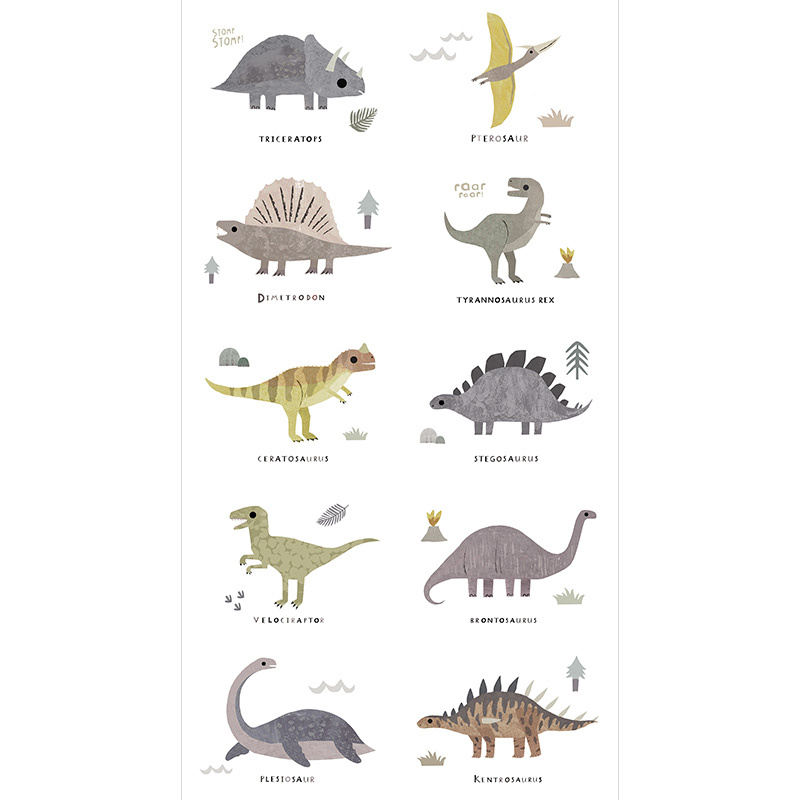 D Is For Dinosaur - Dinosaur White Digitally Printed Panel$8.45Shop →
 Kona Cotton - White Yardage$7.28Shop →
 D Is For Dinosaur - Stomp Stomp Cloud Digitally Printed Yardage$11.96Shop →
 Kona Cotton - White Mini Charm Pack$6.95Shop →
 D Is For Dinosaur - Paw Prints Orion Digitally Printed Yardage$11.96Shop →
 D Is For Dinosaur - T Rex Hay Digitally Printed Yardage$11.96Shop →
 Baby Stars Curvy Pillow Pattern by Missouri Star$6.95Shop →
 Digital Download - Baby Stars Curvy Pillow Pattern by Missouri Star$4.95Shop →
- Kona Cotton - White Yardage$7.28Shop →
 Lucky Rabbit - Hand-Drawn Stars Teal Yardage$11.96Shop →
 Lucky Rabbit - Painted Plaid Orange Yardage$11.96Shop →
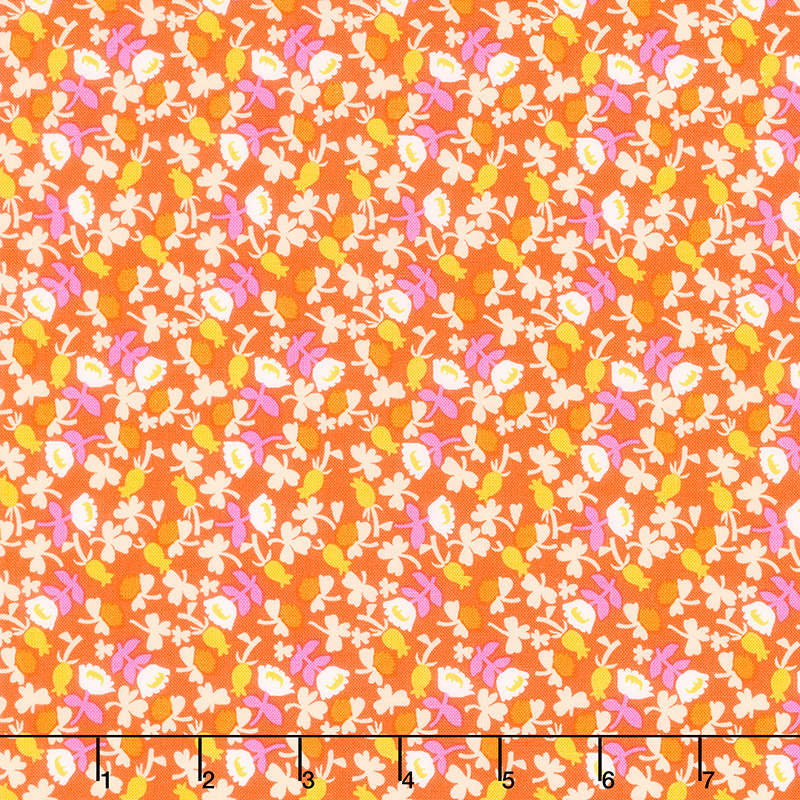 Lucky Rabbit - Calico Red Orange Yardage$11.96Shop →
- Kona Cotton - White Mini Charm Pack$6.95Shop →
- Lucky Rabbit - Hand-Drawn Stars Teal Yardage$11.96Shop →
 BLOCK Baby "Mystery" 2018 Magazine Vol 5 Issue 1$7.99Shop →
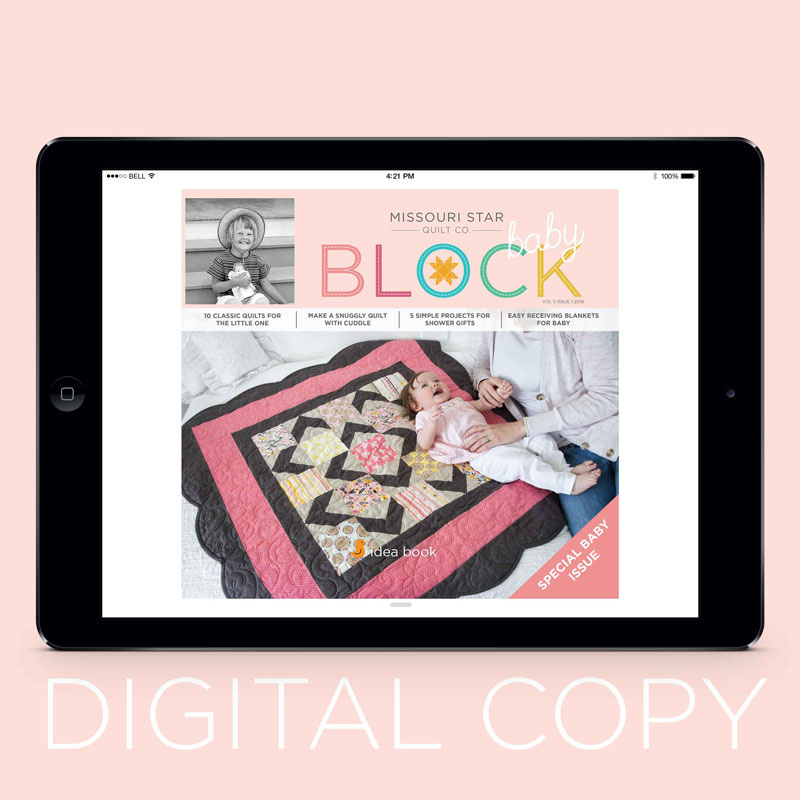 Digital Download - BLOCK Baby 2018 Magazine Vol 5 Issue 1$6.99Shop →
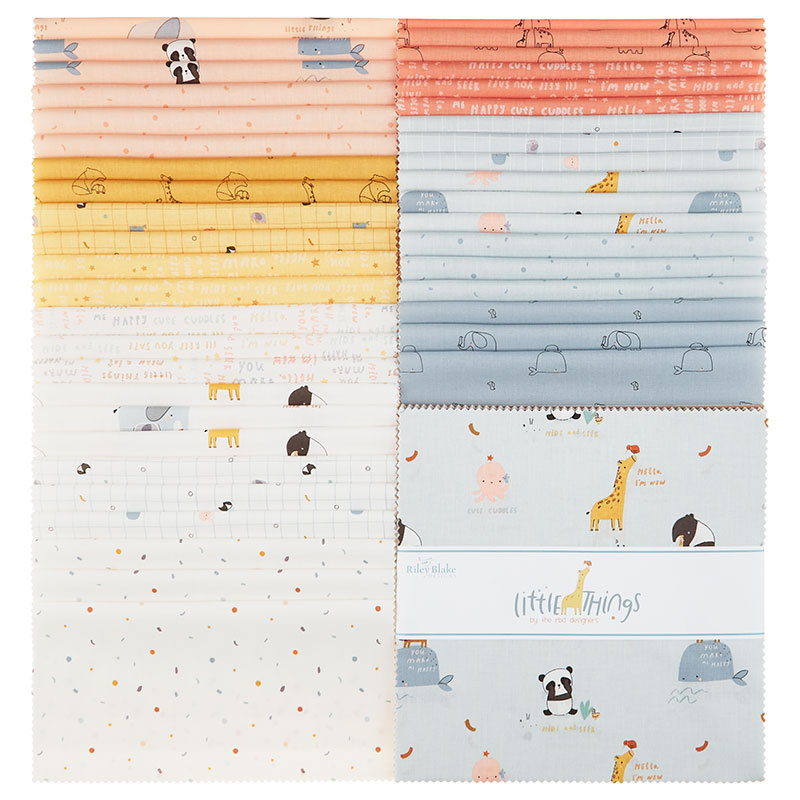 Little Things 10" Stackers$39.95Shop →
- Kona Cotton - White Yardage$7.28Shop →
- Kona Cotton - White Mini Charm Pack$6.95Shop →
 Little Lambies - Herringbone Aqua Yardage$12.44Shop →
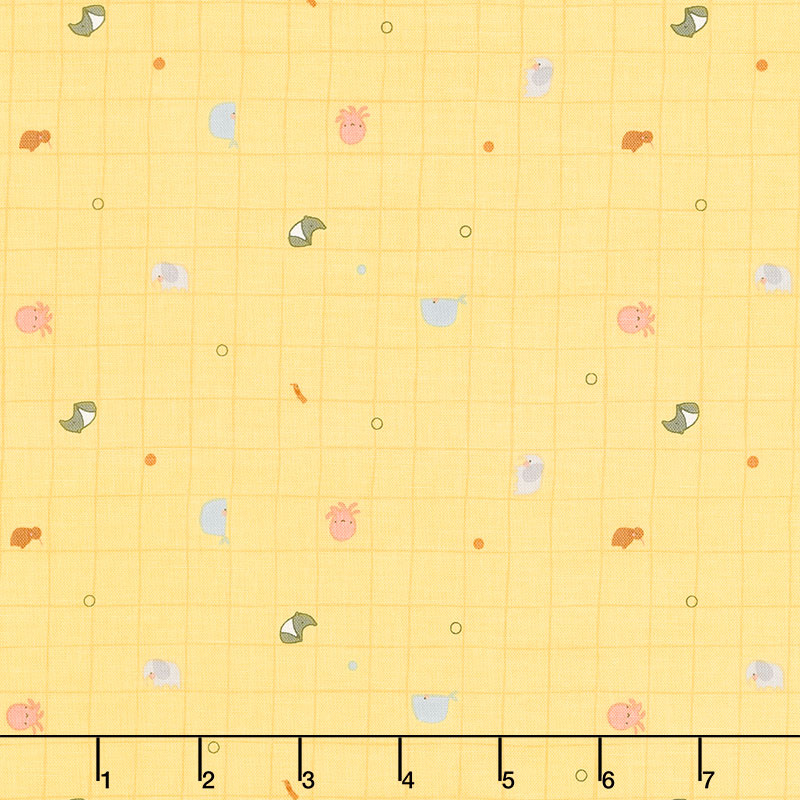 Little Things - Grid Sunshine Yardage$11.24Shop →
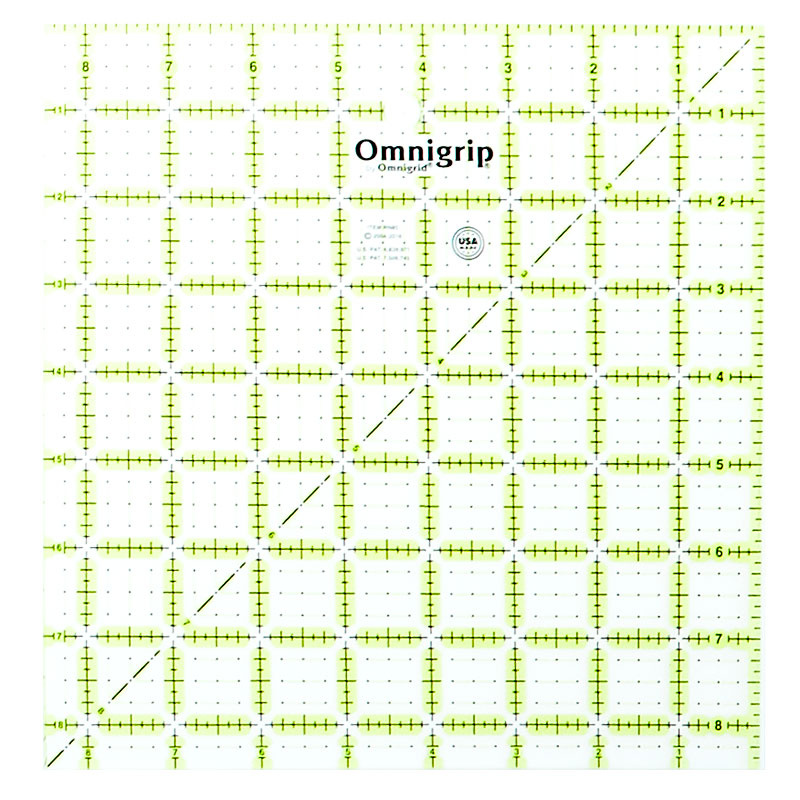 Omnigrid Omnigrip Neon Ruler 8 1/2" x 8 1/2"$21.95Shop →
Common Questions
What is covered in Triple Play: 3 NEW "Baby Stars" Quilts with Jenny Doan of Missouri Star?
These pretty baby quilts are made with precut layer cake squares and fussy cut panels or yardage. Watch to the end of the tutorial for two bonus projects: A burp cloth and a curved nursing pillow adorned with that sweet little patchwork star.
How long is the tutorial video?
The tutorial video is 00:34:53.
Are supplies listed for this tutorial?
Yes. The tutorial page includes the supplies and materials connected to this project.
Is a transcript available?
Yes. A written transcript is available on the tutorial page.
Video Transcript
Hi everybody. It's Jenny from the Missouri Star Quilt Company and it is Triple Play Day. So I am here with Misty and with Natalie, and we've got some fun projects for you today. Now, I know that when you get to be a certain level of quilter, you get invited to a lot of baby showers or you have grandchildren, or you just want to make baby quilts. And so we have a great idea for a baby quilt and a couple of other fun projects, and we're going to show you that quilt in three different lines of fabrics. So it's going to be very fun for you, hopefully. It was very fun for us as well. Anyway, this is my quilt right here. And girls, if you want to pull yours out so we can see yours as well.
Misty:
I think they're really cute.
Jenny:
So it's the same pattern, but three different fabrics and I just think they look darling, aren't they so cute? And it's just different uses of things. They each had a panel. Misty's panel was large, so she couldn't use it. So hers is strictly layer cakes. I had a panel and Natalie had fabric she could fussy cut.
Natalie:
I have fabric with large prints on it. Very fun.
Jenny:
And so it was just very fun. We're going to show you how to make the quilt and two other fun projects.
So to make this quilt, you're going to need one layer cake. Actually, you need about 20 squares. And so it's nice to have some to pick from.
Misty:
You could probably make multiple quilts. Maybe you're having twins or triplets.
Natalie:
That's true.
Jenny:
Yes, you actually could. So my fabric line is called Diaz for Dinosaur, and it is by Paint Love studio for Dear Stella and Misty.
Misty:
Mine is called Little Things and it's by the Riley Blake design team.
Jenny:
I love it when they do that.
Misty:
When they work together.
Jenny:
All the designers make it.
Natalie:
The collaboration is so great.
Jenny:
It's really fun. And yours?
Natalie:
I've got Lucky Rabbit by Heather Ross for Wyndham, and I just love it.
Jenny:
So cute.
Misty:
They're all so cute.
Natalie:
I've been a Heather Ross fan for years.
Jenny:
Yes. And it's just darling, the colors are so bright and happy. So you're also going to need some background and that is for this inner border right here and for the little star points. And so for me, it was about three quarters of a yard. Natalie has a little bit bigger inner border, so a yard's going to cover all that. However, they also have these cool two and a half inch squares pre cut.
Natalie:
Awesome.
Misty:
It does save you some time.
Jenny:
I love it. It does save a lot of time to use those. For the border, my border's a five inch border and Misty's too, I think Natalie, I think yours is six. For the border, it's going to take three quarters of a yard. Again, if you want a bigger border, just buy a yard and size up. It doesn't take very many strips to go around a baby quilt. Our backing is three yards. And I have this...
Misty:
It's so cute.
Jenny:
... dinosaur. Yours is a just a nice soft white.
Misty:
No, just soft white.
Natalie:
Mine are these cute words.
Jenny:
Oh, the words, I love words.
Misty:
There's so many great fabrics.
Jenny:
Really cute. Anyway, shall we show them how to make this quilt, girls?
Misty:
Yes, do it.
Natalie:
It's such an easy block.
Jenny:
It really is an easy block. Now this is Misty's block from your stars and stripes.
Misty:
Saw tooth, it's stars and stripes.
Jenny:
It's a sawtooth star, but I just love the way it's done. So basically we are going to stack these and we're going to cut the block down to nine and a half inches. So I'm going to take a half an inch off of two sides. So that'll be this side right here and this side right here. Now you can do this with any size square that you want, but for this, I was trying to match my panel. So this is my panel right here. Girls, why don't we show the panel.
Natalie:
Oh, yes. Mine's over here.
Jenny:
And then Natalie just has fabric that you can fussy cut out of. So this was my panel and the size I got from cutting these was eight and a half. And so I wanted my star squares to match the eight and a half panel. Misty's are large, so she wasn't able to use her panel in it, but
Misty:
It's so cute. I wanted you to see it.
Jenny:
Well, and at least, I mean, you could put this on the back.
Misty:
Absolutely.
Natalie:
These would make great pillows.
Misty:
Yes.
Natalie:
They would make great art.
Misty:
A little wall hanging.
Natalie:
You could put it in a frame.
Jenny:
Wall art. All the things. And now...
Misty:
Look how cute this is with the little reading fort.
Natalie:
I love the blanket fort, I love it.
Jenny:
And when you use fabric with a ruler, it's called fussy cutting because you're making sure that your little design is right in the center of your square, which you can see on hers. Happens several different times.
Natalie:
There's cute little houses and toys.
Jenny:
It's just darling.
Natalie:
Little doll house.
Jenny:
All right, so again, my squares end up eight and a half, so one of my stars end up eight and a half. So I'm taking my 10 inch square and I'm cutting it down to nine and a half. And then we're just going to cut in two and a half inches on the four sides all the way around. Do we have our, oh, we do. This is so helpful for making this right here.
Misty:
Yes. A rotating mat is very helpful.
Jenny:
Rotating mat. It's very helpful. And if you want, you can actually, if you have a small mat, just turn it. It makes it really easy. So what we're going to do is we're going to take our ruler and we're going to come in two and a half inches and I'm going to make a cut and then I'm going to turn it and do it on all four sides. So two and a half like that.
Misty:
This is just such an easy way to make stars.
Natalie:
It really is. It's so quick.
Jenny:
And this way. One more and then one more down here on this side. There we go. So now these ones here, these four and a half by two and a halves are what's going to have our star legs on it. So what we're going to do is we're going to take some of these and we're just going to put a star leg on both sides, but we are going to chain piece these through. And what we'll do right here is you can draw the line, you can use your diagonal seam tape, you can iron it, whatever. But for this, we're just going to come straight down the side,
Misty:
Point to point.
Jenny:
And we're going to do that. Natalie, let's make your block.
Natalie:
I would love that. And make two of them. One for you and one for me.
Jenny:
We can.
Natalie:
You don't want to make yours.
Misty:
Do we have more squares.
Jenny:
Well, we do have more squares and I have one already finished.
Natalie:
Oh, okay. Cool.
Jenny:
So we'll show this one.
Natalie:
Awesome.
Jenny:
And if all your seams the stars align, everything is perfect. It should be eight and a half and we're done. All right. So then when...
Natalie:
If not though, make your blocks first and then make all of your panel pieces that size.
Exactly.
Jenny:
I always match my...
Natalie:
And you don't have to worry about your block coming if it comes out eight or some something else it's no big deal.
Jenny:
I do match my panel to my blocks or my blocks to my panel. I do my block first because that's the piece that has the cut work that...
Misty:
Well in your steam allowance could vary from...
Jenny:
So I'm trimming these leaving a quarter of an inch and making sure I'm trimming the outside corner. And then I'm going to hand them back to Misty and she's going to take...
Misty:
Sorry, I stole them.
Jenny:
You have some of those squares. And we're going to put a square on the other side right here. And again, so toward the middle. And we've got those right there and she can chain piece those.
Misty:
Perfect, and then you can see how quick it goes when you...
Natalie:
It goes together so fast.
Misty:
... chain piece.
Jenny:
I love this. This little star has just been so fun for me. I may do a full on tutorial for you guys using this star. Matter of fact, I have one in the works. All right. I'm going to grab these and start trimming. Natalie can start pressing.
Misty:
We just have one more to sew here. There we go.
Jenny:
And then we'll put our block together. And just by making those four cuts, we get all the pieces, we get the side pieces, we get the corner pieces, everything. We get it all done. So here's our middle that we had out of the cuts and Misty's going to sew these two to this side like this with the legs in. And then these each get one of these corner squares sewn on both sides right here. So I'll let you go ahead and do this one.
Misty:
Sure.
Jenny:
And then we'll get this ready for you. Put your fabrics right sides together.
Misty:
Whoops. I threw it on the ground.
Jenny:
Oh, I got it.
Misty:
I'm sorry.
Jenny:
No worries.
Misty:
Thank you.
Natalie:
That happens sometimes.
Jenny:
Well, especially when you stack them up on the tray.
Misty:
Yeah, it's slippery.
Jenny:
Now I have some of these because not all my lines are exactly perfect. I had some where my squares kind of winged out to the side. I just centered it up and knew that I was going to catch that in my seam. So you can go down this side and then you can just flip it and go down the other side. And then we're just going to sew the rows together and just like that.
Misty:
Just like that.
Jenny:
Just like that, we're going to get a star. So I was going to call this block Dino stars, but mine's the only dinosaur line, so I had to call it baby stars. We're calling this baby stars.
Natalie:
They're so sweet.
Misty:
Well, and it's such a fun block, especially for a baby quilt because it is so quick, but it's adorable and it can show off the cute baby prints, because you have that big middle.
Jenny:
Totally.
Natalie:
I think you've got that going the opposite. I was going to press the seams.
Misty:
That's all right. I can make it behave.
Jenny:
My little Natalie who thinks way ahead, I'm just like, "Let's get this together." And Natalie's like...
Misty:
Here's the other end. I was just going to make easy.
Jenny:
If you did this out, then those will go in. If your middle seams go in and the outside seems go out, everything will nest perfectly. Actually, to be honest, I rarely iron when I'm...
Misty:
Before.
Jenny:
... I just sew the thing together and then I press it. But we all have our different ways. What do you do Misty?
Misty:
I usually press.
Jenny:
Do you?
Natalie:
You're going to have to flip those seams. I'm sorry.
Misty:
It's okay. No problem.
Jenny:
It's all right. We can press them again.
Natalie:
I'll flip them back.
Jenny:
Right.
Misty:
It is all good. There we go.
Jenny:
Nice. Now for this next part, it would be super helpful to have an eight and a half inch ruler, because that's the block size I ended up with. And so you want to take your little star as soon as we get it...
Misty:
Especially if you're fussy cutting, because then you can really work with that block.
Jenny:
You can see what's under there.
Misty:
For mine, I just cut down my layer cake square. So I just used a regular ruler.
Jenny:
Yeah, that's true.
Natalie:
Is what it is.
Jenny:
So here's my little eight and a half. You can put it on here. You can see that it is pretty darn perfect. And so then I came over here to my little dinosaurs, and this is my little star block here.
Misty:
So cute.
Natalie:
Adorable.
Jenny:
And then some of them you can see right away are bigger than the eight and a half. So I had to make some decisions about...
Natalie:
How to center it.
Jenny:
How to center it, and I wanted to make sure the name was in it, and I wanted to make sure I didn't cut off the head. I felt like losing the tail was a little bit easier.
Natalie:
It's a compromise.
Jenny:
So because of the way they're placed, I actually cut a couple out of another panel. Oh, because this one, even though there's 10, when you get up here, you're into the next name. So you lose the name. So they're not exactly right. So I actually had to cut into the next one. But this little...
Misty:
But even if you didn't want to do that and only wanted one panel, you could supplement it with your layer cake squares and those other ones.
Jenny:
You totally could. You totally could use the layer cake squares and all those, because there's lots of really darling layer cake squares in here. So that's what I did on that. And then I just matched these together. I put every other block. This is the star and the dinosaur. And the star and the dinosaur. So Natalie, let's...
Natalie:
You just alternate.
Jenny:
Let's look at your fussy cutting.
Natalie:
Do you want this fabric up
Jenny:
Right here? Well, I just want, if we can probably just show this. And see the...
Misty:
Look at those little houses.
Jenny:
She made the stars, and then she's got the cute little houses around here.
Natalie:
And the blanket forts.
Misty:
I just love it.
Jenny:
It's so cute.
Misty:
Darling.
Jenny:
And then this one over here, Misty just used straight layer cake squares. So, which she just cut those down to match the stars. So these were cut to eight and a half?
Misty:
Right, and even if you do use the layer cake squares, it still only takes half of your pack.
Jenny:
It's 20 squares total.
Natalie:
You can make multiple.
Jenny:
20 squares total. So you can make two baby quilts out of this one pattern. So then Misty and Natalie each have another project for us that they're going to show us. So lots of fun stuff coming up. And we'll let you get set up for that girls and show that project. Which one of you is next?
Natalie:
We'll see.
Misty:
Okay. So I decided to use a project that was from our issue of baby block that came out a few years ago.
Jenny:
2018.
Misty:
2018, I know.
Jenny:
Babies are all four.
Natalie:
These babies are growing up.
Misty:
It flew by, but there's a great little burp cloth pattern in here, and I thought it would be really fun to set one of our star blocks in there. And so it gives you just a little...
Natalie:
It's so cute.
Jenny:
It's so cute.
Misty:
It's just really cute. And I did alter it just slightly so that I didn't cut into the block. So we have a great little printable for you that shows you the changes I made from the original pattern.
Jenny:
That is awesome.
Misty:
So be sure to print that, but it's really quick and easy. So let me just show you what I did. The measurement that we are looking for, for that burp cloth rectangle is nine and a half by 26 and a half. So I went ahead and cut a piece of flannel for the backing out of that.
Natalie:
Makes it so soft.
Misty:
And it just gives you a real soft side.
Jenny:
So nine half by what again?
Misty:
26 and a half.
Jenny:
26. Okay.
Misty:
So that's what we have here. And then we're going to take two of our star blocks and we are going to sash two opposite sides and the bottom edge with a one inch strip. So I have this Natalie. If you want to sew this on.
Natalie:
I do.
Jenny:
One inch.
Misty:
One inch. You can do it.
Jenny:
You can do it.
Misty:
And I have the other one ready. This is what I mean.
Natalie:
It's not so scary. Three sides, not on all four.
Misty:
Just three sides. So that's what we're looking for. So we can do that side the opposite, and then we'll trim it square and then do the bottom. Here's some scissors. If you want to just...
Natalie:
Sometimes I just do this.
Misty:
Oh yeah, that's true. That totally works.
Jenny:
Oh yeah, I do that, too.
Misty:
Flip it around, as long as the strip is long enough, that absolutely works.
Natalie:
Just a little hack, a little speed hack.
Misty:
I like it.
Jenny:
Well, we're all looking for ways to not have to leave our chairs.
Misty:
Exactly. If I don't have to get up twice.
Jenny:
We make a little nest. We have our ironing station, our cutting, everything right there so we can just do it.
Misty:
I know when I was working on it, I got so frustrated because I misplaced my scissors and so then I had to go wander around and find my scissors.
Natalie:
And who knows when you'll get back.
Jenny:
And you find 20 pair that don't cut.
Misty:
Did you get it?
Natalie:
Yeah. It was just a little...
Misty:
Little narrow.
Natalie:
A little narrow on that section. So I just wanted to check.
Misty:
No worries. So we'll press these back real quick and then we'll trim them off. No, it's okay.
Jenny:
There we go.
Misty:
Awesome. And so then I just straightened up this little edge really quick to make sure we didn't have anything too wonky. Sometimes our seams aren't perfect, but that is okay. Mine was pretty crooked there. And so now we're just going to add that one inch strip to the bottom side.
Natalie:
Okay, cool.
Misty:
Which is just one of them. It doesn't matter.
Jenny:
Doesn't matter unless it's directional.
Misty:
Exactly.
Jenny:
This is so darling.
Natalie:
It's really cute.
Misty:
It's fun, isn't it?
Jenny:
I just can't get over how cute this is. With the little star in it now, I would for sure use it. Let the baby barf on this side.
Misty:
On that side. But I was thinking about that too, and I realized, you know what?
Jenny:
It's washable.
Natalie:
It doesn't matter.
Misty:
It's washable. And that time can be so hard for new mamas, and so if you just have something cute to get through it, that's okay too.
Jenny:
Really okay.
Misty:
The whole thing could be made from flannel too.
Natalie:
Oh, Absolutely.
Misty:
Because there's tons of great baby lines.
Natalie:
It's true. Or even just flannel in general. They don't even have to be baby-ish. They could just pretty.
Misty:
Be It's true. I actually, I made one that is just straight flannel, and this is made exactly the pattern from baby blocks. So this curve is a little bigger. That's the only difference.
Natalie:
They go together so easy.
Misty:
They do. And so now we're going to trim off these edges, make sure they're nice and square.
Jenny:
And these shoulder things. That's such a great gift to give when you...
Misty:
And it's so quick, especially if we've already done the quilt, then it just, it's one more little thing to throw in there. So now we have our two stars bordered on three sides with our one inch strip. And in between we're just going to set a nine and a half inch square.
Jenny:
Perfect.
Natalie:
Nice.
Misty:
And so we can just sew one to each side.
Natalie:
There we go.
Jenny:
Things like this are so much easier than you think they are. I mean, that looks like, "I could never do that."
Misty:
It's not hard at all.
Jenny:
Yes, but it's our same start that we showed you in the beginning.
Misty:
Exactly. Well, and it was a little miracle when I realized that I still needed to cut my layer cake square to nine and a half for the middle, which is the exact same size I had to cut it to make the star. I was like, Oh, perfect, that's just magic." I can't mess it up that way.
Natalie:
It's perfect. There we go.
Jenny:
Yes. And the open side goes, is what you're seaming. That that's one where I would be like, "Oh, shoot." And I would've gotten it turned and had an open side.
Misty:
I'm glad you pointed that out because I didn't probably make that very clear.
Jenny:
No, but that is something I would do because I get on a roll and I don't even look at it. I'm just like, "Okay, this block goes in between." And I would forget that that open side goes to the... Into the seam. Then we press?
Misty:
Yep. If you could press that.
Jenny:
I can.
Misty:
And then I will get this ready. We are just going to stack these up. Like I said, I already trimmed my flannel down to the nine and a half by 26 and a half. So we can just put these right sides together now. And I like working with the flannel because it kind of holds it in place.
Natalie:
Kind of like a little pins almost.
Misty:
So let's just make sure it is as straight as possible on here.
Jenny:
Very nice.
Misty:
There we go. And then we're going to fold this in half. Line up my bottom edges. You just want to take your time to get that right. And then we can turn it like this. And we're going to measure to cut out that curve. And so to do that, do we have a pin?
Jenny:
We do.
Misty:
I forgot to grab one. Here we go. So what I did is I just picked one edge and I measured over five inches and made a little mark, and then I measured down three and a half because that gave me plenty of room to stay away from my block. I didn't want to cut into that. And so then I made a little mark here and I just drew a curve and connected those two.
Jenny:
Perfect.
Misty:
Just like that.
Natalie:
Nice. I will say in my head, I would've been like, I need to go find a plate or a...
Misty:
Yeah, you totally could.
Natalie:
Something that already has a curve and use that as a...
Misty:
You totally could. I just was like, "Eh, good enough." And then I...
Natalie:
Love it.
Misty:
I just cut like that. It's really forgiving.
Natalie:
The drunken path would probably work.
Misty:
It probably would, it would probably work great.
Jenny:
Well, and honestly, lay on your shoulder and see if it's the right.
Natalie:
If it's comfortable.
Jenny:
If it's comfortable.
Misty:
Absolutely. And then now we can just, if you wanted to round this out a little bit more, you open it up and look, and then I would just fold it back. And you would to do that, you just go down a little bit straighter here and then curve. And so it is really forgiving, especially once we stitch these together.
Natalie:
That's good.
Misty:
I'm not worried about this because we're going to catch this and can straighten it up in our seam. And so now we are just going to sew all the way around the outside, leaving an opening to turn it.
Jenny:
On a straight side.
Misty:
On a... Exactly. I did it opposite of my curve every time. And then my brain was like, once I got to the curve, I knew it was time to stop again. And so then I just turned it right side out and top stitched all the way around.
Natalie:
And that closes up that little edge.
Misty:
And that closes up your opening and it is done.
Jenny:
No hand sewing.
Misty:
Exactly.
Jenny:
It's quick and easy.
Misty:
It's really, really quick. And like I said, I did this one with the block on one side and flannel on the other.
Jenny:
All I need is a baby.
Natalie:
It's so cute. I love it.
Misty:
You can just snuggle little Henry right with that. And then I made the one that's all flannel, and I did one also just out our...
Jenny:
The cotton.
Natalie:
Cottons.
Misty:
The regular cottons. And they all turned out great. So I will say when I did this straight cotton, I added a stabilizer to one side.
Natalie:
Oh, you did? Just to clean it up a little.
Misty:
Just to give it a little body. But that is it. It's really quick and easy.
Natalie:
That is so fun.
Jenny:
Awesome.
Misty:
Natalie, you're up next.
Natalie:
Okay. Yay. Okay. So I am teaching this curved pillow, which I think is kind of a must have for any new mama.
Jenny:
It's so handy.
Natalie:
Makes holding your baby a lot more relaxing and comfortable.
Jenny:
And you could actually sit the little baby in here.
Natalie:
You could.
Jenny:
All the things.
Natalie:
Don't leave your baby unattended with this pillow.
Misty:
No, that's right.
Natalie:
I have to throw that out there. This disclaimer.
Jenny:
That goes, that just goes unsaid.
Natalie:
Without saying. So we have a pattern for the pillow, but what I wanted to do was add this block into the pillow top. I thought it would be so cute to put that in there. So I'm going to teach you how to do that part.
Jenny:
Oh, that's really cool.
Natalie:
So in the curvy pillow pattern, it has all the little pieces and you could trace them, which is super easy. This is the actual size that they need to be. So what I did though, because I'm a little bit lazy, I didn't want to trace every piece by hand. So I traced one piece and then I adjusted the settings on my printer until they matched. So then I could just print them off.
Jenny:
Perfect Great idea.
Natalie:
But you could just take this and photocopy it.
Misty:
But you could also just copy it.
Natalie:
Copy them or you could unstaple it and just use these pieces because you're not going to need, once you've cut them out and made your pattern, you don't need. So you tape them all together just like this by matching together the A1, A1, B1, B1. All of your pieces match together...
Misty:
Just a big puzzle.
Natalie:
You tape the whole thing together. And it's so easy to use.
Jenny:
So basically, with this is your pattern. I mean, these are all done with strips, which is what the pattern's written for.
Natalie:
Exactly.
Jenny:
Which you could use yardage, you could use anything.
Natalie:
So all you're looking for is a square that's like, it's 17 by 23 or 18 by 23. So like a half yard, really. And that makes the front, and then you'll need it larger for the back. And what I did is I just used my back or my top piece as my pattern, and cut my back to fit.
Jenny:
Oh, there you go.
Natalie:
Because then if you have a seam or you have a fold, it doesn't matter. Your size is going to be the same size. And the pattern is cool because it gives you an insert and then shows you how to put a zipper on it. So you could take this cover off and wash it, and then your insert can stay formed the way you want it.
Jenny:
Right.
Natalie:
So it's really cool. It's got all the information that you need.
Jenny:
And again, we're using the star block.
Natalie:
The baby star block or the stars and stripes block, wherever you want to find it. So this is what we're going for.
Jenny:
It's so cute.
Natalie:
And I just love it. I think it's darling.
Misty:
Adorable.
Natalie:
The other thing that I think hopefully this inspires you to just think outside the box as far as all of these projects. You could put any little block that you wanted to into anything.
Jenny:
Just use scraps.
Natalie:
A lampshade, a purse, a diaper bag. You could sew a pocket onto something with a block with your little cute blocks. And they're so fun. So what we're going to do is cut, because this block is eight and a half, we're going to cut an eight and a half inch block for one side or square and an eight and a half by seven. But you really could do eight and a half, eight by eight and a half.
Jenny:
You're just trimming it off.
Natalie:
It's just a little bit long on that side. So I've got my main block here, and I've got these strips cut. We're going to put the seven by eight and a half on one side and eight and a half square on the other side. Did I cut that too short.
Jenny:
No, this one's great.
Natalie:
Okay. I wasn't sure I made, I was like, "Oh shoot, did I make it seven square?" That happens sometimes, you never know.
Jenny:
You just never know.
Misty:
See what we're doing.
Jenny:
All right, so... This one.
Natalie:
And this goes on the other end, so that your star fits on this one side.
Jenny:
You could do anything with this. I mean, any layer cakes you can make patchwork.
Natalie:
And we do have a nice little printable that you can get to accompany your pattern if you want the measurements. Or you could just...
Misty:
Follow along.
Natalie:
Isn't that cute?
Jenny:
And he's sitting right over there.
Natalie:
Our little pattern cover bear.
Jenny:
He's here to watch it.
Misty:
Adorable.
Jenny:
All right. Now what do we do?
Natalie:
So the main thing is you want to measure this, which it should measure about 23. It's about 24. So you're going to want your strips to be that length. And I went with a five inch on both sides. That way I could cut the curve and have enough room for this space. And for it not to cut into the block. So these are actually five by 23. We'll have to trim it down.
Jenny:
Shall I just pull it in an inch?
Natalie:
If you want to, that'd be perfect. Because honestly, all of that gets cut off.
Misty:
Cut outside edge is trimmed.
Jenny:
Well that's very forgiving, isn't it?
Natalie:
It's super forgiving.
Jenny:
And this is one of those projects that looks like you worked so dang hard.
Misty:
It's so cute.
Natalie:
It's pretty easy though, once you get it.
Jenny:
And people will be like, "Wait, what, you made that?"
Misty:
Which is what we're always going for, right? A little wow factor.
Natalie:
A little impressive is always good.
Jenny:
You could always just give some fabric and the pattern and let them...
Natalie:
There you go to the quilting mama. Make your own present.
Misty:
Oh, no.
Natalie:
As if they don't have enough going on.
Misty:
No kidding.
Jenny:
Hey, it seemed like a good idea at the time.
Natalie:
Excellent. So press that. Let me move this out of the way.
Misty:
Of course.
Natalie:
And grab this pattern, which is so nicely taped together. It is actually a lot easier than I thought it would be. It was kind of fun putting this together.
Jenny:
A lot of people now are buying online patterns, which requires some of this. So I think it's really cool that you showed people, now, originally Natalie copied this at a hundred percent thinking that was the same thing.
Natalie:
It's not.
Jenny:
And the pieces were huge. And so you just have to make sure your pieces fit the pattern pieces.
Natalie:
Right. So this is where it gets kind of tricky, not scary, but you want to make sure that your star doesn't get caught in the curve. So what I did is I kind of lined it up with these lines, these square lines, because it's just about eight and eight inches. It works out perfectly.
Jenny:
You'll want to come a little bit forward a little bit.
Natalie:
You want to make sure you're centered. I lined up with the edge.
Jenny:
And normally if you were making this just out of yardage, you would have a fold right here, but she's leaving a quarter inch, so we can seam that.
Natalie:
But it could be fold or seam. It's like it's a half an inch difference. So if you just measure your back to your top, they'll both fit together and it doesn't really matter. I have that space. I'm checking to make sure I'm not going to cut my block here. And then honestly, that's all it is. And I could cut. You can pin it and cut with scissors. Or you can just kind of go around the edge using your, it's a huge curve, so it's very easy. Oops. Sorry Misty.
Misty:
No, you're totally fine.
Natalie:
I'm just leaning around you.
Misty:
That's all right.
Jenny:
Do you know what's interesting is I was a clothing sewer before and we pinned everything and now they use weights, which I think is really cool.
Misty:
I was just thinking of that.
Jenny:
At some point, I remember going and getting my silverware out and putting all my knives on my pattern.
Natalie:
I'm going to turn this a little bit.
Jenny:
I was probably a little bit ahead of the time, but you could use weights or you can use pins.
Natalie:
But weights will work. Pins will work.
Misty:
They even have little magnets now.
Natalie:
Magnets, any of those things.
Jenny:
Or slow rotary cutting.
Natalie:
Slow cutter.
Misty:
Exactly. Take your time.
Natalie:
And look at that.
Misty:
That is awesome.
Natalie:
And you've got it. So now we're ready to cut the other side of our top. And you're going to want to make sure that you put your right sides together so that they come out facing the right direction. So we shall lay this down.
Jenny:
So you put right sides together.
Natalie:
And line those up so that they match. Make sure you don't have your salvage down there in the bottom of your curve.
Misty:
That would be a sad day.
Natalie:
Well, it just won't look very nice. I'm going to use that straight edge so I don't have to cut that one section, which...
Misty:
Perfect.
Natalie:
... it's fine. And we're going to go ahead and do this again, going around our curves.
Jenny:
No, and if you're uncomfortable rotary cutting this, you can use a scissor.
Natalie:
Scissors work great. I scissor cut it at my desk.
Jenny:
You can draw it on and then just cut it out with a scissor.
Misty:
I've also seen a lot of people, they'll just still use their ruler and just move it along.
Natalie:
Use it as a guide. You can do that too.
Jenny:
So it's just kind of makes it safe.
Misty:
Whatever you're comfortable with.
Natalie:
So then you're just going to stitch this straight seam and then we'll cut the back and we'll be ready to go. And you can sew them together, flip them right side out, add a zipper if you want to, or sew it. Just do a little hand stitch on that edge.
Jenny:
Will then this become your pattern?
Natalie:
This becomes the pattern for your back piece because you have a seam in it. Will you press that for me?
Misty:
Yep. I'll press it. And there's your extra fabric.
Natalie:
Then what we're going to do is use this fold so that we don't have to seam the back. Because that just saves us one seam, right?
Jenny:
It does. This is so cute with the little star block, it looks adorable.
Natalie:
It is so cute. So now we're going to cut the piece that goes on the back. And remember you have the option to make yours have a zipper or whatever the pattern says. You can do all of that. I'm going to use this finished seam as a fold line and line it up with the fold of my fabric so that I don't have to sew that and have one more seam on this pillow. I'm going to line it up close to the edge so I don't waste fabric because you never know. I might want that.
Jenny:
Yes, you might.
Natalie:
And as long as these are folded right sides out on both pieces so that they match. If you had them wrong sides together, that would match as well. You just want your pieces to come out both facing the same direction.
Jenny:
I feel like this fold is important. So it is, the non pinner is going to pin.
Natalie:
All right then.
Jenny:
And just make sure that your pin is away from your edge so that when you cut, you don't run over it.
Misty:
It's so cute.
Natalie:
I'm just going to go for it here. Don't be afraid. Just do it.
Jenny:
You can do it.
Natalie:
Oops. Just whoa, sorry.
Jenny:
It's only fabric, Right?
Natalie:
It's only fabric. You can fix it up. Although if you're worried at all, do a tracing, use scissors, whatever you decide. There are a lot of ways to get from point A to point B on this project.
Jenny:
On any project, really?
Natalie:
On all projects.
Misty:
So true.
Natalie:
There we go. So now we'll pull this apart and you're going to want to stitch them wrong sides together so that when you flip it right side out, your pretty fabric is on the outside.
Jenny:
You're going to stitch it right sides together.
Natalie:
Yes, sorry. Right sides together. Wrong sides out. Leave a little opening. If you're going to put a zipper, put a zipper in. If you're not hand stitch it shut.
Misty:
And that's here's the little striped version.
Natalie:
And that's it.
Misty:
And that's the original. So cute.
Jenny:
It's really cute.
Natalie:
So fun.
Jenny:
Well awesome.
Natalie:
Here it is with this cute little top. You get the idea.
Misty:
I love it.
Natalie:
Turns out so fun.
Jenny:
It's very adorable.
Natalie:
So that's it. I hope you enjoyed the curvy pillow and don't be afraid. It is easier than you think. I promise.
Jenny:
So now that you know how to make this cute star, you can actually make these three different projects.
Natalie:
So fun.
Jenny:
So fun. And we hope that you enjoyed this triple play from the Missouri Star quote company.
Hi everybody, it's Jenny from the Missouri Star quote company and I am here with Natalie and with Misty. And we hope you enjoyed watching our latest triple play. You can find us together on the third Friday of each month as we hit another tutorial out of the park. If you aren't already part of the Missouri Star quote company family, be sure to subscribe and click that bell to be notified each time we release a new video. See you next time.



