

Triple Play: 3 NEW Dashing Star quilts with Jenny Doan of Missouri Star
 Jenny Doan
- Layer Cake
- Traditional
- Double
- Beginner
- Quilt size 80" × 80"
Triple Play is a favorite tradition here at Missouri Star. Once a month, Jenny, Misty, and Natalie each demonstrate their own, unique spin on a favorite block, technique, or template. In this episode, the talented Doan ladies show off three fabulous new Dashing Star, or LeMoyne star, quilt patterns.
Instructor
Jenny Doan
Jenny Doan is an American quilter, author, and YouTube personality. Jenny started Missouri Star Quilt Company in 2008 and today it is the largest quilting supply vendor in the United States.
Shop this tutorial
 Scattered Shoofly Stars Quilt Pattern by Missouri Star$5.95Shop →
 Digital Download - Scattered Shoofly Stars Quilt Pattern by Missouri Star$4.95Shop →
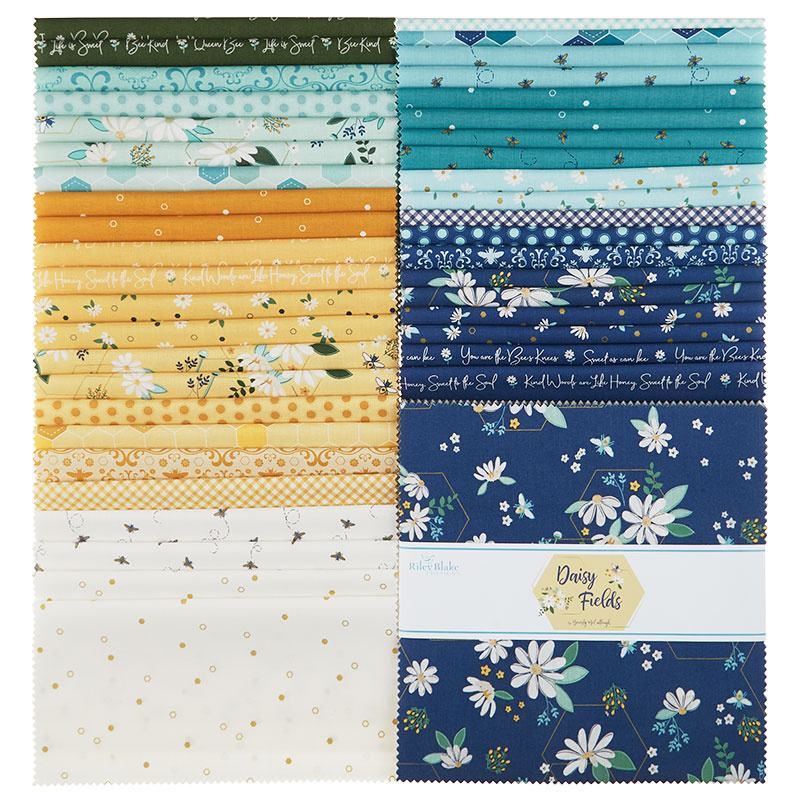 Daisy Fields 10" Stackers$38.95Shop →
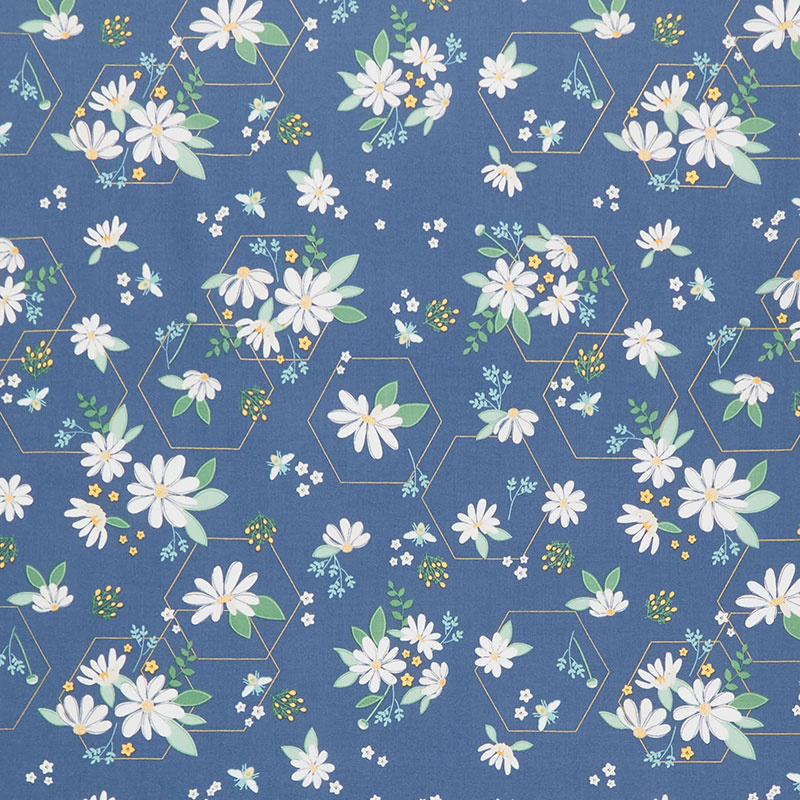 Daisy Fields - Main Denim Metallic Yardage$11.96Shop →
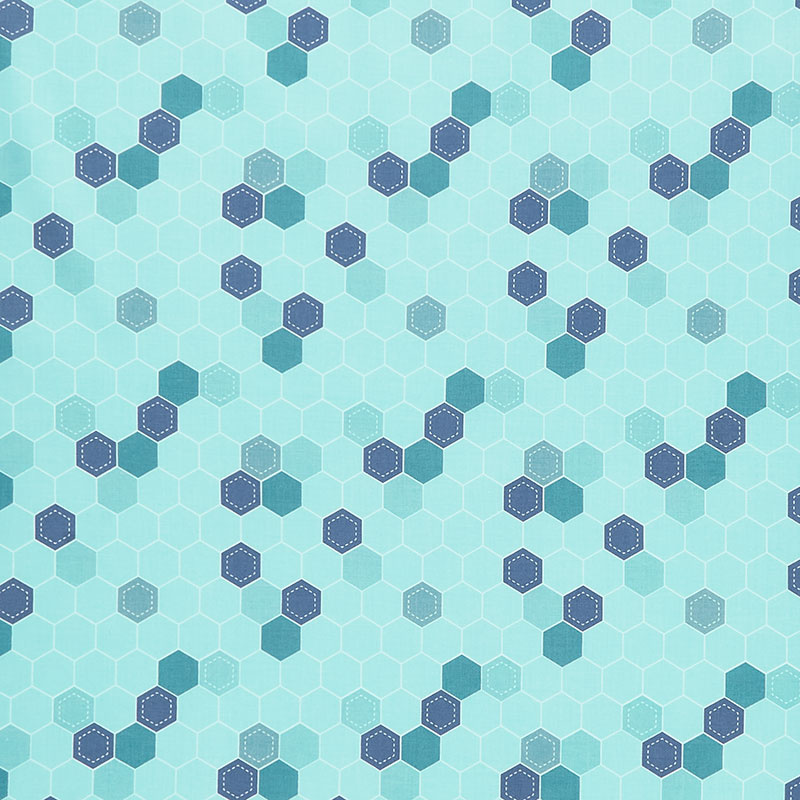 Daisy Fields - Honeycomb Scuba Yardage$11.24Shop →
 Scrappy Dashing Stars Quilt Pattern by Missouri Star$5.95Shop →
 Digital Download - Scrappy Dashing Stars Quilt Pattern by Missouri Star$4.95Shop →
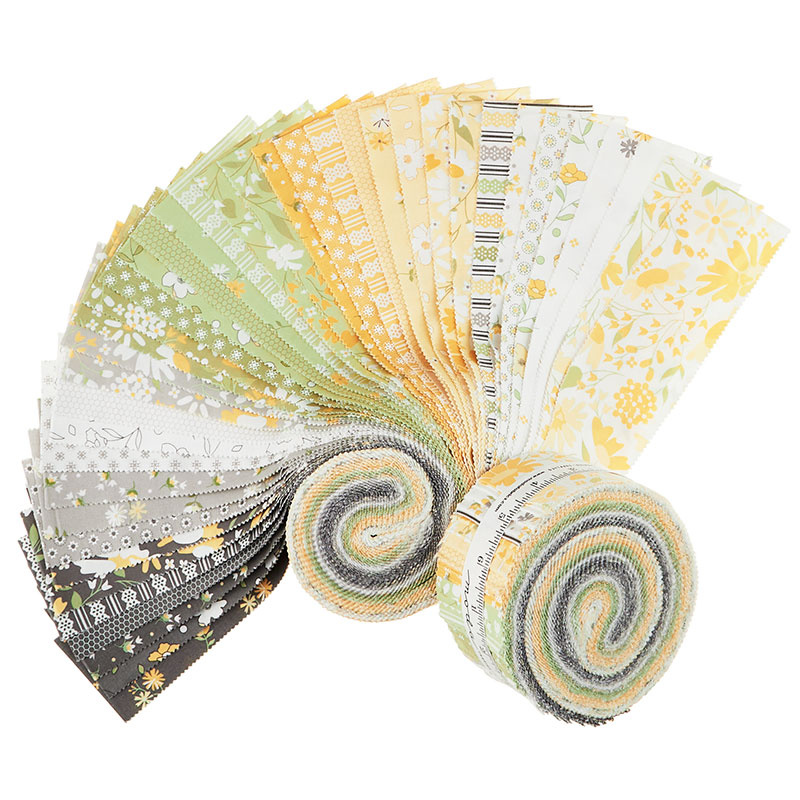 Buttercup and Slate Jelly Roll$45.95Shop →
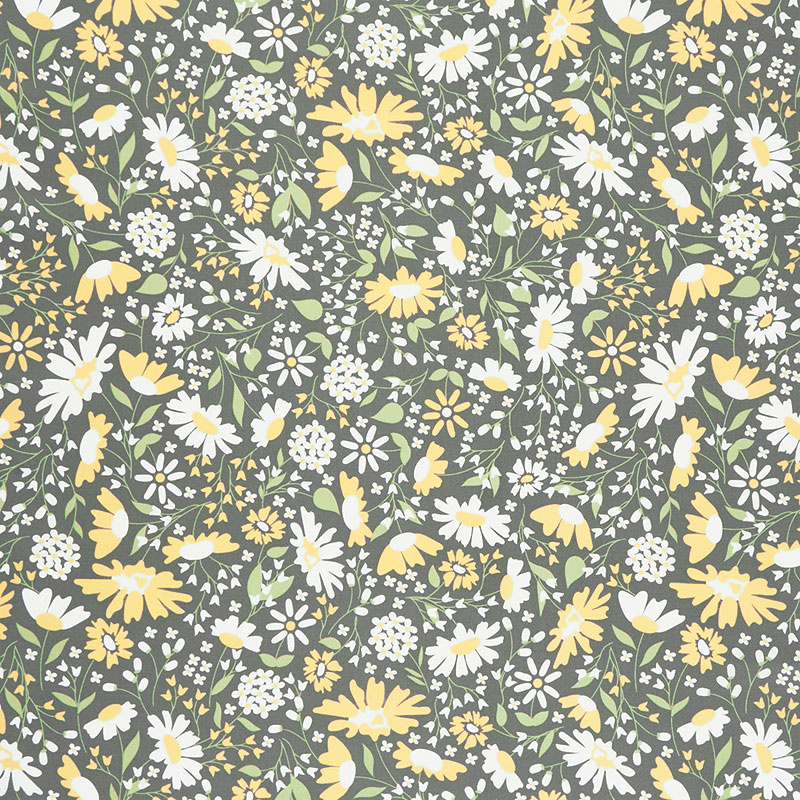 Buttercup and Slate - Buttercup Blooms Slate Yardage$12.96Shop →
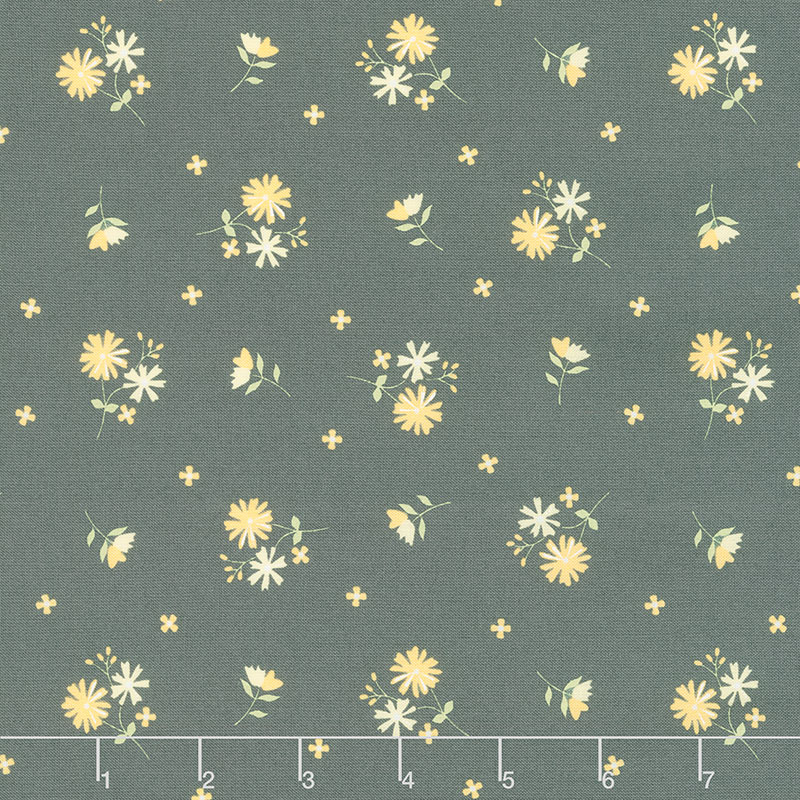 Buttercup and Slate - Daisy-Oh Slate Yardage$12.96Shop →
 Star Dancer Quilt Pattern by Missouri Star$5.95Shop →
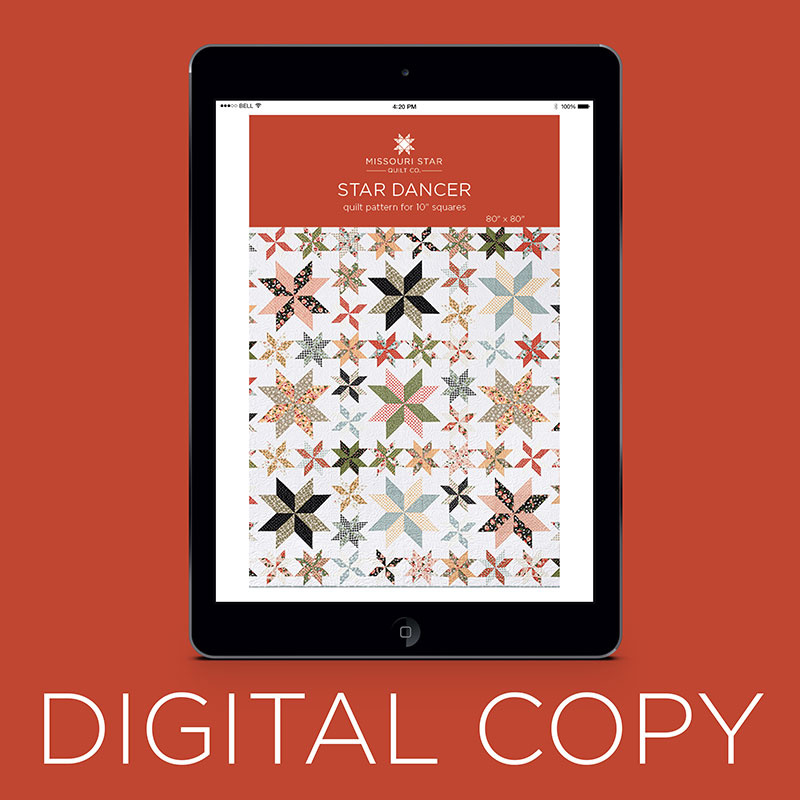 Digital Download - Star Dancer Quilt Pattern by Missouri Star$4.95Shop →
 Country Rose Layer Cake$45.95Shop →
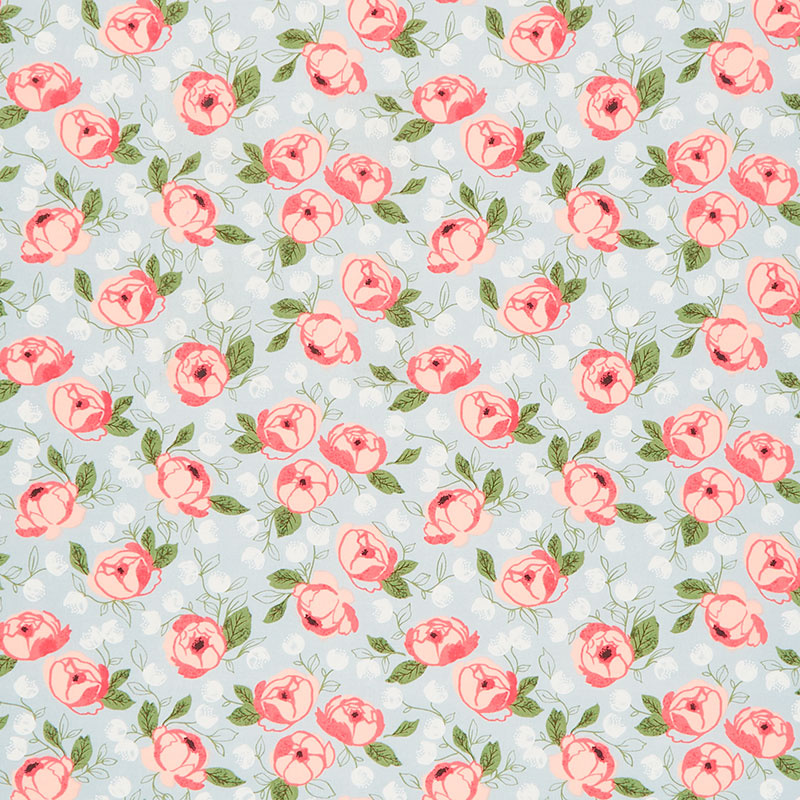 Country Rose - Country Bouquet Smokey Blue Yardage$11.96Shop →
 Bella Solids White Layer Cake$40.95Shop →
 Bella Solids - White Bleached Yardage$8.24Shop →
 Country Rose - Dainty Floral Smokey Blue Yardage$11.96Shop →
Common Questions
What is covered in Triple Play: 3 NEW Dashing Star quilts with Jenny Doan of Missouri Star (Video Tutorial)?
Triple Play is a favorite tradition here at Missouri Star. Once a month, Jenny, Misty, and Natalie each demonstrate their own, unique spin on a favorite block, technique, or template. In this episode, the talented Doan ladies show off three fabulous new Dashing Star, or LeMoyn...
How long is the tutorial video?
The tutorial video is 00:44:48.
Are supplies listed for this tutorial?
Yes. The tutorial page includes the supplies and materials connected to this project.
Is a transcript available?
Yes. A written transcript is available on the tutorial page.
Video Transcript
Hi.
... and with Misty, because it's Triple Play Day.
Best day ever.
Right? I love Triple Play. Anyway, today we're teaching you three different things to do with the LeMoines star. We call it the dashing star, but we have several names for it.
Yep. Lemon star.
And today, we'll probably cover them all. Anyway, Natalie, I think you're up first.
All right.
Natalie, I love your quilt. I think it's darling.
It's so cute.
I do, too. I think it turned out really great. [inaudible 00:00:37]
I love how you took the old pattern and really kind of made it modern.
Yeah.
And I love the sashing idea.
Thank you. Yeah, I decided to-
She's so clever.
... instead of having it be sashing, I made it part of the block. So then, you can twist it and turn it.
I love that idea.
I just feel like you just elevated the whole thing. I love it.
Well, thank you.
Show us how to do it.
I called my quilt Scattered Shoofly Stars because the shoofly is part of the star block, and you can scatter them all around. It's really cute. It's 80 by 80. I went ahead and quilted it with time warp. It's one of my favorite new designs. And I used this great print on the back. It's this beautiful hexagon.
I love those.
I think it's just so cute. This whole line is beautiful.
It's really done... It's beautiful.
It's a really cute line.
All right. So, to make my quilt, you're going to need one pack of 10-inch print squares, and I use Daisy Fields by Beverly McCullough for Riley Blake.
It's so cute. Look at these little hexes on here.
It is. It's beautiful.
I love it. I love it.
I love the little gold detail.
There's gold flecks throughout, and bees, and flowers, and dots. It's just beautiful.
It's darling.
You'll need about four-and-a-half yards of background fabric, and that makes up all the white that you'll see. And you'll need, for backing, seven-and-a-half yards of regular 45 or two-and-a-half yards of a 108.
All right. Let's get started. This is going to be good. The first thing you'll want to do is cut your background fabric into lots of different sizes. We'll need 10-inch squares for the stars, and then a few other sizes, four-and-a-half, two-and-a-half, and two-and-a-half-inch strips. We'll go through that as we get to it.
[inaudible 00:02:13].
I've got some 10 inch squares cut already. Then you're going to want to divide up your fabric, because we need matching sets to make all of our... I'll need two of those.
Oh, okay.
We need to make some matching sets so that we can make our stars.
I'm such a good helper.
I did it in contrasting or just different colors. I wanted them to stand out from each other.
Lights and darks. Contrasting.
You want to see your work.
And you need two of each. Now in my quilt, two of each could be two that are exactly the same, or it could be two that are the same color that you can't really tell them apart. So you'll see all-
That's really a good tip.
On this one right here, these two yellows are different, but you can't really tell in the quilt because they're so similar.
It just blends together.
So this line is great, because it does have duplicates of many of the prints, but the ones that you don't, you can kind of just put your blues and yellows together.
I would've never noticed that. That's that's really a good tip.
Yes. Just so you know, there's a few that I did that way. And a few that had just the perfect numbers. So what you're going to do is take all four of these. And two of them you're going to pair together. And then the other two, you're going to pair with a white square. And we are going to draw the line on the back. We're going to make an X.
What size are your squares ending up?
They're going to end up four and a half by the time we're done. And this set will give you enough to make two dashing star or lemon star. All right. So we're just going to draw these lines real quick. And then Misty, I'll have you sew on either side of both lines.
All right.
We always say either side, but it really should be both sides.
It's true.
Every once in a while, somebody will correct me in the comments and I'm like, correct, correct, correct.
So both sides of the line.
So on both sides. So the key to this star is that two go together. The two colors go together, and then the other, the light goes with a white, and the dark goes with a white. And so it's going to be the same for all of our quilts.
Yeah, which is really cool. Because once you've got this method down, you can make this lemon star, or LeMoines star, or dashing star, pretty much any size you want.
Yeah, it's based on a square. So this is a good-
Yeah.
No pressure.
I know. You drew all these lines.
I love how we all just stand and watch ourselves.
So fast.
Okay. So while Misty's sewing the rest of these, we will cut. So the first cut that you want to make is your vertical and horizontal cut. And that's because there's no lines to mark them. Mom taught me this little hack.
You can get lost very easily if you do it the other way.
Yeah. So if we go ahead, we're going to line it up and cut right through the center, and then right through the center horizontally, as well. And then you can cut on your lines diagonally in both directions.
Oops-a daisies.
And then if you have a clearly perfect, you could square them up from this point, or we can press them all open and squirm with the block lock.
How do you like to do it?
I like to use the block lock tool. And I we've got one in here.
So I'm just going to press these.
And we do, so that's perfect.
Which means I'm going to leave my dark color to the top. Set that seam, roll it back. And I'll start handing these off to you so you can start squaring.
Okay.
What are you squaring them to?
I squared all of my blocks to four and a half. And that's pretty much as big as you can get. You can see these. There's just not a lot of space left over here.
And the cool thing to remember on this, is you actually do get two blocks. You get two stars.
Yep. There's plenty. Now I do have these.
You have them cut?
I don't know if I actually squared them, though. I might not. No, I guess I did.
Let me check your work here. I'm just going to be a mother, check your work.
I might not have squared all of them.
Yeah. These are not squared. These are squared. Oh yeah. Okay. Okay. I got what you're doing here.
There we go.
What? I squared enough for one block?
Yeah. You squared enough for one.
Okay. So you're going to continue by cutting all of your half squared triangles and squaring them all up to four and a half. And then I'm going to use the ones that I've already got squared to show you how to lay it out.
All right. So put these here.
I always start by putting together my pinwheel in the middle. That just helps me-
That's how I do it, too.
... to keep it straight. I'm going to scoot that. All right. Oops. Okay. So then you're going to bring in your matching colors, and I just attach them like this.
One, like a little puzzle, isn't it?
Yep. Does this one need to... Nope. I got one here.
There we go.
Okay. Perfect.
And then here's these yellows.
I did accidentally sew one together like that when I was making the quilt.
Which is a cool box. The dutchman's puzzle.
Such an interesting thing. I was like, what did I do wrong?
Something is different.
There's these. So you're just matching your colors. And then you take your little four and a half inch white background squares and put them in the corners.
There's another.
And then we just assemble the block in rows.
All right.
Can I just do this and-
Yep. That's perfect.
Alrighty.
Oh, that's interesting. You're doing it in rows. I would've done it rows this way. I would've sewn this to this, and this to this, and then sewn the two together. I'm not sure why, but I would have.
We just all have-
I don't know.
... have our different ways.
In my head it was like put together a row, and then join them and...
Well, and it works, right?
Yeah. Yeah. And you'll get to whatever the end result is by doing either method.
Absolutely. And we're really walking you through this one. So then when we do the others, we'll probably-
Can you press that?
Yes I can.
Thank you.
We'll probably not show you every detail, because it's the same as this is, but I don't know.
They're all very similar. They are all very similar, the method for making the LeMoines star.
It works.
Such a fun block.
All right.
There's that one.
Pass that down over, girl.
I don't really have to do anything. This is great.
We'll get comments after these, and it'll be like-
I wish I had a tee.
I want my own ironer. I want my really celler.
It really is the best.
Let's flip that over.
There we go.
Perfect.
And really, the trick with yours, Natalie, is this sashing which is really cool.
Now I'm excited to get to that part.
Yeah. It's really, really simple.
There's that one.
Okay. And I don't know if I'm ironing these the same way. Probably what I should be doing, is ironing all one row this way, and all one row the other.
That does make it easier, but it's not-
You can flip as you go, too. And then we'll kind of reiron.
It's a pretty flat block. Doesn't have a lot of bulky seams, really. The pinwheel in the middle is probably...
I just love these colors.
I do, too.
The little metallic flecks.
The use of that hexagon in these fabrics. And the words on this, what are the words say? Words are like honey.
Yep. Kind words.
Be kind. Ah, you'd get inspired just sewing with this.
There go. Start sewing this together. Can do those, too. Perfect. We're almost done with block one.
There we go. You know you did it right, because everything matched up.
It all does. That's the beauty of squaring, too. It really makes life so much easier.
Yeah. I had no idea what I was missing all those years I wasn't squaring. And when I finally started to square... And the reason I didn't square was because none of the tools made sense to me. And when the clearly perfect slotted trimmer came out-
Just down this way?
[inaudible 00:11:39]. Yes.
... all of a sudden that made sense to me.
And I'll have moms press that.
There you go.
And once one tool makes sense to your brain for squaring, I think then you can do it. Then it makes sense. Then what's happening, mat, you figure it out. Because now I can square with anything, but for a long time-
So trial and error. Find the tool that you like the best, that makes you comfortable, and gives you the result that you like. All right, it's looking good. We're close.
Making my seams next.
Now, in the original, we snowballed these, and that made-
Your sashing.
... little shoofly.
So in this block, we only snowball one corner.
Oh, nice.
There's that one.
You want to just sew that on there, and then I'll press the whole thing.
Absolutely.
All right. So do you want to start on this stuff? Are you ready?
Yes. Yes. So the next thing we're going to do, we're going to take some of our print blocks and cut them into two and a half inch squares. And that was just easier for me, because I wanted a variety of colors, and I wouldn't get as much variety if I made four patches with strips. So I just cut them down. If you don't want that much variety, you can make all your four patches out of the same colors, and that's totally up to you. So let's do, how about a light and a yellow?
Let me iron this real quick-like, Misty.
Alrighty.
I do have a four patch made already, so we don't actually have to sew this, because it's super simple. You're just putting four two-and-a-half inch squares together and just making, I think, just the amount you need for the quilt. And that is going to go-
Right at this moment, that's what I'm saying, I can't see the four patch.
That's the magic of it.
That's the magic.
So you're making a bunch of little four patches. And then what you're going to do is snowball one of these corners, which honestly the block could spin any direction. So you could just snowball one corner and spin it the way you need it when you get there. You know what I mean?
Uh-huh.
Does that make sense? Okay. So let's put this color right down here. You can draw a line if you want to, or you can use diagonal steam tape. And we're just going to snowball that one corner.
I cannot see this coming together. This is so fun for me. It's like a little present that happens, because you don't know what's going to happen.
Yeah. It's going to be pretty cool.
I love it.
I think you're going to like this a lot.
There we go.
All right. So we're going to trim that off and press it back. Then we're also going to snowball one of these corners on our four patch with a white two-and-a-half. Oops.
I love this.
So go ahead and do that. It needs to be on one of the prints, because you need your colors to line up. So pick whichever print you want to snowball. Snowball that corner.
There we go.
Okay. That's where your four patch went. All right. So this block is 16-and-a-half inches. So you're going to cut some 16-and-a-half inch strips. And those are going to go right in here. And two of these strips, you're also going to snowball. So this one out here is going to get snowballed going one direction. This one goes that way. And so I always have to-
Oh, so that's why you didn't just cut one big piece.
Okay. They have to go different directions.
Yes.
Because it has to snowball inside.
You have to do them opposite. So see how they go opposite directions. And that is because this one here is going to make that corner of the shoe fly. And this one over here makes this corner.
Oh, that's so cool.
That is very cool.
I love that.
All right. Let's set that up.
So yeah. Then you can go ahead and stitch these together.
And these can follow right behind it.
Nice long seams. I like it.
That is really fun.
Isn't it? It's so easy.
It's looking at it and I'm like, well, why didn't you just cut a... And then you did the [inaudible 00:16:13].
I could have, but if I did, I would have a hard time getting that snowball into the middle.
No, this definitely makes it easy.
That one can go.
Go click the cut on that, and I'll press it.
Yeah. There we go.
Excellent. And we can attach the four patch to that. Oops. Not quite lined up there. It probably will be okay.
You think?
Yeah. It's a big white strip.
All right. All right.
There's no point to match up there.
That's true.
Goes on this side. I'm going to go ahead and leave it laid out for a minute, and then I'll let her sew it together, because I just want everybody to see how it looks before it's completely sewn up. It is pretty easy though. Right?
I think so.
It's a LeMoines star and a four patch, and then just some snowballed corners. And there you have it. You've got this magical little shoe fly down there.
I love it.
It's so cute.
And I feel like you could do this with so many different things, right?
Got you.
All right. So let's go ahead and attach this one. And then you can do this one next.
Well, and people, we've been doing this with nine patches and four patches for a long time, but now we've got this shoofly. That's so cool.
That's so cool.
Clever. Clever girl.
I think it's cute. I like it.
Yeah. She's my girl.
And then on this one, you just want to watch that little cross seam in the middle. Make sure you get a good nest nesting on there.
A good nest.
Yep. Got it. Really, though, because everything is kind of cut to size, it's not difficult. Do you want to pressed or you just stitch it together?
I don't need to. I can just open it up.
And then we can press the whole thing.
That works for me.
Yeah. These are the only two points you've got to watch, right there in that little shoofly. And then I'll show you how it goes in the quilt, because that's also fun. It's just a rotation. One row goes up and down, and the other row goes down and up.
And you can't even see where they all are, because they're in so many different places.
I just love it. I think it's really, really fun.
And it comes together really quick.
It does. And because the block is so large, you get a large quilt really fast, with a lot of fun space to put quilting in.
That is actually one of the things I really loved about the original big stars quilt, is because literally-
Well, those ones were like 24 inches.
It was huge.
Those were huge. Yes.
So let's go ahead and just press this out.
I just thought that one went together so fast, because it was so big.
It does. Yeah. It's a great quilt.
I love it.
There we go.
So this is our block, the shoofly stars block.
So let's see which it is.
So the first row you'll see that it sits like this. So shoofly in the bottom left, and then top left. And then bottom left and top left. You got that?
Yeah.
So four across.
And then the next row, the second row is top right, bottom right, top right, bottom right. And then it just rotates exactly the same, two more rows. It's four by four. So 16 blocks total.
That looks awesome.
It's great. It's just that easy. So I hope you love it.
It's just adorable. All right, Misty. I think you're up.
I am.
Misty, I love your quilt.
Thank you so much.
It's so cute.
I love it, too. I really wanted to play with the two different sizes of stars, and setting them together, and you know I love tiny. So I decided to make smaller, not super small.
I just love how they circle that.
That's still two and a half.
That's still two and a half.
Much smaller would've been a lot, I think.
That pinwheel in the middle.
Yeah. But it was really, really fun. And I really love how it came together. And so the big stars are made exactly like Nataie's. You don't have to do anything different there, so exactly how you learned in her block. This is the same size quilt, even. It's 80 by 80. And I used this-
Oh, let me see.
... pretty floral back.
Isn't that sweet.
It's so sweet and subtle.
It's just soft and pretty.
It's really sweet.
That's beautiful.
So let me show you what you're going to need to make this. You're going to need two packages of 10 inch squares, and I used country rose by-
So two of the print.
Two of the prints.
Okay. Two of the print.
Yes. You're fine. I used country rose by Lala Boutique for Moda, and it's just a really soft, beautiful, wine.
She does beautiful fabric.
It's so pretty. And then you also need one package of background, 10 inch squares, and then an additional two yards. If you just want to get yardage and cut all your 10 inch squares, you could get five yards of your background. So that's totally up to you.
That would work.
Yeah. So like I said, the big star is made just like Natalie's. You can see we just did our sets of contrasting fabrics. And then you get two of these blocks out of each of those sets, and you only need nine, so you'll have an extra big star left over. So you can make a throw pillow or something.
Oh, that would be a great idea.
If you wanted, yeah. So just keep that in mind. But let me show you how we're making the small stars. So it's the same sets of three, because we're still needing our contrast in the middle, and our blues, and our oranges. Same idea, but we're just going to mark them a little bit different. So I'm just going to do it on this set for you. So you can see I've got my print and my background together. And I actually like to mark on the background side, I don't know that it really matters, but it's just-
I typically do, just because it's usually all the same color and I don't have to worry about getting a different color pen.
And it's easiest to replace if you make a mistake. Background is much easier to just-
Exactly. And so now we're going to draw a center line, both directions. So I'll mark it like this, and then turn.
And could you just cut that?
You totally could, but I like to sew first, because then I'm not sewing a bunch of little pieces. So that's why I don't. But if you like a better cut, you can do that, because essentially we're making the four half square triangles at a time out of a charm pack, but we're doing it on a layer cake. So we're going to sew all the way around the outside, and on both sides of these lines.
So this is sometimes called make 16.
Yep. The easy 16.
The easy 16.
All right. Here we go. Slower. All right.
So if you were doing this on five inch squares, if you had matching five inch squares, you would just sew all the way around your five inch square. It's the same thing you're getting here.
On the lakey you do opposite sides of each line, and all the way around the outside edge. Right?
Exactly. And for me, this just is a little faster. It's got those nice longer seams. So it saves a bit of time. We're almost there.
One more.
So close.
One seam more.
Perfect.
There we go.
All right. And now you can see all the way around. On both sides of the lines that we drew, we've stitched. And so now we're going to cut on those lines and cut these apart. Oops.
It's kind of a clever way, Misty. I usually cut mine in fourths and sew around.
Really?
Sew around. Yeah.
Oh, that's awesome. I thought I learned this from you.
You might have. And I might have done it this way in teaching several times. But I think every time we grab a piece of fabric-
You just mix it up?
We just do it.
Well, I also leave these together. I don't cut on the lines. I cut this way and this way and this way. And then that way and that way and that way, and then across on the lines.
See, isn't that funny?
Yeah.
See, in my mind I do this, because then once I have these, I know exactly how they're cut.
Because it's easier just to cut them twice.
Yeah. So then now I just cut corner to corner on all of these.
Now it totally makes sense.
I just love that about this triple play.
I know. We all do things differently.
And shall I start pressing them open, or are you block?
I prefer the block lock. So let's do that. We can press those open. And like I said, you would repeat this with all of your sets, just like we did for the larger star, and Natalie's.
So we do a white in a color, and orange in a color. No, I'm sorry. A white and a blue, the orange and the white and then the orange and blue together.
Correct.
That's right.
Exactly.
And you'd have four of each ones, because you're using a layer cake.
Yes. So you'll get four matching stars.
Oh that's so cool. Lots of stars.
All right. So now we're going to square these, and we are squaring them down quite a bit. But this was the closest I could get using this fast method. And so we're going to square these down to two and a half. So I'm just going to lay my block lock on here.
Yeah. People will often ask me, "Why did you use this method?" And I'm like, "Because I'm going for a certain size square."
Yes. And because of the fabric you have, and whether you need prints to match, or not match.
There's just little factors.
There's a lot of little things that factor into what methods you use.
Yes. So then there's that one. I have some of these already squared, but I'll square one more, just so you guys can see. So the words always go on the background. I'm going to slide this down. As long as it looks straightish. I'm going to have to square both sides. So we'll cut this side, and then I just rotate and slide this down, because it's the other side that we're looking for.
Oh, there's a trick for you.
Yeah. Yeah I do that, too.
That's awesome.
Because you just turn the whole thing.
You just turn the whole thing. Exactly.
I do not do that. I actually pick it up and figure out where the thing goes again. But this is not the most brain friendly for me. I use the clearly perfect.
You love the clearly perfect, which would totally work. You would just trim it before you press sharp. So once we have it all squared up, we can just lay it out the exact same way. So let's do that. I need my two colors together. So I have some of these ready. So we'll just make our pinwheel in the middle. I do just like Natalie, I always start with the pin wheel.
I do too.
Yeah. It's just way easier for my brain. So there's that.
Well, it's almost like you don't know where anything else goes until you have that middle together.
That's the definite, right?
Yeah.
There we go.
Legs out, legs out.
Legs out. And then our orange.
Yeah. My little mantra is always white to the middle, white to the middle.
That is helpful. All those things we can remind ourselves in our brain to get it right. And white to the middle. And then your outside corners are just two and a half on these blocks.
So simple.
Yes. So simple. It goes together exactly the same way. And then you have this darling little finished block.
That's so cute.
So these ones I don't have as good of contrast, but you can see they just... Our whole top row is made up of these little blocks. And then the second row is just two of these blocks together, and then a big block, and then two small blocks, and a big block.
And I love... This is just like a nerdy math thing, but this totally comes out, because you're two-and-a-half together, makes four-and-a-half. So this entire thing is going to line up perfectly.
You have all the little junctures.
All the way through with no worries about-
It was very satisfying to me.
And I do find it interesting, so here, this is actually a contrasting, this is a background that's in the pack.
That's in the pack. And that's important to point out, because for this you use every square in your pack. So you can't really leave these out. But I wanted you guys to see that it's really okay. It just looks a little bit different. You don't have quite as much print against your background.
It kind of gets lost a little bit.
It gets lost a little bit, but-
And then, depending on your fabric line, you just choose background colors differently, maybe.
Right. I could have pulled it from the backing or if you added a border.
You cut a few extra squares from different fabrics that you have access... Solids.
So I think that's the key. You may not love this initially, but when you get the quilt all together, it's beautiful.
It's not a big deal.
It is beautiful. I love it. And I used... What pattern did I use on the quilting?
Curly, twirly flowers.
Curly, twirly flowers.
That's one of my favorites, too, because it's just so full of movement.
And it's just cheerful, too.
I love it.
And I do think it's interesting that both of you did no border.
Yeah.
Yeah. Without consulting each other. We've been so busy the last few weeks, we haven't seen each other.
We've hardly seen each other.
It's true. All right. Well I'm going to show mine now.
All right. Let's do it.
All right, you guys. Ready for my quilt?
Yes.
Yeah.
What do you think?
It's so cute.
I love it. There's a little scrappy border. It's so fun.
And I love the strips and the scrappiness of it.
Well, and I love how it comes together and it makes this secondary pattern in the middle. I'm going to show you how to do this. So one of the fun things that happens when we do a triple play, is that sometimes we get the same cut of fabric, and sometimes we don't. So I did not. I had to make mine with a jelly roll strip.
It's so fun.
It is fun.
And so the construction is completely different. So let me show you how to do this. So to make my quilt, you're going to need one roll of two and a half inch strips. And I've used this darling fabric, buttercup and slate, by Corey Yoder of Coriander Quilts for Moda Fabrics. You're going to need some background fabric. You're going to need about two and a half yards. And this includes your squares and your two little borders. You're going to need some border fabric over here. And this border is one and a half yards, and it's a nice big six inch border. And then the backing is five yards, and it's this great little gray print I thought was so pretty.
Such a sweet little daisy flower.
The little daisy flowery thing is really sweet.
Adorable.
She always does really dainty, pretty little flowers.
And you can see your quilt pattern really well. That's beautiful.
Yeah. It shows up perfect.
So mine is sticky buns, which is almost curly twirly flowers without the blossom.
Exactly. So cute.
We all tend to the same kind of things. Anyway, let me show you how to make this. Because we have jelly rolls, we have to now create our fabric. And so what I did was I just unrolled my roll, and I put four strips together. And I tried to get one from every color family.
That's cute.
And you just sew them in long pieces. So when you sew four strips together they become eight and a half inches square. And that is the size.
Idealy. But you should probably measure yours.
Oh, you should. So all of our quarter inches are a little bit different, but we're hoping for eight-and-a-half, if you do-
But if it's not-
So if it's not, all the squares just have to be the same size. And so mine is 5, 6, 7, 8-and-a-half. Let me count that again. That went kind of fast. 1, 2, 3, 4, 5, 6, 7, 8-and-a-half. All right. So we're going to cut eight and a half, and I'm just going to cut my whole strip set. And I think you should get five squares, five of these squares. And since you're getting five, and we use 1, 2, 3, 4 to make our thing, then we have some extra squares, and we can make stars. Not all of my stars match is what I'm saying. They're just scrappy. And so you're just going to go along-
You just cut them all and then kind of mix them up.
Yes. And what I need, actually, I'm going to cut two of these, because I need that many for my square. So let's see. We've got 5, 6, 7, 8-and-a-half. I follow the bouncing ruler line.
Just dancing across there.
So then you're going to take your background and you're going to cut some eight-and-a-half inch squares right here. And we're going to put our eight-and-a-half inch square on our strip set. Now you can see mine isn't perfect. So I'm actually going to use my eight-and-a-half inch square as my measuring stick. So you will sew along that. So we're going to sew all the way around this. So you're going to do two of these, two of the squares, and then one will have two of these together. And when I put these together, I'll lay this out, because this one is them together, but it's already done. So let me just lay this out here. All right. So Natalie, while you're sewing these two together, I'm going to go ahead and cut two more over here, and they'll be eight-and-a-half, because we're going to sew those together. So we've got 5, 6, 7, 8-and-a-half. So 5, 6, 7, 8, and my half is at the beginning.
There we go. All right. So now when I put these together... I just turned them and put them together this way. So one goes sideways and one goes up and down. And then we're just going to sew all the way around. And it makes your box, and it makes your side pieces go out. Now, I didn't pay too close of attention to how they went together. I just knew that I needed four that were for the middle, my pinwheel. And my pinwheel basically becomes a square. You can't see the light background. So we'll do that. All right.
Which I think looks really-
It's just different. Right?
I think it looks really cool.
So then what we're going to do on these, is we're going to cut these here.
You want that one? Okay.
Sew that one too.
I even know for sure.
Well, you don't have to, but I might as well keep you busy, right?
I might as well.
So then we're going to go ahead and cut this just corner to corner. And then these blocks are going to get squared to five-and-a-half. So go ahead and press those open.
Do you have a lot of room there?
What do you mean?
To square.
For squaring. Is there plenty of room, or is it kind of tight?
There's plenty of room, I think.
That's good.
Let me see how much room. Now that I've said plenty of room. I'm like...
Better check.
No panic.
All right. So this is our block lock. There's five-and-a-half. So we have about between an eighth and a quarter of an inch. Plenty of room. Just plenty of room. All right. I'm going to trim this off.
But not a lot of waste, which is great.
No, not a ton of waste.
Well, it's enough that if your seam allowance varies a little bit, it's going to be fine.
Yeah. All right. So there's that one. I should have one of you block lock girls doing the squaring. Oh, this one is perfect, I mean on one side.
Just have to trim on one side. I love it when that happens.
I know, right? Just one side.
Saves time.
Five-and-a-half. There we go. One more.
Before you know it you'll be a block lock expert, too.
I will. Well, it's interesting because once you figure out what you're doing by squaring your blocks, which I figured out with the clearly perfect, then other tools suddenly makes sense.
It started working for you.
Oh yeah. Here, iron those.
Oh, sorry. I missed them.
And then we're going to cut this one.
I was slacking.
And iron this one, too. No, you're never slacking, please.
I was just watching you square. I actually just like love squaring.
Kind of mesmerizing.
It's so satisfying to me.
Is that right?
Oh, yeah.
Oh, that's interesting.
I actually love squaring, period. I like to do it.
I'm the same. I enjoy that, too.
Well, that's kind of how I feel about binding.
I love binding, too. It's so meditative.
I feel like binding is the only time I ever slow down. It like forces you to sit still.
You can watch a little movie or listen to it podcast.
I don't don't know where you're putting these. Are these the olds or the news?
I'm sorry. I don't know. I'm just pressing.
Five-and-a-half.
Just pressing along. Oh, hang on.
Make sure you're going to five and a half, and not cutting it too short.
Wait. Wait a minute. All right, here we go. Oh my goodness. Five-and-a-half. There we go. Five-and-a-half. Five-and-a-half. Yes. Repeat it 55 times. All right. So I need eight of these, of this color.
And four of the others.
And four of the others. So count how many I've squared here, because I know I squared four. Maybe I have to square them all. Oh yeah, because you only get this many from each block, huh?
Mm-hmm.
Yeah. Quilt math is hard for me. It's hard.
It can be hard for everybody.
Oh look, I love the math. And I'm like, hmm, no.
Sometimes math is hard for everyone. Even math people.
I think these are good to go.
Are they?
Yeah. That one, I'm not sure. But these ones are squared.
That one looks like it needs a little squaring.
It needs a little trimming.
It's got some...
Just a little haircut.
And then here's these ones. But you have some squared. Do you want to use those?
Let's use the ones I got right there. It'll make more sense, visually, probably. Because those are just extras. I mean, those are the next block.
They don't match anything?
Yeah, which a lot of mine on the quilt are. So then we'll square these to five-and-a-half. Oh, I love it when a plan comes together. There we go. There's one of those, and two. You can see I get turned around with this thing sometimes.
That's okay.
It doesn't want to lock in there, does it?
Your seam just has to be pressed one direction, and then the words go on the opposite side.
I always feel like during these tutorials I have to get it done so fast. And everybody is like, "Don't rush, Jenny. We'll wait for you." And I'm just like, "That's so nice."
So nice.
All right. So we may take a little more time this time, because we just want to show you all the things. Oh, there's that one. Make sure this is good on both sides. It is pretty good on both sides. Just a little shaving, and the last one here. And then my block is actually going to go together the same way as the girl's, with the exception of a few blocks in the center. All right.
Here we go.
So let's look at this right here. So we're going to put these in the middle, and you can figure out how you want them to go together. If you line them up this way, they line together as a square. And of course you'll have two sides, you have two different ones. See how that makes a square, and then these go out.
Yeah, that looks great.
And then because it's all scrappy, we don't really have to worry about matching anything up or anything like that. We just put the whites together to the middle, like this. Wait for it. Wait, wait. No, this way. There we go. Whew. Sometimes it's work. Wait for it. Oh this is my center right here. I lost my center for a second. I lost my north star.
So cute.
And so this just becomes this scrappy, fun, no stress block.
Those came... Those are-
So is that right?
Let's switch this one with that one. Because then at least you have contrast in color.
It keeps the scrappiness.
Oh, it still matches. Okay, wait, maybe this one.
You're going to drive yourself nuts, now.
I am going to drive myself and yourself.
All right. So let me cut some five-and-a-half inch squares on this. So this is a five-and-a-half inch strip. I'm going to leave it folded. And I'm going to just cut some five and a half inch squares right here. I've cut off my salvages. And five is going to come over. Wait, don't put it under there. I might cut it.
Don't cut it.
Don't cut it. Don't cut that one either.
I won't. 1, 2, 3, 4, 5. I should have had these five-and-a-half inch squares ready.
That's okay. That's a good cut. You can do it.
Now it's ready. We'll wait for you.
All right. Thank you. All right. So these go in the corners. Now we have to put all this back together. There we go. Puzzle, puzzle. Oh, no.
This way.
Oh, there. Thank you.
There it went.
I get by with a little help from my friends.
That's why we have each other. We lost one. No, there it is.
All right. So this is, then, my finished star. But every star has a little bit different. And so this star right here, this is my star block right here, but in this corner I've put another one of these half square triangle blocks. So you would take a random extra and just put it over there on that side.
Facing out.
Yes. So this one faces to the center.
This is your little diamond.
This block has two. And then this center block, all four of them are done. And that's what gives it the fun look. So this one over here again-
So just you have four in the corners that have one corner.
And then four.
My middle squares each have two. And then the very center square has one on every side.
Exactly. Has four.
And of course you guys know I mixed all these up. So I didn't have one star. I didn't have to go through and go, oh, this is matching.
These ones don't match, but it doesn't matter.
Yeah. I didn't have to do any of that. Because I just literally sewed all my strips together, cut them into squares, and then made all the squares, and then went ahead and just mish-mashed them together.
It's really beautiful. It just looks so great.
So once you sew all your blocks together, you can get five of those out of each one. And there was this little piece left. And so I went and took those little pieces, and of course I sewed some of them together. But they're all going to be just a little different because it's your leftover. But I didn't want to waste it. So I cut them all into two inch strips, and I did this little outer border.
It's so cute.
It looks so good. I love the little border.
I did one-and-a-half inch inner on both sides, and then my two, and a one-and-a-half, and then this six inch border out here. So you're going to make nine of these stars, and the quilt ends up being 78 by 78 once you get all your little borders on. And I love a border. So I'm good with that.
It's just so great.
78 by 78, 3 quarters of a yard for binding. And there's my back again. So cute I had to show it twice. Anyway, that was my take on the dashing star with a jelly roll, which was a little bit more brain work.
A little challenge.
A little challenge.
So fun.
Turned out Great.
I hope you guys loved it. I think this came together really fun. We have three new great ideas. Mine was a little challenging because it was a jelly roll, but that's fun as well, too. And I love yours, the different sizes, and what you did with this, really cool ideas. We hope you enjoyed this triple play on the dashing star from the Missouri Star Quilt Company.
Hi everybody. It's Jenny from the Missouri Star Quilt Company, and I am here with Natalie and with Misty. And we hope you enjoyed watching our latest triple play. You can find us together on the third Friday of each month as we hit another tutorial out of the park. If you are already part of the Missouri Star Quilt Company family, be sure to subscribe, and click that bell to be notified each time we release a new video. See you next time.
See you next time.
See you next time.



