

Triple Play: 3 New Foundation Paper Piecing Quilts with Jenny Doan of Missouri Star
 Jenny Doan
- Layer Cake
- Lap / Throw
- Beginner
- Quilt size 70" × 70"
We have a new tradition here at Missouri Star: Triple Play! Once a month, Jenny, Misty, and Natalie each demonstrate their own, unique take on a favorite block, technique, or template. This week these talented Doan ladies are showing off three adorable quilts made with our Missouri Star 10" Paper Piecing Squares!
Instructor
Jenny Doan
Jenny Doan is an American quilter, author, and YouTube personality. Jenny started Missouri Star Quilt Company in 2008 and today it is the largest quilting supply vendor in the United States.
Shop this tutorial
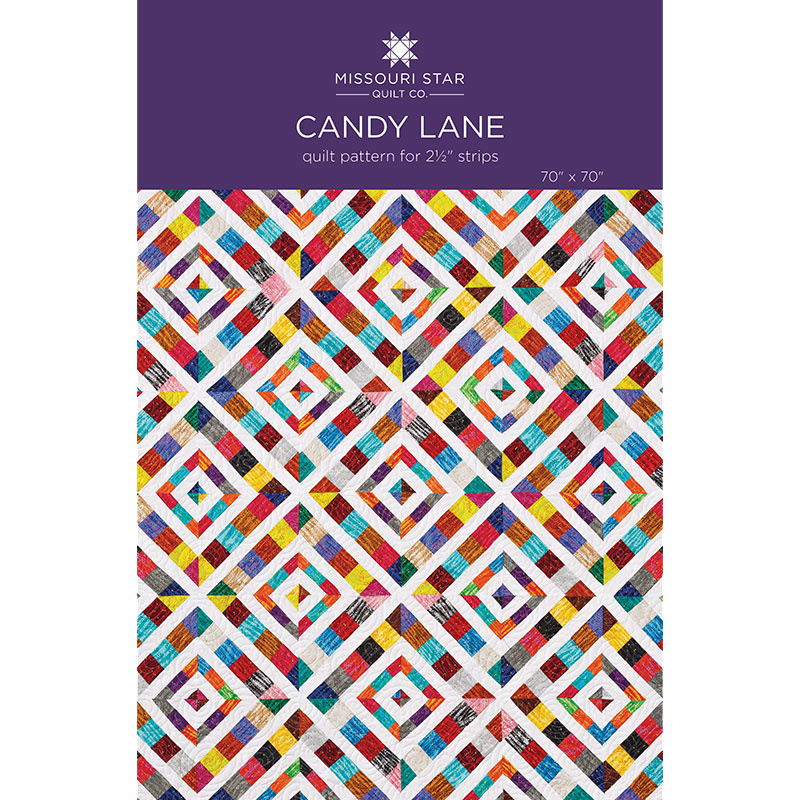 Candy Lane Quilt Pattern by Missouri Star$4.95Shop →
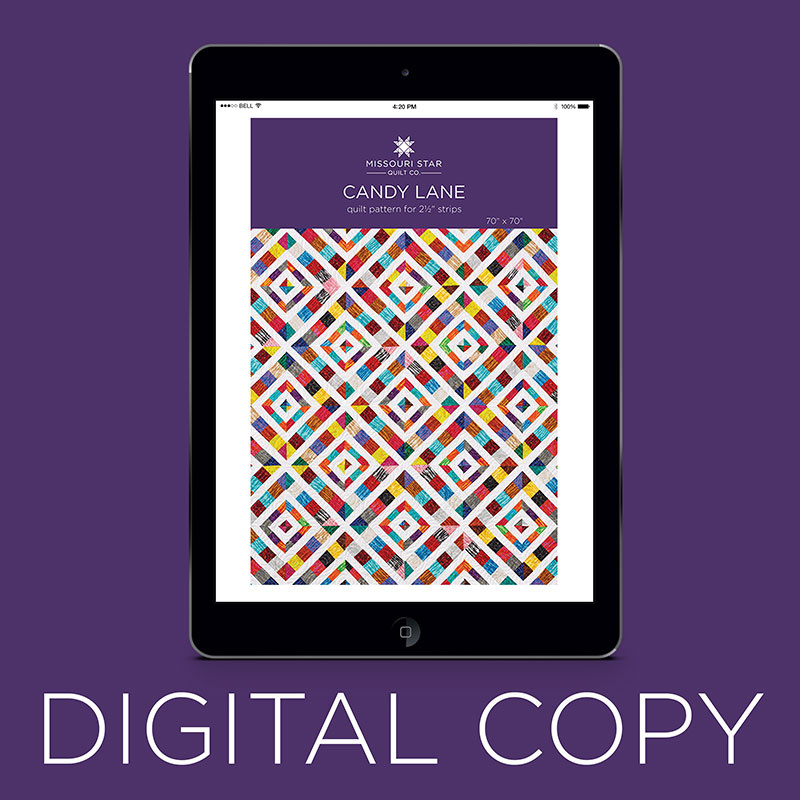 Digital Download - Candy Lane Quilt Pattern by Missouri Star$3.95Shop →
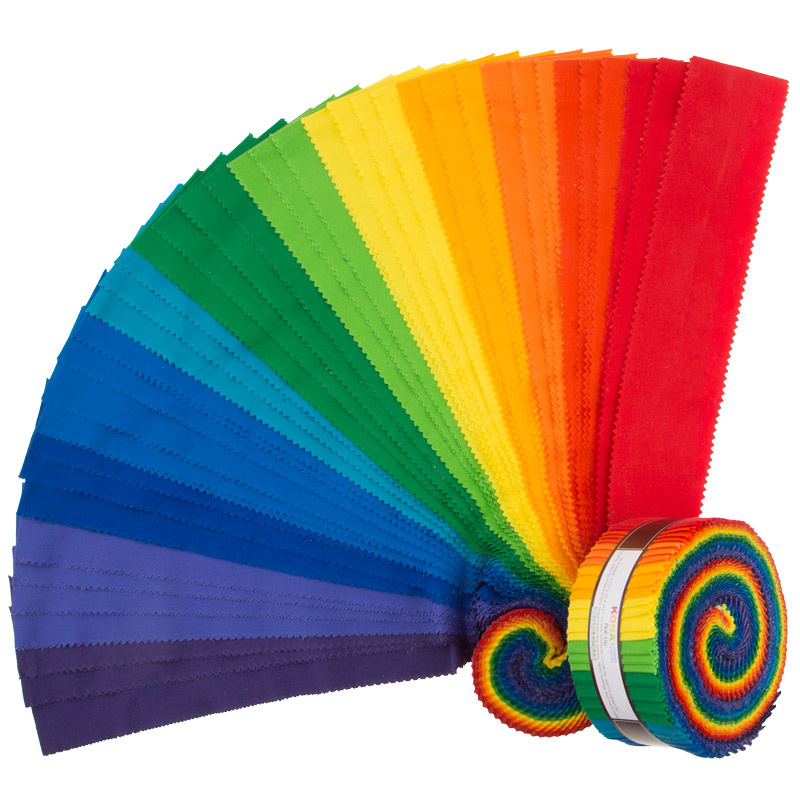 Kona Cotton - Bright Rainbow Palette Roll Up$29.95Shop →
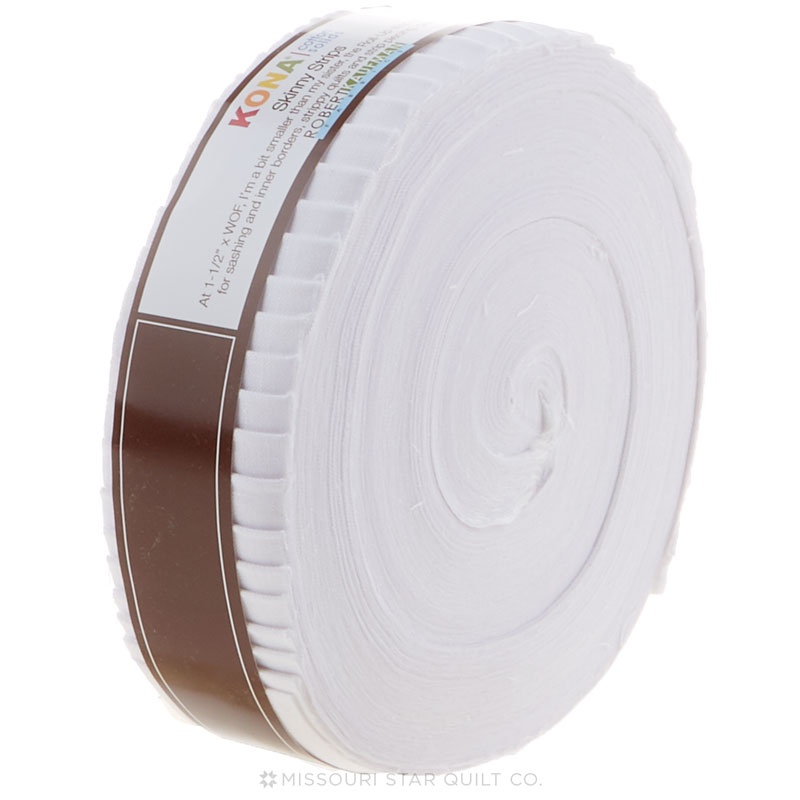 Kona Cotton - White Skinny Strips$22.45Shop →
 Dewdrop - Grape Soda Yardage$10.44Shop →
 Dewdrop - Lip Gloss Yardage$10.44Shop →
 Skyward Quilt Pattern by Missouri Star$4.95Shop →
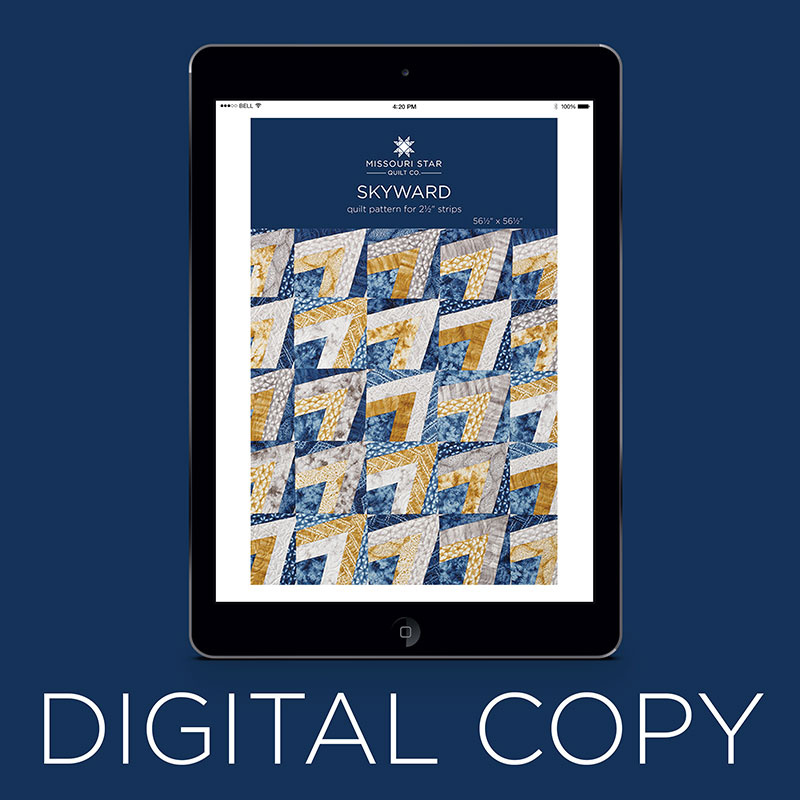 Digital Download - Skyward Quilt Pattern by Missouri Star$3.95Shop →
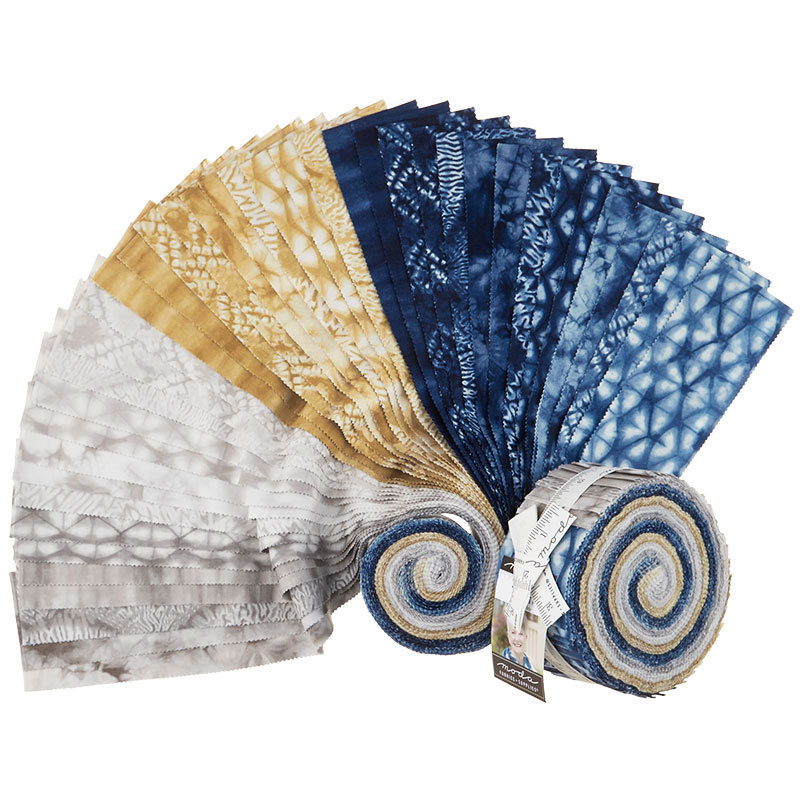 Tochi Jelly Roll$41.95Shop →
 Tochi - Shimo Kumo Yardage$10.76Shop →
 Tochi - Kawa Sora Yardage$10.76Shop →
 Wanderlust Quilt Pattern by Missouri Star$4.95Shop →
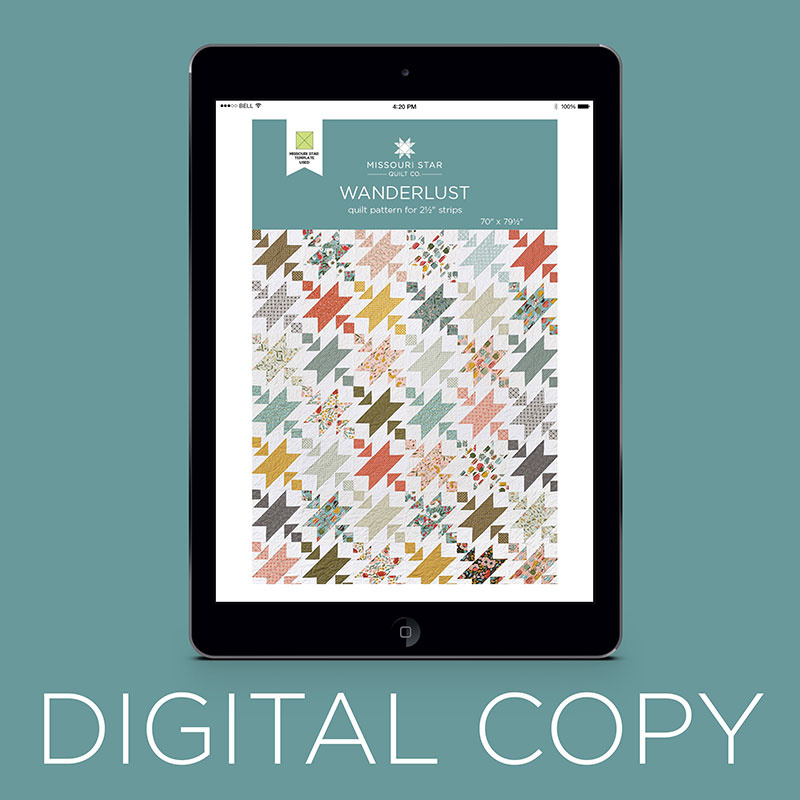 Digital Download - Wanderlust Quilt Pattern by Missouri Star$3.95Shop →
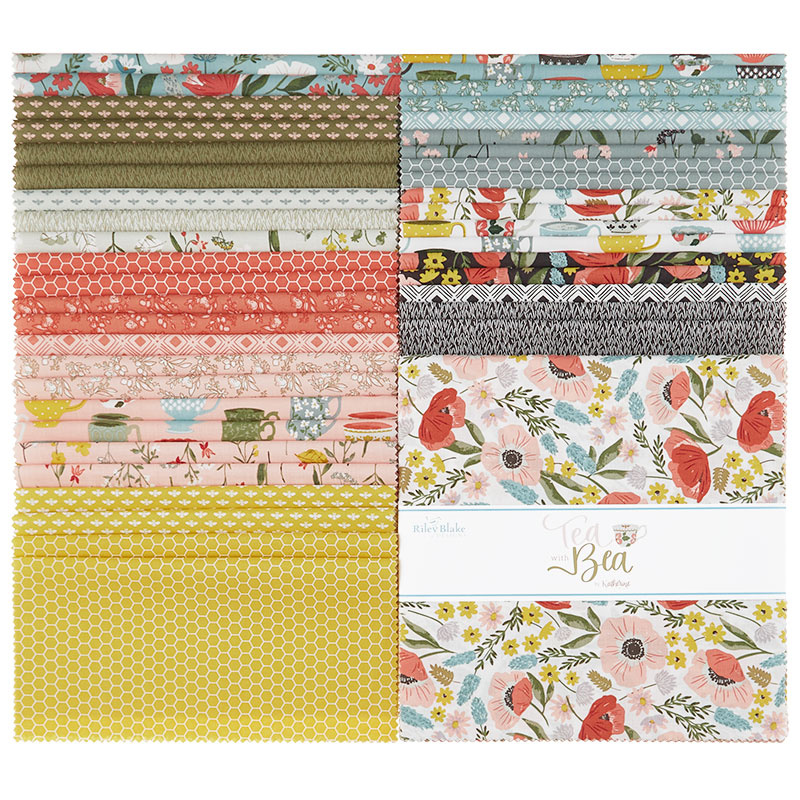 Tea with Bea 10" Stackers$38.95Shop →
 Confetti Cottons Crayola Solid Color White Rolie Polie$37.95Shop →
 Tea with Bea - Floral with Bea Sky Yardage$10.96Shop →
 Tea with Bea - Posy Coral Yardage$10.96Shop →
 Missouri Star 10" Paper Piecing Squares$8.95Shop →
 Missouri Star 10" x 10" Square Ruler$19.95Shop →
Chapters
- 0:00Foundation Paper Piecing Triple Play
- 0:50Misty's Wanderlust Quilt
- 1:16Wanderlust Supplies
- 1:56Wanderlust Cutting
- 4:42Wanderlust Block Construction
- 14:26Wanderlust Block Square and Trim
- 15:49Wanderlust Final Layout
- 16:44Natalie's Skyward Quilt
- 17:24Skyward Supplies
- 17:50Skyward Block Construction
- 29:10Skyward Layout & What If's
- 30:47Jenny's Candy Lane Quilt
- 31:02Candy Lane Supplies
- 31:43Candy Lane Strip Set Construction and Cutting
- 33:30Candy Lane Block Construction
- 41:22Candy Lane Block Square and Trim
- 42:50Candy Lane Final Layout & What If's
- 44:42Thanks for joining us for this Triple Play!
Common Questions
What is covered in Triple Play: 3 New Foundation Paper Piecing Quilts with Jenny Doan of Missouri Star?
We have a new tradition here at Missouri Star: Triple Play! Once a month, Jenny, Misty, and Natalie each demonstrate their own, unique take on a favorite block, technique, or template. This week these talented Doan ladies are showing off three adorable quilts made with our Mis...
How long is the tutorial video?
The tutorial video is 00:45:18.
Are supplies listed for this tutorial?
Yes. The tutorial page includes the supplies and materials connected to this project.
Is a transcript available?
Yes. A written transcript is available on the tutorial page.
Video Transcript
Misty: Yes
Natalie: Yep
Jenny: So what we chose to work with today were our ten inch papers. So these are foundation papers. So basically you get three ideas on what to do with these papers. But usually we build off of a single block
Misty: Or shape or template
Jenny: Shape or template, and make that different. But this time, uh uh. These templates, these papers, completely different ideas. So Misty, I guess you’re up. We’ll let you go first.
Misty: Alright.
Jenny: And we’ll get started right into this.
Misty: Sounds good. So this is my quilt
Jenny: Which is amazing.
Misty: Thank you. I love it. It came out even better than I hoped and sometimes it’s really fun when you have an idea in your head and it just really works.
Jenny: It really works.
Misty: It worked out.
Jenny: Not all of them do.
Natalie: So beautiful.
Misty: Thank you. This one I decided to call Wanderlust. It kind of had adventure vibes to me.
Jenny: And the fabric is darling too.
Misty: It’s so beautiful. It is. I really like it. It’s very, very easy. To make this quilt, you’re going to need one package of ten inch squares. And I used Tea with Bea by Katherine Lineaus for Riley Blake. You’ll also need two rolls of 2 ½ inch background strips which includes your inner border or you can use 4 ½ yards of background fabric. For the outer border you’ll need 1 ¼ yards. And I used the same fabric for the binding and that’s ¾ of a yard. For the backing you need five yards of vertical seams or 2 ½ yards of 108. You’ll also need the Ten Inch Paper Piecing squares. And I recommend the ten inch square template.
Misty: Alright so let me show you how we made this. This is all based on our ten inch squares which is what our paper piecing squares are. And so I am going to cut my entire layer cake into 2 ½ inch strips. So if you had a jelly roll you could use this as well.
Jenny: Absolutely. Let me just say for that, this is the most versatile of all the pre cuts because you can get charms, you can get jelly rolls and all of them.
Misty: All the sizes you need.
Jenny: But if you have a jelly roll, this would be a great quilt for that.
Misty: It would. It would work for that too. So we’re going to start by cutting this into four 2 ½ inch strips.
Jenny: It always surprises me a little bit, people will say, well I just have fat quarters, what can I make with those. And I’m like, well you could cut them into 2 ½ inch strips or five inch squares or whatever, and they’re like OH!
Natalie: You can make anything you want.
Jenny: Ya people don’t think of that. They think they’re kind of stuck in that box.
Misty: Exactly. So we’re going to leave two of these rectangles whole. They stay 2 ½ by 10. And then one of our strips we’re going to cut down into 4 ½ inch rectangles, so 2 ½ by 4 ½. There’s one, make sure we’re straight. And this is waste. We can just toss that. And I like to keep these
Natalie: A tiny little piece though.
Misty: Tiny little piece. And then from this one we need 2 ½ inch squares. So we need two of those. Everything is in twos. And then this piece since it’s such cute fabric you’re going to want to hold onto for another project. So just set that aside.
Jenny: I’m like, wait, what’s happening.
Misty: It’s just extra but you can hold onto it.
Jenny: He can go with this little guy.
Misty: There we go, ya. You might need that tiny little one inch strip for something. So then these are how you cut all of your package of ten inch squares. And then you’re going to need those two packages of background fabric and so what we’re going to cut is three inch pieces. And those pair with your 2 ½ inch square.
Natalie: So 2 ½ wide by three inches long?
Misty: Exactly. 2 ½ by three, thank you for pointing that out. And you need double of all of your background pieces. So even though these go with the 2 ½ you actually need four of the 2 ½ by three inch rectangles per block. Does that make sense?
Jenny: Ya
Natalie: Yes, because you need one on either side.
Misty: One on either side. Exactly. And then these are six inch, 2 ½ by six inch and that pairs with the 4 ½ inch.
Jenny: And do you need double of those?
Misty: Double of those across the board. And then for our ten inch we have five inch, 2 ½ by five inch rectangles. So this is kind of how everything goes together. So let’s go ahead and make these now. And so basically what we’re going to do on this one is sew it on one side with a quarter of an inch seam just here. I’ll have you do that.
Jenny: Now I’m ready. I have no idea how you made this so this is kind of fascinating to me. And I love these things because we all do it so differently. We think so differently.
Misty: I know. It’s so fun to see how they all come together
Jenny: Alright.
Misty: Alright. So we’ll have Nat press that one back for me.
Natalie: Alright.
Jenny: I’m losing my pedal here.
Misty: Ya it was sliding a bit. There we go. And then now we’re going to put the other one here so that when we sew this back it kind of makes like a little V.
Jenny: Oh.
Misty: Ok? So then sew that on that side.
Natalie: So the seam side is always the 2 ½ width and then the three inch goes long ways out?
Misty: Exactly. And then we press that. There we go. And then now I have, like I said, you’re going to need two of each of these for your blocks. I have one ready to go. Ok so we’re going to trim this. And you can see here that I’ve lined this edge of my fabric up on the 45 line of my ruler. And I want to make sure I have a quarter of an inch overhang here and if I just go point to point it should be really close but I just like to check to make sure it’s not too wonky. And then now I’m going to trim this off like so. And so these are going to be our triangle corners. I’m going to go ahead and do that again.
Natalie: For me, using the ruler for things like checking the 45 inch line and checking, you know, to make sure that this is actually a quarter of an inch, that just gives me so much more confidence. I know it’s going to work.
Misty: Exactly. You know it’s going to work. It’s all going to work out so we can trim this one too. And so our two outside corners are done. And so then now we can move onto the next size which this, we’re just going to treat it like a snowball. And so we’re going to lay this just like so and sew from this corner to this corner. So we could draw a line or you can use the diagonal seam tape.
Jenny: I will use the diagonal seam tape. Since I’ve become friends with that, it’s like my best friend.
Misty: Perfect. Yep. And then we can trim this off. I did kind of make a nest for myself because there is quite a bit of pressing and trimming. And so we’ll press that back.
Jenny: Well all of our, when you go to set up your sewing space, all of our sewing spaces are set up very nest like.We work in a little area and so just remember when you’re sewing, fixing your own space
Misty: You want to have everything close to you and make it convenient. So now we’re going to do the same thing but in the opposite direction. So I want this to overlap here so that I keep my point and we’re just going to go this direction corner to corner. There’s that one.
Jenny: And this lines up exactly on the top of this
Misty: Yep, exactly.
Jenny: There we go.
Misty: And then I’ll let you go ahead and get started. We’re going to do the exact same idea with our ten inch and five inch strips except for they’re not going to meet in the middle. And so we’re just going to lay this on here corner to corner. And on this side the opposite way corner to corner. So I’ll let you do that while I trim this. There we go.
Jenny: Every time we do one of these we always think it would be so nice if all three of us were sewing together.
Misty: I know. It’s nice to sew together.
Jenny: It’s nice to sew together.
Misty: There we go and then we’ll trim this off.
Jenny: That’s just a hair wonky, will that matter.
Misty: I think it will be ok. It’s pretty forgiving. There we go. Thanks, Nat.
Natalie: No problem.
Misty: Ok so then these are all of the components that we need, two of our triangles, two of our little points there and then two of these pieces here. Now that we have all of our components ready to go, let’s go ahead and grab one of our paper piecing squares and I’ll show you why these are helpful. First thing, let’s fold it in half and give it just a crease, corner to corner. And then we’re going to open it up and we’re going to use our ruler and going the opposite way from that fold we want to mark a quarter inch over from our corner point and draw a line. So that’s what I’m going to do here. You can see this point is a quarter inch in, this point is a quarter inch in. And we’re just going to draw a line all the way down. There we go. And so to begin we’re going to start with our largest wedge, it looks kind of like a half hexi. Yes, exactly. We’re going to start with one of those and we’re going to, you can press this in half, just give it a nice finger crease. And we are going to line that little crease up with our fold. And so we know it’s exactly center. And we always want the wider part of this to be going out away from the middle.
Jenny: That’s a really good mantra to remember.
Misty: Yep.
Jenny: Wide out, wide out, wide out.
Misty: The same on this one. We’re just going to give this one a little press.
Natalie: And that line that you drew, that’s a quarter of an inch off from the center so that when you put the seam in it will be right on the center?
Misty: Exactly. Exactly.
Natalie: That’s so smart.
Misty: And so we can line these up here. And we just want to make sure everything stays together. And our pieces should all match.
Natalie: And then you’re also matching the fold with the fold?
Misty: Yep, so that our centers are all lined up and you could glue your first layer if you want. You could put a pin in here to kind of hold everything together. That’s what I would probably do just out here.
Jenny: I would probably glue. Glue that thing on there.
Misty: That’s fine. And then just so I know my middles are staying in that center point and then we can just sew our quarter inch seam all the way down this side.
Jenny: Ok. Alright so I just want to make sure that this is, so do I want to make sure this is on the line.
Misty: Yep the edge of the fabric should be
Natalie: Next to it.
Misty: The edge of the fabric should be
Jenny: Right next to the line, right?
Misty: Exactly
Jenny: So much pressure. So much pressure.
Misty: You’re doing great.
Natalie: It’s going to be so good.
Jenny: Get rid of this pin.
Misty: There we go.
Jenny: Stay on the line and then make sure these stay lined up and on the line. That line is super helpful.
Misty: It is really helpful. Ok and then Nat I’ll go ahead and have you press our top layer back.
Natalie: Sure, alright.
Misty: And this is one where I found it really important to press in between. I didn’t feel like the finger press was quite enough.
Natalie: It keeps everything really flat.
Misty: Yep, flat and pretty and how we want it. That looks great. And so next up we have these pieces. And again we can find that center and put a little finger press. And the wide part goes out. And so actually now that I’m thinking, we can just put that point right on our crease.
Jenny: And you’re going to do that on both sides?
Misty: Both sides, exactly.
Jenny: Let me grab this one first because that one is going to fall off.
Misty: Yep, so we can sew down that side.
Jenny: So I am making sure that point is lined up. Making sure this stays on the line.
Misty: Turn it around and do it on the other side.
Natalie: I like these kind of projects because it doesn’t feel like you, you get to do both and it’s like, it seems like half the work kind of and then you’re done.
Misty: It does make it feel faster that’s for sure.
Jenny: Well and honestly foundation piecing is one of those things that’s old as the hills. People have been doing foundation piecing, you know, forever. I mean I’ve done it where you use muslin squares. I’ve done it where I’ve used phone books. I mean you guys don’t even know what a phone book is.
Misty: I do. I actually got one in the mail the other day and I was like, this is still a thing? I was surprised.
Jenny: I used to use like the hamburger wrappers, you know, whatever worked.
Misty: Whatever works
Jenny: And we just came out with papers just for ease, you know, but you can literally foundation piece on anything.
Natalie: That piece didn’t quite go out
Misty: That’s ok. So then you can see how this is coming together. And then we’re just going to finish this off with our triangles. And again we can just line that point up on either side where we creased it.
Natalie: So easy.
Misty: And we can sew.
Jenny: I just love this.
Natalie: There’s a ton of great applications for papers, for foundation piecing. And you can get really, really complex and artsy. And I love those projects.
Misty: I do too. There’s so many beautiful ideas.
Natalie: I feel like we’re just touching on the beginner aspect of what you could do with papers.
Misty: Well and honestly it was a bit of a challenge for me to figure out what I wanted to do because prior to this I had only ever done, like crumb piecing and string quilts. That’s all I had ever used the papers for and so I was like, I want to think outside the box but I don’t even know where to do. But it was really, really fun. There we go.
Natalie: Alright.
Jenny: That’s so cool.
Misty: It looks so, so cool. So if you flip it over you can see our ten inch paper just from taking seams gets a little bit wonky. And so because I wanted my squares to be exactly ten inches and I also wanted to make sure that I didn’t lose any of these points, I decided to use the ten inch square template. And I just laid this on here.
Jenny: If you lose a point?
Misty: It’s not a huge deal. I just tried.
Natalie: The nice thing about that is you can kind of tweak it, you know, a little bit one way or the other.
Misty: Exactly. And this is going to be close on this side but at least it gives me some on all of them. And so now I’m just going to trim this off.
Jenny: Now a lot of times we’ll say use the paper to trim with but literally when you take seams on paper it shrinks it up so you don’t want to use the paper as your pattern on this.
Misty: Not always.
Natalie: It can depend on the project.
Misty: I’m going to go ahead and turn that.
Jenny: And also one of the tips for using the papers is you want to shorten up your stitch length just a little bit because it just makes it easier to tear off the papers and it also keeps those stitches, you know, they’re not as easy to pull apart.
Misty: Exactly.
Jenny: There’s a little bit of stress when you pull the paper off the back.
Misty: Right but you can see this is our finished block.
Jenny: It’s so cute.
Misty: It’s so cute and it actually comes together really quick. And because we use an entire pack of ten inch squares it’s just laid out six across by seven down, 42 blocks. And I just had them all the same way so they’re all sitting in the quilt just like so, you know, and then we’ve got a 2 ½ inner border and a five inch outer border.
Jenny: Beautiful.
Natalie: Love it
Misty: And what does it measure, Nat, do you remember? Do we have that?
Natalie: Umm, 70 by 80.
Misty: 70 by 80.
Jenny: Oh and let’s look at this quilting pattern because this is a kind of a new pattern. It’s leaves
Misty: Ya it has these really cute little leaves.
Natalie: I think it’s called Leaves and Loops.
Jenny: Leaves and Loops, is that right? I was going to say Vines and Loops.
Misty: You can look at it better on the back.
Natalie: The fabric is so pretty. I love how quilting looks on a solid piece of cloth,
Misty: I do too. It’s so pretty. So who’s up next?
Jenny: I think it’s you, Nat
Natalie: Me.
Misty: Awesome.
Natalie: So the quilt that I made this time is behind me and I named it Skyward. And I thought it was kind of cool because all of these points kind of point up to the sky like flying geese or dragon scales or fish scales or sevens. There are a lot of different things that come to mind when you look at this and it’s interesting to hear everybody’s perspective of what they see. But it’s kind of cool
Misty: It’s really beautiful.
Natalie: And you’ll see there’s a lot of different ways that it could have been laid out so it has a lot of creative potential.
Misty: I love that.
Jenny: It does.
Natalie: So let me show you. This is the block, whoops, let me just grab one of them. This is the block that we’re talking about and I will show you how to make that.
Misty: Alright.
Natalie: To make my quilt you’ll need one roll of 2 ½ inch print strips. And I’ve used Tochi by Debbie Maddy for Moda Fabrics. You’ll also need a yard and a half of accent fabric and that includes your border. You’ll need 3 ¾ yards of backing and then I also recommend the ten inch paper piecing squares and a glue pen.
Natalie: Ok so we are going to start by taking one of our papers and we’re going to put a little crease in it, just a quick little finger press just like you did for yours. And then the next thing we’re going to do, sorry I want to talk about the periwinkle block. So each one of these blocks, you can see it starts with this little periwinkle shape in the corner. And I used the same fabric on my borders. So they’re all the same. I thought it would look really cool if they all matched and you could mix them up. You could use a charm square if you wanted to and have them all scrappy.
Misty: But you took it from your accent fabric?
Natalie: Yes. My accent fabric and my inner border are the same. Yep. So what you’re going to do, you’re going to cut a five inch strip and you’ll find it’s really easy to cut many of these at once. So it’s a width of fabric strip, fold it in half. I’m going to go ahead and fold it one more time so that you’re cutting four at a time.
Jenny: And these are made for the charm pack so the five inch strip is perfect because you can just sail along.
Natalie: Yep. So then I’m going to use one of these straight sides, make sure it’s lined up nice and straight and we’re going to cut. Four at a time is pretty simple. Once you get more layers than that it gets a little bit trickier to cut. Sorry.
Jenny: The under the arm cut
Natalie: Yep.
Misty: She’s a wild one.
Natalie: Living on the edge. Ok so then we’re going to take our little glue stick and we’ll just need one of these. And I would, if I was assembling this quilt, I would go ahead and do my prep ahead of time and glue down all of my periwinkles and get those papers prepped. It’s super easy.
Jenny: And this is a little interesting, you have to look for the right side. I don’t think it really matters but it’s fun
Natalie: It’s very difficult to tell which one is the right side on this which makes it totally versatile. Ok so you’re going to put your glue right down here in the corner. And I just do a few little stripes and then it’s important to go ahead and stick your fabric down quick because this stuff dries really fast. So line it up right there in the corner and just give it a firm little press. And if you find that that’s not lining up you can reposition it. Just readjust it, no big deal. Ok, so we are going to start by adding our color strips. And what you do need to know about this is that because whichever side you start on is fine, it doesn’t matter. But because the next strip is going to cover, you want to make sure that you have a good 2 ½ inches of overhang so that you don’t end up with gaps. So we are going to start
Jenny: Now I noticed on your quilt back here, some you did with the gold and some you did with the silver. Is there a reason for that?
Natalie: Ya, well so when I was, when I started out I wanted the gold to be the centers but I didn’t have quite as many gold as I did silver
Jenny: So it depends on how many are in the roll?
Natalie: Right. It was one or the other. So I had to swap because I needed more of the long pieces for the next row.
Jenny: I think for me that’s what made me see it in a scrappy way. I think this with different fabrics would be such a cool quilt.
Natalie: Ya I look forward to trying it in a different fabric.
Jenny: Really fun.
Natalie: Ok so we’re going to start on this side. And we’re going to line up that edge, this outside edge you don’t have to worry about a lot of hang over. We’re just going to let this one go over the edge because it has the selvedge on it. And then just stitch from the edge of the paper up here to the edge of the periwinkle.
Misty: Ok
Natalie: And then we’ll go from there. Just try to keep it lined up along the edge of the fabric but if you get off a little bit, it’s no big deal. This is a really forgiving project. Yep, that’s perfect. Ok, so then what we’re going to do, we’re just going to press this back a little bit. And what you have to remember is that your next strip is going to stitch along this direction so you need to make sure that your cut goes in that same direction. So you could line up a ruler if you were worried about it. But typically I just kind of cut and go as I go. And so I would just go out here a little bit and just trim it off. So then you’re next, will you press that?
Jenny: Sure.
Natalie: It does go a lot easier if you press in between each one so the whole little sewing nest where you have cutting and pressing is very convenient. Ok so line this up and on this strip you’ll want to flip it over because what you want to make sure of is that this cut can go all the way out. And see how this point is a little bit down.
Misty: You want to finish that point.
Natalie: Ya. I’m going to go ahead and pull that up a little bit because you just want to make sure that when you trim off that edge and when you attach the next strip that it will be completely covered.
Misty: That makes sense. I would have never thought of that. I would have sewn that wrong a lot of times.
Natalie: Ya I did that ya but you have to make sure that you have enough fabric to continue that seam on the other side. Not super tricky, just kind of something to think about and continue to remind. Now you don’t have to stitch it all the way up here, you can still just start on the fabric.
Jenny: And then your next one will be gray?
Natalie: Next one, yep. We’re going to make a second one of these guys. We’ll fold this back and trim it off right here. And then trim this just along that edge so that you have room to go all the way out. And then if you will press that.
Jenny: Perfect.
Natalie: We’ll grab a cute blue one. I like this. This one is cute because it has the cute, almost looks like little flowers. Oh, we’re going to do gray next, whoops, I was, I got ahead of myself. Yep, I’ll pick that same fabric in gray.
Jenny: It’s such fun fabric.
Misty: It’s really pretty.
Natalie: Then just do this other side. It’s kind of log cabin style where you just do one side and then the next and keep on going. And just keep lining it up and go all the way down to the end.
Misty: Alright. This paper wants to curl on me every time.
Natalie: Alright. We’re going to flip. And we’re going to make sure that this edge follows that line. And if you’ll press that, that will be great.
Jenny: Always my pleasure.
Natalie: The pressing lady. So this one can just go like this. And just make sure it covers that whole thing which on this side you’re not going to have too much because you’re at the corner so really if you just go out to the edge you’ll be ok.
Misty: Ok. There’s that.
Natalie: Alright. Keep trimming and pressing.
Misty: I can see how when you prep all of your papers at the beginning you could sit and sew
Natalie: A bunch of the same side
Misty: Ya, that would be nice.
Natalie: I wanted my strips to match but if you did them scrappy that would be even more fun because they can just kind of like braid into each other. Let’s see, we’re looking for a blue one. How about this kind of stripey look?
Misty: That’s pretty.
Jenny: Do you need the same on both sides?
Natalie: Yep. So you just have to make sure that it will cover both directions and this is at least double so we are good. Because now that we’ve covered the corner of that block, we don’t have to worry about fabric continuing out in that way. It just has to cover the paper.
Misty: There’s that one.
Natalie: So we’ll flip this back and trim it.. And just do this other side.
Misty: Ok.
Natalie: With the other half of that strip. Perfect. I think these would look so cool if used different sized strips like maybe some 1 ½ or something or one inches.
Misty: Oops, I got a little too close. Does that matter?
Natalie: No it doesn’t matter.
Misty: Alright, I’ll keep on sewing then.
Jenny: As long as you catch the fabric underneath.
Natalie: As long as you catch the fabric under we’re totally good.
Misty: I think it’s good.
Natalie: Ok, excellent. Alright so I don’t know if you can see but it looks like we’re going to have just a hair of a corner here and it would probably fit in the quarter inch seam but in order to make sure that I don’t end up with holes or things that don’t catch, I’m going to put just a little bit of fabric to cover that.
Jenny: Should I press this?
Natalie: Yep, that would be great. So I’m going to just use this little gray piece. And I just cut off a couple little chunks.
Misty: And you can see in the quilt where you have those little corners.
Natalie: Ya, so here and here I just have some little bits of fabric that ended up in the corners because I didn’t quite finish out the edge. But that doesn’t bother me at all. I think it looks really cool.
Misty: It does, it just continues the pattern.
Natalie: And all we’re doing here is covering the paper so that we can end up with a ten inch block.
Misty: Do you want me to do this side?
Natalie: Ya.
Misty: Ok, there we go. Tah dah
Natalie: Ok, one more quick press of the little corners and then we will trim it up.
Misty: You know what’s really funny is looking at this, you’re like, how is this going to square? Because it looks so
Natalie: So like a diamond.
Misty: Yes.
Natalie: Alright so the squaring, we’re going to go ahead and flip it over. And we’re going to use this template because the paper does shrink a bit. And you can see that it shrunk a lot right here and just a little bit over here. So I like to use the paper to go ahead and make sure it’s really square. And I line it up with the corner of my periwinkle. So that stays. But then I’ll go ahead and cut this off, this one, and then I’m going to go this way. Alright. And that is our finished block.
Misty: It looks awesome.
Jenny: It looks awesome.
Natalie: Yep. So the next thing is to just tear these papers off. And they’re super, super easy to tear off. If you’re having any trouble at all you can just kind of give the seam a little tug and it will just kind of separate.
Misty: They just kind of pop loose.
Natalie: It’s a great activity to get them all done. We can just sit and watch a show and rip them all off in time.
Jenny: Keep the garbage can handy. I was doing this on my desk one time and my desk was just piled. I’m like, I better put these in the trash. I don’t want anyone else to see this.
Natalie: We all tear the papers off. The glue part comes off no problem, even though we’ve glued it down. It stays in place for when you need it to stay in place and then when you don’t, it comes right off.
Jenny: So you have a few more blocks here, I’d like to see some of the layouts because I can see this several different ways.
Natalie: Ok, very cool. Alright so I did have a lot of options for laying it out. And I have a couple of different blocks here.
Jenny: This is really a fun one to play with, ideas.
Natalie: Scoot that out of the way. So what if we put all of these to the center and then had these guys come in. We could make a big, a more traditional periwinkle star style. Or you could do two in and two out.
Jenny: You could do rows where they kind of go up and down.
Natalie: Yep, yep. Ya I had something going where I had it like this and then I turned them out so it made like a, whoops not like that but like that. So it kind of makes like this little blue heart. So there’s several different ways to do it. Ultimately, I ended on putting them all the same direction and I just think it turned out great and so I hope you enjoyed my tutorial on Skyward. It measured 56 square. And we have a nice little five inch border. And the backing is this beautiful streaky, it looks very indigo dyed which I think is so pretty. And the quilt pattern is Botanical Blossoms. It’s one of my favorite because it has such a great little variety of flowers. It’s cute and elegant.
Misty: So pretty.
Jenny: And I guess it’s my turn.
Natalie: Yep. See what’s next.
Jenny: So I’m super excited about my project. I just think it’s so cheerful. It’s so bright and happy.
Natalie: It’s so cute.
Jenny: This actually looks like fabric to me, like made fabric but it was all out of a jelly roll strip and so it’s just super quick and easy to make. So to make my quilt you’re going to need one roll of 2 ½ inch print strips and we have used Dew Drops by Whistler’s Studios for Windham Fabric. You’re going to need a roll of background strips. And we’ve used these 1 ½ inch wide skinny strips from Kona. You’re going to need 1 ¼ yards for your outer border. And for your backing you’re going to need 4 ¼ yards of vertical seams or 2 ¼ yards of 108 wide. I also used the ten inch square template from Missouri Star, the ten inch paper piecing squares and a sew line fabric glue pen.
Jenny: So let me show you how to do this. So what we did was we took our strips and we put five sets of six strips together like this. And we just sewed them along. Sewed all your strips together. And you’re going to have five of six sets. I keep getting those numbers mixed up so five of these sewn together. And then all of these are then going to be cut into 2 ½ inch pieces like this. And so we’re just going to lay our ruler on here, cut our 2 ½ inch pieces. And you’re going to do that to your whole pile of all of these. And you’ll have a big pile of all these different strips because we want to scrap this up. We want it to look, you know, different.
Misty: So fun.
Jenny: So then with the rest of the strips you’re going to get three sets of threes right here. And those are also going to be scrappy and these ones you cut at 1 ½ . So we’re just going to kind of lay these out here so they’re even. I’ve got two folded together. And I’m just going to put my ruler in here and cut these at 1 ½ like this.
Natalie: Did you ever fold and cut your sixes that way?
Jenny: Yes, oh I stacked them up
Natalie: That is brave because I feel like I would make them crooked.
Misty: I would worry with all the seams. But that’s just me.
Jenny: Well the thing about it is, yes so if you have the seams then you have to just be a little careful to, you know, because it’s twice the thickness already. And so you just don’t cut as many stacked up. But if you fold two and cut them
Misty: It worked out ok?
Jenny: It worked out just fine.
Misty: That’s awesome.
Jenny: The other thing you’re going to need are some 1 ½ inch white strips. And can I just tell you how thankful I am that we have pre cuts like that are already cut.
Misty: It saves us so much time.
Jenny: Saves so much time and so now we can get ready to construct our, there you go, the special sticker. We can get ready to construct our block. And it’s super easy. So I have just come off making a string quilt for my trailer or camping quilt. And, you know, the strip down the middle and when I realized we had to do a Triple Play with papers I was like, OH and so I love this idea because it’s super easy, super forgiving and just, you know, just one of those things that is just quick and easy. So what I did on mine is I just, you know, put my finger on mine down here in the corner, held it and did a glue line straight across the middle and just eyeballed that. Then I took my white strip like this. And I’m going to just cut off my little selvedge. You don’t actually have to cut off your selvedge, but you know, I did. And then I’m going to center this up so it falls in the middle of that. Center this one up. And just press that on there like that. It makes it much easier when you’re sewing it not to drag around a tail so I just clipped this off. And so then what we’re going to do is we’re going to sew a 2 ½ inch strip to this side right here. And you have to make sure it reaches both sides. You want to make sure that it lays in there really nicely. I’ll let you do that, Natalie.
Natalie: Ok
Jenny: Because we’re going to sew one of those to both sides.
Natalie: Alright.
Jenny: And so you don’t even have to really worry too much about the quarter of an inch but you’ll notice these are matching up. And every once in a while you see some that aren’t perfectly matched up and that’s because my seam isn’t exactly perfect. So it’s pretty forgiving but you want it to generally line up, you know, you just kind of want to watch and make sure that your seam allowance stays pretty close to the same. And Natalie and Misty always sew great seam allowances. I mean they are a straight seams.
Natalie: You’re very funny.
Jenny: It seems to me. It “seams” to me. Now we’re just going to let you press that quick.
Misty: Ok.
Jenny: And then I’m going to grab a different piece here.
Misty: There we go.
Jenny: And then we’re just going to put this on the other side of our white strip right here, making sure that we catch both corners. And sometimes it’s right on the edge of that.
Misty: I love these projects because they really come together so fast.
Jenny: They’re so fast, ya. And you get this stunning effect. You know, to me this really looks like the board game Candyland you know.
Misty: And like you worked really hard.
Jenny: Like I worked really hard. My kids always really loved that game Candyland and that’s what I thought of when I named it Candy Lane
Misty: And I think it is adorable too with all the colors
Jenny: Absolutely. It’s just so cheerful and bright. Alright so now you’re going to iron that. And then we’re going to take a strip and we’re going to put, I have no idea what happened to my other strip
Misty: To the one you had.
Jenny: But I’m sure, oh here it is. I will come back upon it some time, this is how my desk, my desk is always piled. So Natalie what I want you to do with this is I’m going to have you lay this on here and sew this one down here. And then you can come back over here and just do the same thing.. Cut them both at the same time.
Natalie: Easy.
Jenny: That’s a little trick of the trade, just a quick easy way.
Natalie: A sewing hack.
Misty: Anything to save time.
Jenny: Well and sometimes you know, I always think that of everything to save time, what are we saving all this time for
Misty: That’s true
Jenny: Sometimes it’s really good to enjoy the process. And everything I do seems to kind of happen at hyper speed and so I just feel that that’s my personality and my nature.
Misty: But it is important sometimes to just slow down and enjoy it too.
Jenny: It really is, that journey.
Natalie: But if you go faster then you can make more quilts.
Jenny: That’s right. There was a little thing on the MSQC All Stars page the other day about a lady was like, so I have all this fabric. Is that bad? And I’m like, you are a curator of textiles, you know, and then this other lady, haven’t you read the thing, you know, he who dies with the most fabric wins. And I almost commented because my comment is always he who dies with the most fabric hasn’t been sewing fast enough. You know, and so it’s just kind of however you look at those things. Anyway if you could press those back.
Misty: You bet.
Jenny: And so now these little ones come in. Now because there’s only three sets of these you don’t get a lot of mix up going on with these. And so
Natalie: You can’t tell looking at it.
Misty: No you really can’t.
Jenny: You can’t tell at all. So when I put them together, I watched, so you can see this one and this one and this one, they’re all the same. But because I put one on going this direction and one on going this direction they match up differently. So we’re going to set this little guy right next to that and we’ll use one of these. So we have just a little different on the other side. And I did, when I was putting one together, I did look at those and make sure there were no two purples together, no two greens. But once the quilt is all finished and you’re looking at it. Oh I did see, right there is two grays right down here. I’m not mad about it.
Misty: I would have never seen it.
Natalie: I have a little, oh there it is.
Jenny: A little tiny one
Natalie: I just lost him under the machine.
Jenny: This is one because we’re sewing on both sides of that center seam, we’re not sewing across at all, we’re just sewing both sides, it’s going to scrunch up that paper. You’re going to lose a little bit of your paper. The nice thing about it is that there is enough on here so that it really gets, you know, you really know to cover the square. It just works. It just works great.
Natalie: It gives you a good guideline.
Jenny: Yep. Now we’re going to put one more white piece on both sides. And you’ll notice, I didn’t cut any of these to length except for my jelly roll strips. And so the rest of these are just little bits. And again like Natalie, we’re going to end up with some little corners that need to be covered. And I have some little squares cut somewhere but I think I’ll just cut a couple more right here because I can’t seem to put my hand on them.
Misty: They keep wandering off.
Jenny: Oh my gosh, you guys, if you could sew with me on my desk you would really know how things wander off.
Misty: It’s not just you though. It happens to all of us.
Natalie: Yep.
Jenny: I’m always like this, where is my, you know. Alright so if you will, let me clip this back. Clip this. And then if you will iron that back. I’m going to have you add these. Now I’m sure there is a measurement for these in the pattern but the way I did it was sometimes when I’m squaring up these, like this that I cut off will be big enough to use on a corner.
Natalie: I did that with mine too.
Jenny: So I saved some of those little pieces and then also like these where you can put them on this way and do it, you could also cut them diagonally and get both of them. So go ahead and sew those on. We’ll just do it the big way. But just so you guys know it really is a small scrappy piece. It’s about half of a 2 ½.
Natalie: Ya you can conserve pretty well.
Misty: That’s awesome.
Jenny: Ya it’s super easy to. Ope, here you go. It’s super easy to come up with those tiny pieces for the corners. Let Misty iron this. Alright I’m going to move some of this stuff out of the way.
Misty: There we go.
Jenny: Alright so this what you look like at the end of the day. It’s a little bit of a mess but that’s what I love these ten inch square templates. And we’re going to put it on here. And you can see our paper has still kept its shape but we’ve moved in a little here and a little bit over here. But what we’re doing, what I’m looking for right now is I’m looking for this point to be in the middle of my white square because that is my anchoring strip on the whole square.
Misty: That’s a great tip.
Jenny: So as long as this is in the middle of these and I’m covering all my edges, you know, I look to make sure that all my edges are covered. Then I’m just going to trim along here. And I’m not like Natalie, I can’t do the whole twisty turny so we’re going to do this. I can also go around but this would not be the place to make that bad boo boo. Alright so here’s our piece. And like Natalie said, you know, this is one of those where, you know, give it a little pull like this and all those papers have now pretty much released on the back. You know, you can just kind of lift them off. They come up super easy. And I make quilts to be used and loved and worn out. I’m a utilitarian quilter and so if this were a piece of wall art I wouldn’t even mind if I didn’t take the paper off but because I’m going to have this washed, you know, I’ll want to take that paper off. So now let’s look at how these go together because this is super fun to me. Misty, can you press that down right there?
Misty: Yes.
Jenny: Down right there. So when you put them together, I put them together in big blocks like this. Oop, now see I would not have that so we’re going to flip him around.
Natalie: I think it looks kind of cool, it makes it look like you somehow have a corner piece there instead of. I don’t mind it.
Jenny: Ya no we don’t mind it but also, oh here’s the one I was losing. I thought I had another.I had another.
Misty: Look at that.
Jenny: See how cute that is and I chose to make huge big blocks like this.
Misty: I was just going to ask if you sewed these together first.
Jenny: Yes. Now again with all the other things that we’ve done, you know, if we did this whole row, you know, you do a whole chevron row and the next row can come in.
Natalie: Any block that has a line down the middle is essentially a half square triangle. It could go into all of those different designs. They can create stars. It can create, you know, all the triangles around the world patterns.
Jenny: We actually have the quilt that all goes in one direction. So let’s take a look at the quilt. So we’ve got one, two, three, four, five, six, seven, eight, nine. Nine of these big blocks on here. It makes a great quilt. It’s about 70 by 70. And so it’s a nice size. We’ve got a big six inch border out here. This is our backing back here. This fabric is just so fun, isn’t it? I love the little gold flecks and this quilting pattern is called Sticky Buns. It’s just around and around. It’s one of my favorites. I use it a lot. Anyway it’s just a great way to use papers and strips. It would be fun to see this all scrappy. Like when I did my camper quilt it was all blue and green strips, you know. And it’s just fun to do. So I hope you enjoyed my paper piecing project for the Triple Play.
Jenny: So we hope you enjoyed this month’s Triple Play on our ten inch paper pieces from the MISSOURI STAR QUILT COMPANY.
Jenny: We hope you enjoyed watching this video. If you’re not already part of the Missouri Star quilt family you can hit the subscribe button below so you won’t miss a thing. And if you click that bell it will notify you every time a new tutorial comes out. See you next Friday.



