Skip to content

Free quilting video tutorials from Missouri Star

Quilting Tutorials
Triple Play! Easy Hourglass + A Block LIVE from the Studio!

Triple Play! Easy Hourglass + A Block LIVE from the Studio!

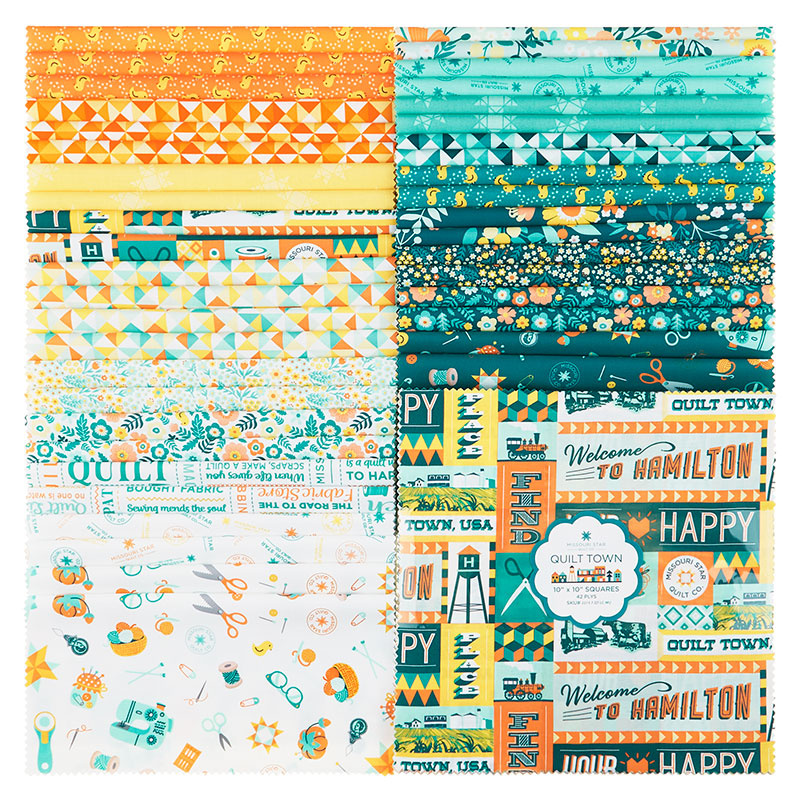
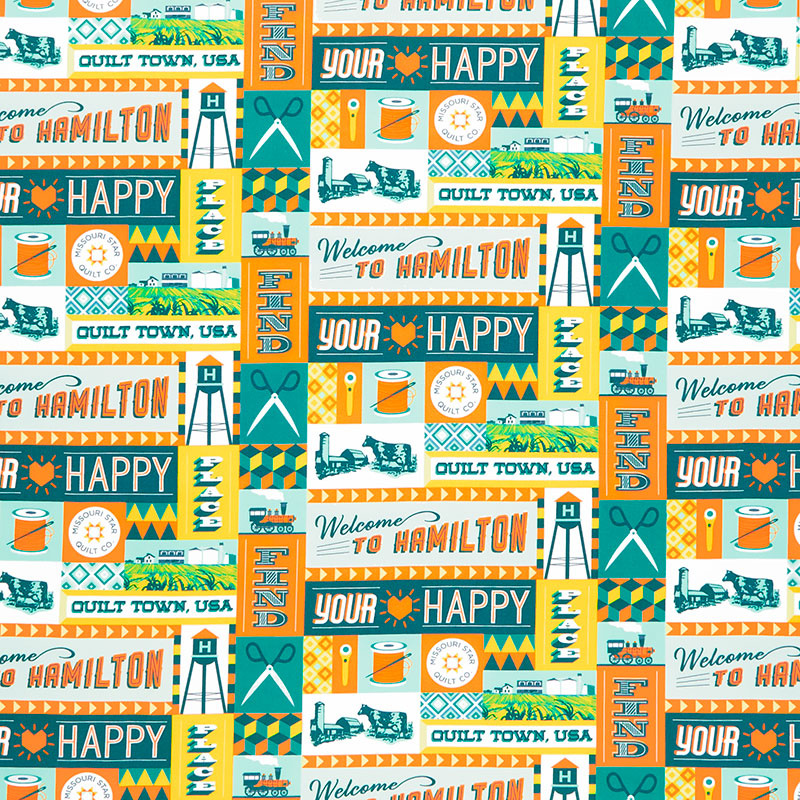
Today, Jenny, Natalie, and Misty take the Easy Hourglass Block and add a block of their choice to make something magical. Made out of the NEW Missouri Star Fabric “Quilt Town”, you’ll love seeing these quilts come together. This tutorial aired LIVE from Jenny’s studio, and it’s filled to the brim with layer cake heaven and unedited fun!

Instructor

Jenny Doan

Jenny Doan is an American quilter, author, and YouTube personality. Jenny started Missouri Star Quilt Company in 2008 and today it is the largest quilting supply vendor in the United States.

Common Questions

What is covered in Triple Play! Easy Hourglass + A Block LIVE from the Studio!?

Today, Jenny, Natalie, and Misty take the Easy Hourglass Block and add a block of their choice to make something magical. Made out of the NEW Missouri Star Fabric “Quilt Town”, you’ll love seeing these quilts come together. This tutorial aired LIVE from Jenny’s studio, and it’...

How long is the tutorial video?

The tutorial video is 00:57:59.

Are supplies listed for this tutorial?

Yes. The tutorial page includes the supplies and materials connected to this project.

Video Transcript

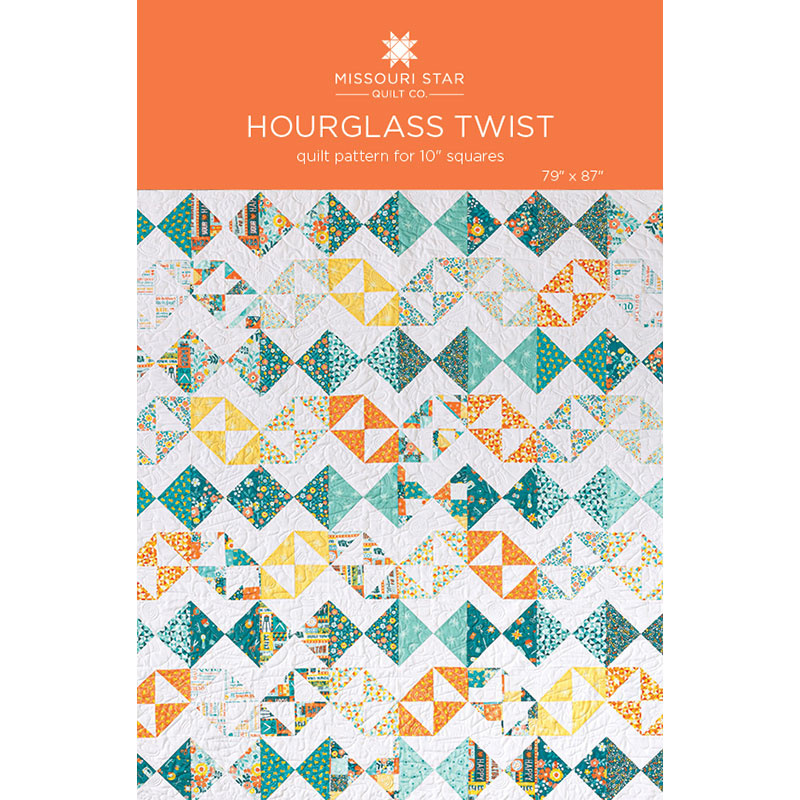
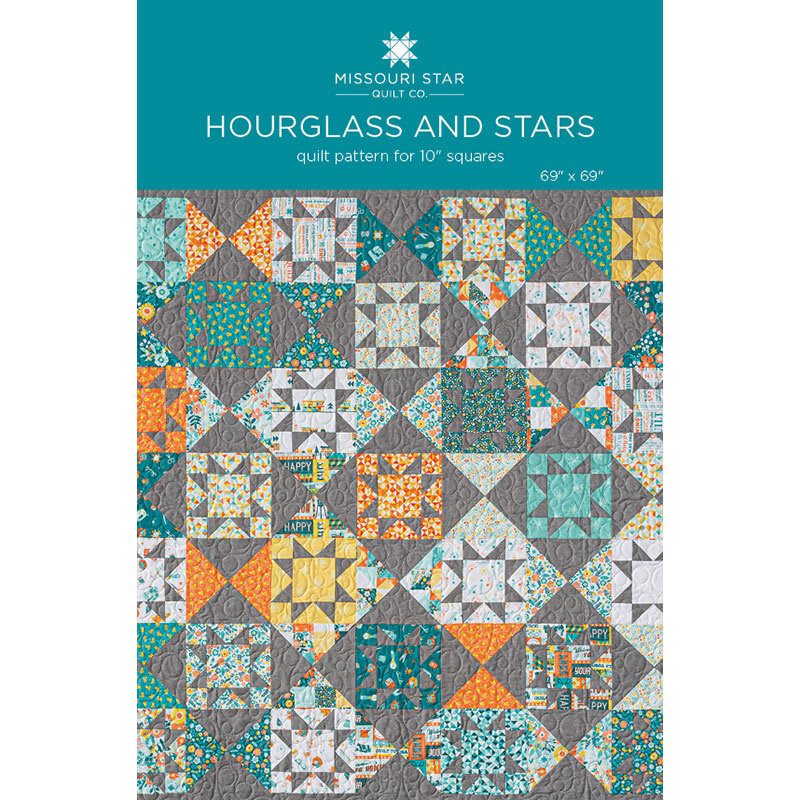
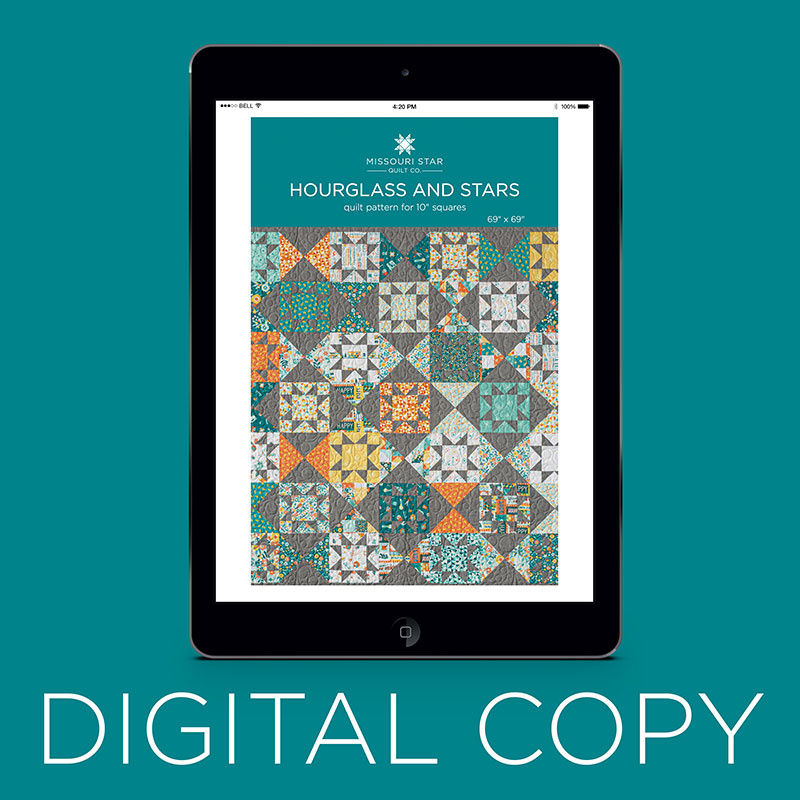
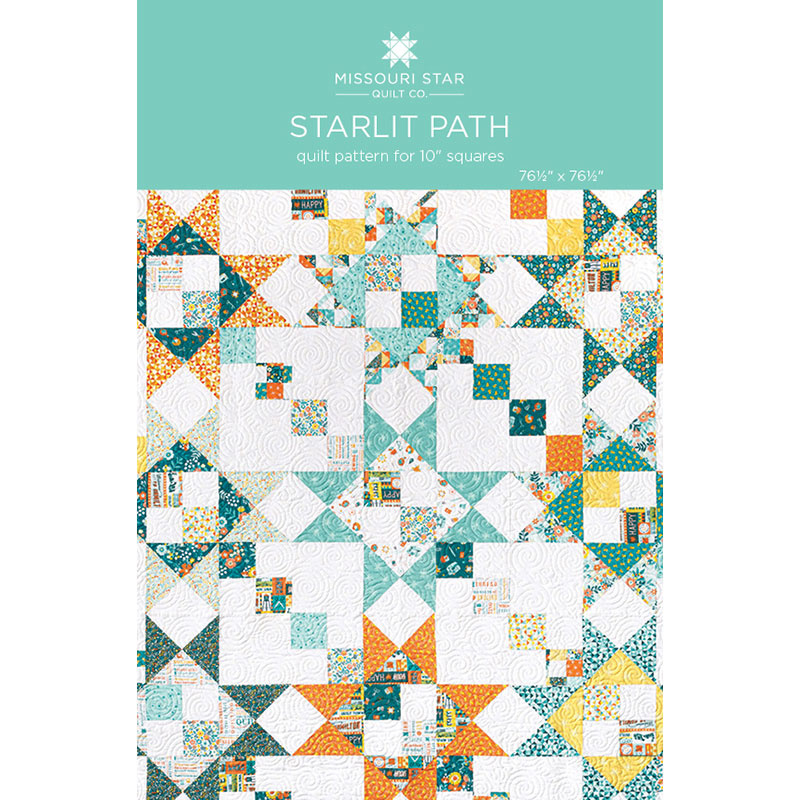
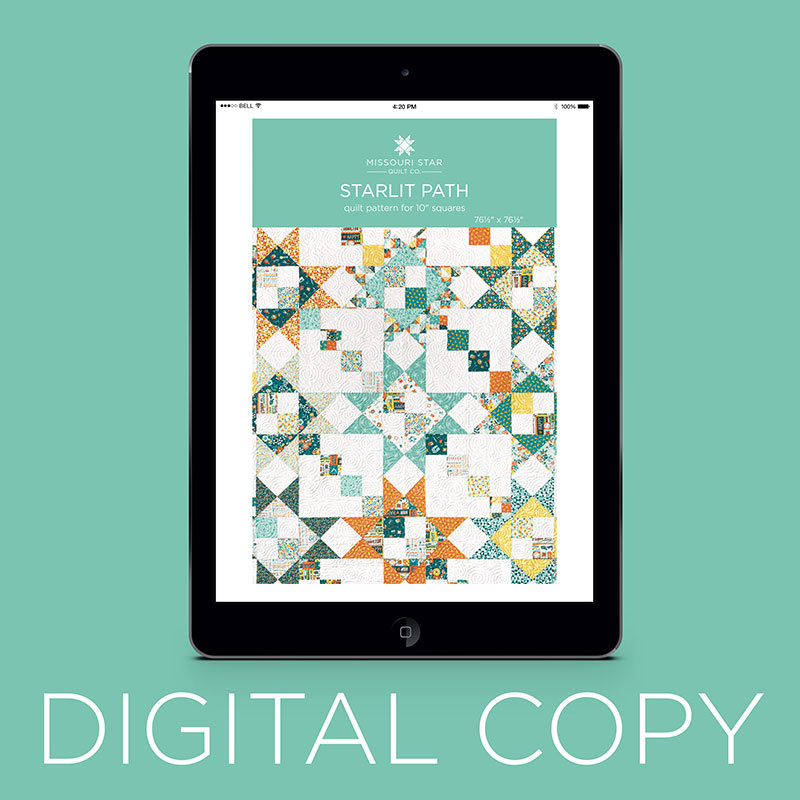
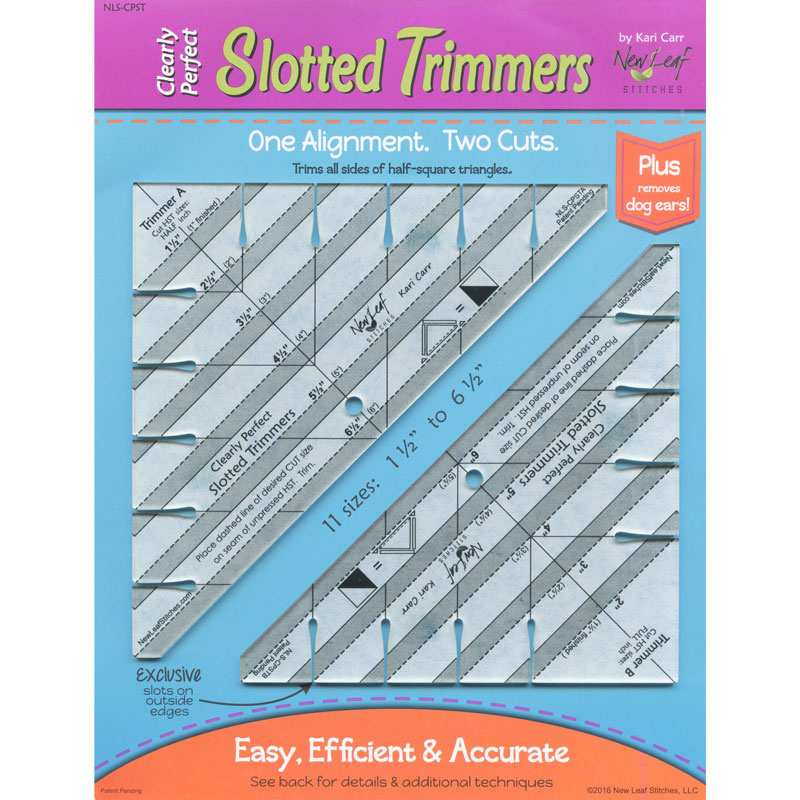
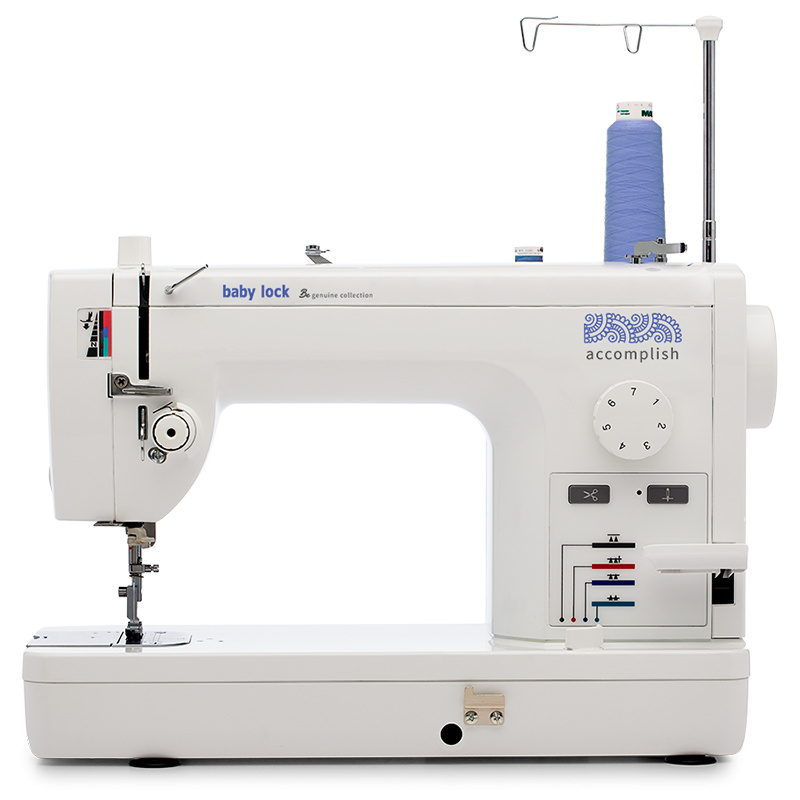
no I need some lips oh too late hi everybody hi everybody good morning good morning good morning this is our first Triple Play Live I know so that's exciting very very excited and uh we're super excited to be here and to be doing it and we've got some really fun things to talk about today because we actually have our new souvenir line yes that we've made our quilts with and they are awesome they're beautiful yeah I think you know so many people want a souvenir when they come to Missouri Star and doing it with fabric is just right up our alley exactly and so we have a triple play the block we've chosen today is The Hourglass block yep wait let me say this I'm here with Natalie and with Misty I got so excited that we have a life and it's triple play week and it's just a play week I forgot to say all the things yeah it's okay no it's perfect that's all right so anyway we are going to start with my quilt um because our block this month was The Hourglass plus another block yep so everybody chose a secondary block and I PL I chose an hourglass plus an hourglass perfect nice I bet you can't see it in the quilt behind me though look how fun this is oh yeah isn't this great so here's our hourglass right here and then we have this hourglass right here that is set on Sideways yeah not point exactly is it on point or is it just kind of sideways well technically it's on point all right well there we go technically that's my girl right here all right so to make our quilt what you're going to need is one packet of print squares and one packet of background squares now sadly when I got my packet here it had one square of the Missouri Star background Square in it and it like occurred to me that we had bolt yardage and you didn't know no you didn't know that our our team had put together this really cool packet of background squares oh we're always looking for background squares that are cute and different and this has you can't probably see it but it has the Missouri Star yeah it's a white on white with a star and I love it so much but I use plain white so here's my plain white right here one layer cake of that one layer cake of print my inner border I used this yardage right here from the line and I used three quarters of a yard and I cut these into little strips and made this inner border out here so cute look the village is really cute all the crown my quilt our whole Little Village looks like our main street here in Hamilton I love it then my for my border it's a nice big six inch border and you'll need a yard and a half for that and I used this sewing fabric right here because my back is all the big mural fabric so this is the the mural fabric right here and um yeah show my back I mean the back of the quilt it's beautiful isn't that gorgeous fun I love it it's a great quilt backing yes and it's 45 so I did have to sew it together so you'll need five and a quarter yards if you use a 108 it's only two and three quarters so that's cool and then I wanted something kind of to pop on the binding and I used three quarters of a yard of binding and I use this little Chuck the duck because it comes just this bright orange it's cute you know it just um you know it adds everything together binding this time too it's really fun all right Misty girl okay move these things out of the way we'll get started on the Block okay so the first thing we're going to do today is we're going to make a large hourglass and I'm going to show that and so that mostly so the girls don't have to show it you know we don't have to show you like 20 times so what we're going to do is we're going to take two squares and put them right sides together we're going to draw the line diagonally once and we're going to sew on both sides and I've already done that wow not for this one not for this one okay so then what we're going to do is we're going to cut this in half and Misty make sure your iron's nice and warm I'm ready and then we're going to press this open okay both of them and we're going to press to the dark side so I keep my dark on the top there's one there's one and she's going to press another and while she's pressing that I'm going to draw the line corner to corner again so that it goes what what did you say yesterday Natalie perpendicular perpendicular or Crossways to this to the center line forward I know it's like I'm like wait what does that mean perpendicular just means it crosses the line all right so then we're going to draw a line this way and we're going to put our two pieces together so that they're on opposite sides so color to white like this and we're going to Snug up that Center seam right there and Natalie I'm going to have you go ahead and I'm just going to smoosh this up just a tiny bit okay there we go and so on both sides of this line all right this method gives you two half Square triangles which I always love when you do one thing and you get two bucks so um did I get that or is it I think so it seemed bumped up here's my real about mistakes if you put your quilt out and you have to hunt for the mistake I don't even worry about it yep if your eye goes to it three times then I fix it that's the rule for me that's a good one all right all right so now what we're like this and then I'm if you'll grab me if you'll grab that one so half this is the clearly perfect slotted trimmer it sure is a two is that right yep trimmer A2 so these ones are bigger than yes these are these are the larger ones and um and I'm lining it up on the eight and a half and I'm lining my seam line up with theirs this way and also this way and this one comes a little bit over so I'm just going to move that a little bit hold it down these are this channel is great for hourglass because it gives you that line on the seam that you can really keep all your Corners lined up right so if you'll press that of course and then I will do this one right here thankfully it's not scooched in the middle how'd it come out looks great awesome beautiful perfect did I do it right all right so they're that one and so then you get these little hourglasses like this and they're eight and a half is that right they are eight and a half squared to eight and a half really yep and the reason I did that is because my next hourglass is four four and a half inch blocks which also ends up eight and a half so Misty are are yours different sizes they are oh okay yeah okay because I did I looked through all the patterns and I was like oh someone's different size I thought it was a mom but it's you yep no cool mom's eight and a half all right so the here I have two blocks together we're gonna make the easy eight half Square triangles and I have these two blocks together and I have drawn two lines so that we can get eight half Square triangles out of here and Natalie you'll want to sew on both sides of those lines okay and then we will trim those up I have a bunch here that are already trimmed but I want to show you how to do that as well and we love to watch Natalie so we do it's meditative right she's so good at it that's right oh stop it's true flatter me it's just like stop I'm blushing I actually think we're a lot more Goofy on live I think so you know we can we know people are watching right away you can get away with it yeah a question this would be the perfect yeah do we have any questions Dalton how many people we got watching we got some people watching we have quite a few people watching had over 2300 when we first [Music] um nice I do have a question here from Deborah is it important to set the seams before you press to one side it so I used to do that all the time and then I like stopped because I just get in a hurry yeah and so while it's important it's not um entirely necessary yes we'll still as long as you're you're looking for a flat block at the end of the day critical no that's what I was looking for important but not critical yes so I just forget most of the time because I'm like oh I want to see what this looks like you know I'm making it I'm working on it it does help everything lay nicely yes it does one more we do have a piece of advice from Linda she says that she read somewhere that if you ride up on a galloping horse and you can't see the mistake in your quilts it's good to go there you go and for those of you who don't ride a horse you could like roller skate by exactly you know maybe your animal of choice is an ostrich yeah it could be anything it could be true I don't recommend ostrich writing I've never ridden one I've just been near one and they're terrifying I feel like that's something I should put on my bucket list an ostrich write an ostrich oh huh it's not on mine [Laughter] okay so wait I just cut this on the line and what I really wanted to do was I really wanted to cut it diagonally and horizontally first the reason is the line is always going to be there yes vertically and horizontally first thank you and the reason is the line is always going to be there and this way we're cutting where there are no lines when our square is still together but it works either way because basically we're just cutting this into five inch sections and then we're going to cut horizontally vertically and diagonally twice and then we have eight half Square triangles and we are going to square those and remember this one when we made our hourglass it made two blocks this also makes two blocks nice and so it's even one to one that's perfect all right so I'm going to grab this little thing and I'm just going to square a couple of these because these get squared to four and a half like this and you can see my line is on their line and it's just a little bit we're trimming off but that little bit is going to make all the difference when things start fitting together and so I'll do I'll just do a few of these and then Natalie I'll have we'll have you start sewing them together we're going to put these blocks together as an hourglass as well I'll set the seam this time and put this out of the way she's setting the scene oh good girl Hey listen to that one I was careful oh there we go and one more and then I'm just gonna because I have some of these cut I'm just not gonna trim them up right now I'll do it later because I can show you only need to make one block yeah I can show you the block and so I have some of these as well so what we're going to do is we're going to make an hourglass out of these and that means our two colored points are going to go in and our two solid points are going to go in and then you're just going to sew these together as a four patch okay like this and um and I did not lay those totally tidy so you might want to check those out we should use them actually it's not hard work right no it's just and all of us have gotten to where we love squaring yeah I really enjoy so um and I think it's just because it makes it it makes your blocks so uh perfect so neat it's very satisfying yeah all right Misty can you grab me a Kleenex down there absolutely excuse me everybody enter it's winter and and our weather keeps going from in Missouri yes we had snow on the ground sticking snow this morning nice ice on our walkways and when I came over here I almost didn't need a coat I know it's bizarre I yeah I just can't so oh I should leave those together I forgot yep those should be ready to go as if you've if you've chain pieced them perfect yep I just forgot these like this push those two apart so and then we'll do the same thing to this actually Misty since she's sewing you can quickly press this of course and if you always press to the dark side then those seams will be they'll be good either way yep they'll Nest yeah and while we're pressing those we have a question from Brian is that a wool pressing mat that we're using today it is a wool pressing mat and we do love the wool pressing mat I have a small well pressing that in my studio and my iron noise leans off the edge oh it like rolls and I still have like this little burnt Edge no pressing that trying to maximize space all right you can press that yep [Applause] and I'm excited I have to say I've probably laid this quilt out at least seven times really different things there are so many things you can do with it um because I chose on my quilt my darks for the large hourglasses and my lights for the little I had these two together at one point and these two together and I had I had it coming where it was trying to hook but because I did light and dark it you know the fabric didn't make the placement the way that I wanted to so I ended up doing this so we have a roll a row of just our glasses that I sewed together like this you know and I just sewed you know Wonderful interesting how they look yes and then the secondary one I just switched back and forth so that I was always sewing the color to color so here's color to color like this and then color to color and so they it tends it makes them do this you know kind of a little Chevron and this was the the uh the layout that I like the best so I have one two three four five six seven eight nine rows by one two three four five six seven eight blocks eight times nine is seventy two so I did not use all my blocks because I had a few that were just white yeah or just um are very light and I didn't think they'd show up and so 72 blocks remember you get two out of each block and so it just went together quickly and easily this little piece right here hand me the piece of the Border yeah that has the little strip on it I want to show you how such a fun fun to play with so the nice thing about this little border is that it comes it comes on on the roll this way so we're literally cutting this way now that my first strip I just cut folded it didn't work they're not folded exactly and so then what I had to do was open it up and I wanted to make sure that I could still see this bottom line right here so there's a quarter of an inch of fabric below that actually a half an inch below that so that I could have a quarter in the seam so I lined up my um my ruler right here I've lined this up for a right hand there's the I can I can cut if you want so this way and then when I went back to do the top of it I did the same thing I just went a half an inch off of this line which gave the next row the exactly right amount and gave me a top to sew because there was plenty of oops and it is two and a half inches right yeah it just worked out that way that's awesome well I think it was designed that way yeah and um yeah so it's still two and a half two and a half inches and because I think I remember talking to Jackie and saying that we needed a two you know usually about two and a half for an inner border and that it would be perfect and so this I literally just put you know how we put our borders on sides first and top and bottom and just made it work so cute right yeah that's really cool I think that's right I love it so that was mine hourglass plus an hourglass so I think we called it hourglass twist is that right yep hourglass twist that's what it says oh good awesome and it makes 79 by 87 and yeah so this notion to sew is fun because it has scissors it has thread it has little rotary cutters on it yeah lots of different sewing notions on it and I thought it was just perfect for Missouri Star fabric so who's up next I think I'm next all right okay all right so we will put this stuff over here and let me get this quilt down all right we'll hang this one there we go here's this one you might just I don't do it we'll do it this is the top Misty you can uh okay let's talk and I will help now is right here all right awesome is that middle guys that's pretty close I think maybe is that me oh yeah there yeah that's good good you have my step outs cherry thank you all right and while we're moving things around here just a quick question for you Jenny Anita would like to know do you recommend starching when making these blocks this is so cute Misty you can't start um the question I'm using if I'm making really really tiny too yeah typically if mine won't lay down nicely there you go yeah you know if it's not laying down right then I grab that bottle and douse it yeah or if you have Fabrics get me to sewer do you want all Iron okay if you have fabric that the creases won't come out of I'll start yeah you know it's just to make it behave so I know a lot of people will actually run their whole fabric through a starch bath to add to have that kind of patience to wait for it and also you like you like a little bias so that you can eat one way or the other I do I think it's just whatever you get used to yeah and preference and as needed yeah absolutely so it's one of those things where it's like it's a great tool to have at your disposal whenever you need it but it's not critical yeah I think it's fine we might have rotated this the wrong way I can't remember exactly but it looks fine it's three stars and a middle and three stars how the four patches run is written let me look at that where's your pattern I'm not sure will you check the diagram on the pattern I think I think it's supposed to go that way but you can do that these are the things you don't usually see on the normal triple plays very great we have to try multiple wait wait wait show them the back oh yes that's true you guys take a look at this back this fun sheeter take a look at the back behind us so cute all right I love it thank you guys all right are we going the right way now is that right Cherry this way yes that's correct middle is right here right right there that looks good and while we're putting this quilt up here Susan wants to know how are we hanging that quilt on the wall behind me yeah we have a design wall behind us and we're just pinning it right into the design wall it's got a piece of foam and flannel foam batting and flannel yep it's screwed to the wall yeah I put a lovely frame around it a wooden frame so that it because because you bring the flannel to the edge and like um staple it to the wall so that it's all flat and then we put a wooden frame around the coverless Staples exactly so go ahead oh no finish finish what you're saying I was just gonna say we get the foam at like a hardware hardware store Home Depot or something absolutely so this is my quilt I called it Starlet path I just really love my little Ohio Starlight block that I did way back and I actually made a big version exactly like this but this is just a different layout um with more four patches that chain through the whole thing and so yeah I just couldn't resist doing one more option 76 inches square and let me show you how to do it it's basically the exact same method that Jenny did for her hourglass but because I wanted these star legs I used two different sets of colors so I did and orange with my tone on tone let's just do one let's just make one and then we'll draw the line corner to corner so this first part is the exact same way exactly the same yep we'll draw that line there's that we'll sew on either side okay and then this other one and we are using the fabulous white onion yes it's so cute and so whatever um is going to be the legs of your star you're going to need two of that 10 inch square and so this I you pick your yourself what are your legs they're gonna yes you kind of have to decide a little bit and so the legs on this one are going to be this fun orange and then the middle will be these uh Notions and so we're going to place these together and draw a line as well sorry I was doing too much talking and not enough marking so we'll sew on either side of that and then trim these [Applause] Mr your line didn't quite go to the corner but I sewed um not right on the line so you want to oh I see this one okay no worries there you go thank you cut off perpendicular again like we did before there didn't work today yes remember Hillary kept saying trapezoid one time Hillary nobody knows what that means there we go she's like Mom A lot of people do and so then we are going to take one of each of our sets we're going to pair these together so that we have them going opposites and then we're going to sew on either side and you have to make sure that your two orange pieces are going on yes on opposite side yes you actually do need all four of these I have some already written interesting this is one of those things that it's a little bit of a challenge to my brain like I don't know I don't want to attempt it really this is like making the Ohio star yeah actually this is how we do it for the Ohio State exactly and we do have a question from Debbie she wants to know that could these blocks be made using upcycled denim oh sure and could that be long-armed afterwards it can be long-armed um you have to set your long arm foot a little bit higher because when you get to where all the seams are together that's like eight layers of fat of denim gets to be um unless you're just using the denim inside if you're just using the squares of denim inside you totally can long arm it and it totally is just like a heavier piece of fabric so it would feel like you were quilting upholstery fabric and so it would be fine absolutely and I did Sev I do a lot of Jean quilts and I even put batting in them they're very heavy it's like a weighted blanket my family likes them oh I'm glad you're going to use this I I am so I squared mine to nine instead of eight and a half and so I am just going to look on my ruler and I have this diagonal line that I'm having on this seam line and then I need to make sure that my nine inch mark meets those other points the points just have to go into the corners of the ruler exactly of your measurement so I've trimmed these sides and then I can flip this around same idea this should go right where I want it and then we just trim off the excess I would like to say I could replicate that but that makes absolutely no sense to my brain it's really interesting that is so interesting and so I have the rest of these all squared and ready to go and so you need four for your Big Blocks so you can see I have them ready and they're gonna go like this but oh sorry Phantom sewing no it wasn't my throat my foot was on the thing oh I just don't want you to sew your yourself to the machine oh it wouldn't be the first time it'd be terrible all right and so now we can move on to our four patches so I'll set these aside in the middle four patches four patches yes see oh it sure does it change through okay I should have looked better you're fine and so then to do that we are going to take another print oops they're all pinned together here we go a print and our background and we'll put those right sides together and we are going to sew on opposite sides this is one of my favorite ways to make four patches we actually need to do that with two done hard to tell which is which I know I'm like is that up or down I think it's that way is right side so do you know what helps me with that I'm using a white on white fabric I will lay it on my dark pants and it's you can instantly see which side I'll just put it down and I'll I'll look and you can really instantly see so she sewed on both sides I'm just going to cut this and and then I'll let Natalie press these open yay and speaking of that tone on tone fabric Gwen would like to know what's printed on that particular one Missouri Stars I wonder if there's some way we could could really see it if you if you put it against the um the black matte will it show up I don't know the light sewing through showing through it perfect right there see it has has a little um Missouri Star print on it yeah FYI on this Misti if you drew a line down the middle we could sew the sides and the middles well but we have to switch them oh they have to be switched yeah okay so there we go if you're making plain ones it would work absolutely it's just another little hack yep so then we'll press that and then we'll set these opposite and then we sew down the sides again exactly there you go so then we'll just put these two Fabrics together like that and we'll sew down these sides all right let me make sure they're snugged up did you make your two sets of two the same or did you mix I mixed everything yeah I mixed it up yeah I had them together but then I didn't keep those with a block I just shuffled all of my four patches so that they all had something a little different nice well I love the scrappy look yeah sometimes though if you want the chain to be really bold you would choose all bold colors that's true absolutely here we go there's one more now we can cut this in half this direction you just want to make sure you're cutting perpendicular to that seam it's the word of the day it's the word of the day now I love it okay and then when you open it up we have our four patches they're so cute they are so cute and I trimmed those with my Square ruler as well foreign yes because they end up a little big yeah they should be they should end up about nine and a half yes and so we have to square them down to nine which means I need my middle line to be on the four and a half so one two three four and a half and one two three four and a half so that's what I'm checking so this is in basically a quarter of an inch all the way all the way around yep so we'll just trim and trim and then we can rotate this now where do you put the middle thing so I'm looking I'm just measuring in four and a half yeah okay so one two three four and a half on that Center Line and same this way so that it all works out and then we can just trim there we go and so now we can start assembling our block let me put some of this out of the way this is a giant block which is super satisfying and fun because then your quilt goes together so fast so here's our star wait oh thank you perfect and then our little four patches go this way I think that one's still big but that's okay that's okay I have more up here we can swap it out just like so and then these other Corners are just a nine inch background Square just like that oh that's so cool that's beautiful and then it's this beautiful this which is a big black wall hanging by itself or a baby quilt you can put some borders around this yeah you could Board of that thing like four times exactly and it's ready to go so that's it I know a baby who might need one yeah exactly I was thinking the same thing awesome so that is my quilt so you made um one two three three across and three down it's just nine Big Blocks Big Blocks and it's a you know great size we started we did quilting pattern sticky buns sticky buns and a size 76 by 76 yep and I use the same little orange as my binding so I love that on that I'm actually glad to see this on that binding I was worried it would be a little too linear but it looks great yeah it's adorable awesome so Nat Europe my my pieces yay I'm gonna grab a little drink of water we have any questions Dalton we do uh Valerie would like to know why would you use the method of sewing around the square versus sewing down the lines well for one you can get more for two you're looking for different sizes uh for three um any of them work it's just personal preference for me that made sense to my brain to sew around although it does leave the bias edges exposed excuse me I don't think it matters Which Way but um but that's you know for me it's just kind of personal preference and when I started I didn't know there was uh quilt police or rules or ways you were supposed to do this and I come from a clothing background sewing and so we love the bias centered you want me to sew on this one whatever you want to do I haven't sewed yet so also all right I just hope I'm not gonna I'm just feeling a tickle in my throat oh no do the whole thing and I do have Michael from Chicago as well I think he's really enjoying these quilts because he wants to know if they're maybe going to appear in the finished quilt shop oh um so tutorials don't go in the finished quilt shop but if we do happen to make an extra snack it would go there thank you I love that linen background yep I used Essex linen graphite I have a sticky note stuck to my house nice that's funny okay so my quilt I called hourglass and stars very descriptive name for you maybe not the most creative because it's hourglass it's hourglasses and stars and to make my quilt you're going to need a package of 10 inch squares you'll need some background about two and a quarter yards and that includes the inner border right here which is two and a half inches it's fun to see it with a different background yeah Essex Linux gives it so much texture sure it's great I just wanted to see what it would look like with something besides white I thought why not why not yeah so my outer border is a yard and a quarter and it's a good size I believe it's a five inch border and I do love your bike I think on borders you can just do whatever you want if you want to make it six inch or ten inch go for it yeah so for me I if I'm fitting it to something that determines my border size or how many borders I add like this top may go over the top of a queen size bed but if you want to draw hanging you know and remember when you add borders that if you're adding a four inch and a six inch that's like 10 inches but because you're adding to both sides it's really 20 inches bigger on the quilt so it makes a difference just quickly yeah quarters can make a huge difference but you want to show the back yep so the back is this great print it's just squares it's like two and a half inch posted stamp looking amazing cheater print fabric that I absolutely love I love it too adorable the quilt pattern is called Circle meander yep and this came loose oops there we go and The Binding three-fourths of a yard almost every quilt we do is three-fourths of a yard for binding so yeah it's true it's a great little size it's this yellow um the light yellow print from the line it's a tonal print same as the white but so in the white print we have the white the yellow and um yeah and actually a little bit oh is that actually enter we'll just peek through here and let's see this one right here yeah yeah so it is so this aqua color that gives you a good idea of what all yeah this is what the white and white looks like as well so yeah we can show this and maybe it'll give you a better idea can you see that Jared thank you yes there we go perfect this is what the White and the yellow look like they're tonal prints they're beautiful they're so pretty and the white is the same they're just tossed so there's no linear for those people that have that line thing like I do okay so let's get started so I made my hourglass blocks just the same way Mom did they're eight and a half I don't think I need to show them again do you I think no no just back up to the first where mine shows because you just lay two squares together draw the line so on we've done hourglass twice they're essentially exactly the same thing and how much do yours measure eight and a half eight and a half so it's exactly the same all the squares in this quilt are eight and a half inches perfect and I used um lighter squares on my stars because I wanted the star legs to pop and then I just use the darker ones for The Hourglass and some of them like this one I I did Dark that was when I learned that you just can't really see it very well against the graphite background so you know am I using a darker background use your lighter squares for things that you want to stand out look for the contrast yeah especially when you have smaller pieces with the larger pieces it doesn't seem to make any difference at all I do want to mention because I sewed a block with the graphite with the linen and it has a little bit more a looser weave so it does it has a little bit more stretch so just be careful and not don't pull back it has a bit of a learning curve but it's beautiful starch might be your friend exactly okay so to make the Stars I did um I I took a page out of Misty's book and we did the let's use this one I like this print it's got like you did the all the way around you did your yeah your stars the method that you did in is it called star saw two stars and stripes yeah Sawtooth Stars and Stripes all of my all of my linen actually is into two and a half inch squares or two and a half inch strips these are for The Hourglass oh yeah so so if you're making them and okay all right no I didn't because I don't I didn't have the ones that you swapped back and forth okay perfect yeah so Misty's has when you when you see Misty's star thing it's sort of swapped back so it's a good thing you're going to show this so I didn't do that so we've got just one layer and I just cut a bunch of two and a half inch squares perfect so this needs to be squared down to nine and a half before you get started correct me if I'm wrong mister you're right you're on it okay good just wanted to make sure you've got this okay so I actually forgot the nine and a half when I was doing it one time and I'm like why aren't you not working all right so you're going to square those down for your stars and then you're going to take your two and a half inch ruler and just cut two and a half all the way around the entire piece of fabric which I think is so cool it's a very cool way to make stars Natalie we've gotten a ton of comments people just love the gray background gorgeous I'm glad you guys are liking that I think it's fun to just try something a little bit different so I don't have to go behind my arm or something yes I will because you're left-handed helper side there you go yeah and so on this you might want to use a rotating mat yeah and if you don't have a rotating mat remember if your mat is small or even if it's big you can rotate it you can take it yeah just pick it up and turn it so there you go so now what we're going to do we are going to take these blocks and these ones get star legs added yep so to do that you can draw the line or press the line or just use your diagonal seam tape but you're going you're sewing right on the diagonal right so right to point right on the line point to point and we'll line them all up and do one side and then we'll trim press slip and do the other side this is seriously my favorite way to make stars so when we did our baby quilt this was the star I used for the dinosaur quilt yep it's it's absolutely amazing one of my favorite things I love that one seems like it might be a little small so I'm going to switch it out for one that's there we go if you do get a square that's a little small if you just like um like kind of put it evenly small on the other side it will it will get caught in the scene so yeah I got a little crookedy there so I'm just gonna do that seam again that's okay there we go she's a wild girl all right so I will cut and you can flip and press I am ready we'll get through this in no time at all perfect yep and I'll add to the other side okay so we're just going to put this on the opposite side and we're going to sew point to point so that it intersects with that first star leg that we've that's right oops sorry I gave that to Misty instead of you yeah I kind of skipped a step sorry nap what do you mean well because I handed it to Misty before you explained yeah no worries now you can show all right so we're gonna we'll add the other Square to this side and Sewing Corner to Corner or point to point making sure that your centers overlap and they do because your little rectangle is four and a half and you're two two and a half's overlap by plenty to keep your star point you won't lose your point yep unless you're sewing a 5 8 inch seam what's your shoe review well you're not really sewing any any kind of inches because you're just going point to point no I mean when to lose when they lose not to lose oh when you're yes yes when you assemble your block be sure to use a there we go quarter inch all right and Misty Christina would like to know what sewing machine are you working with today this is a baby lock accomplished it's a straight Stitch super fast great for piecing all right so now we're just going to place these with the background Fabric or the Essex linen facing the light Fabric in the middle and you've got a star so cute fit so I just do this chain piecing thing all right I'll give you each piece as it goes it nice and straight and everything kind of looks pretty good now I've got to straighten this one out better so I don't mess you up sorry I didn't look at that there you go we do have a question from Michael Natalie he says he's a little confused is The Hourglass making the Sawtooth star look like it's on point or did you put them on point no The Hourglass makes it look like it look like it's on point these are all set yeah you'll see you'll see this one there yep I do I have quite a few blocks made so we can kind of show how it lays out oh no it came unthreaded it literally throws the star on point good question Michael so I love those kind of tricks in quilting where you know you're like how how did I love I love how this works so these the hourglasses are opposite every row is opposite these ones you'll see are kind of side to side and these ones are up and down and that creates this box around the star that throws it on point right so so then each star is going to have this one has like a background of the Essex linen and this one has a background of the print I love that and what was the uh finished size of this quilt Natalie ah that is 63.69 squared 69 by 69. yep yep and we do have a question would it be possible to make these quilts bigger oh yeah yeah absolutely so when we do a quilt for any tutorial we try to use make as good use of a whatever pre-cut we're given which in this case is a layer cake to try to make as good of use of that as possible um and so so that you know that if you want to make it bigger you just have to add another pre-cut buy another layer cake buy another egg a little bit and more you know double your yardage and you will be able to well if you double everything you'll double this yes so it'll be you will be you'll have quite a bit left over for your stash or to make a table runner or whatever but so remember with pre-cuts four charms equals one layer cake and one charm makes a baby two makes a crib three makes a lap four makes a twin four charms equal one layer cake so twin twin if you have two layer cakes or eight charms it's going to be closer to a queen king queen yeah queen king or whatever almost done she's getting there one more scene one more seam and that's moving away so we can show off this pretty layout yes yes trying to get all my scenes to go where I want them to go we go I'm so good at this picking up after kids yeah you're doing a great job Mom there we go got it all right let me press that and then you can talk about the layup and we'll start so I started yep stars in the corners and it doesn't yep I did okay I just have to make sure I'm doing it right we always have to double check yeah oh no well you can I'll switch it with something else it's all right it doesn't matter we can put this one down here all right and then our our hourglass blocks go in between every other way yep and it looks like you worked hard and said all those on points yes so cute so that is it I don't think I have any more store blocks I have lots of hourglass blocks but uh that's it so run for the rose so you've got so I have one two three four five six seven buy one two well it'll be seven by seven because it's Square and every row is star hourglass star hourglass but every other row you can do like an a b a b these ones are sideways and these ones are up and down and that creates that creates these on point boxes I see yeah that makes sense so they're up and down and sideways all all throughout that makes sense awesome and that's it it's pretty simple all right all right I hope that works yeah I think we have time for a few questions if you have any questions we sure do a question from Ruth when making your star points do you sew exactly corner to corner or a thread width to allow for fabric fold over [Music] think yeah yeah it's typically you try to go corner to corner I don't even see the thread width anymore so you know I'd have to have a pretty good magnifying glass I think all of us really quilt because we enjoy it and we just try to have joy in it and we don't worry about the tiny the tiny things yeah too much I would say that's our philosophy yeah well we're utilitarian too so we're making wheels for people to love and use and wear out yeah right and if we were worried about it being in uh hanging in a museum or a show we would we would pay a little different attention absolutely but we um technically the thread with would actually make it a little more exactly it absolutely so if you want to do that go for it it's a great it's a person it's a great technique if you want to do that yeah but I don't think I don't think we really worry about it because we're just more relaxed than that yeah what else Dalton what you got Nora says my finished hourglass blocks ended up wavy is their way to save them just started and Michael wants to know is The Binding also from the new line yes it is everything we showed you so this binding is the yellow tone on tone that we held up with the aqua and the yellow and the white this is the yellow and I I love that we used all different colors we actually don't know when we're making these we know the block we're using but we don't know what each other's quilts are going to look like until generally the very end and so so I will say too on this one I pieced the back together because it's 45 but because it's all these little squares it was so easy to match and you can't even tell that there's a seam yeah that's so great it's just like it is it's like magic I love it I love that and there is a question about the quilt Town fabric specifically whether there will be more coming and yes there will yeah they've already ordered more it's on its way I'm excited too yeah and it is on the rails yes the other thing is if you're interested in any of these patterns they're available right now as digital downloads the print patterns are coming soon they've been ordered they're just not here yet yeah so sometimes things take a little longer than we expect yeah absolutely there's all these systems and processes and everybody's just doing the best they can that's all we can do that's right more questions we actually have a question as well about Birthday Bash and what is golden star oh okay I thought about that a little bit Hamilton Mo wait and see oh boy hahaha so Missouri uh so golden star is a contest that we run and for the next so many tests that we run and for the next so many days every 10 purchase you make gives you an enter it enters you into the contest because we're going to pick 15 winners to come to Hamilton during Birthday Bash and they get a shopping spree and they get everything so because it's our 15th year we're going to do that we put on a whole little play about it yeah Missy and Natalie we're already trying to forget that that happens when Jacob told us this is what we wanted to do I wrote him a note and said Mama doesn't rap and I spelled it wrap so he would know for sure that I didn't rap so I guess it was fun it was a lot of fun yeah yeah so we got to make the little video and it's a little contest that we're having and you can find you know they'll link to it on this and then also Birthday Bash is held every September it's the uh anniversary of opening it's our birthday party 22nd almost it almost always falls over the 22nd yeah it's a big party it's a big party so it's it's a birthday party because it's our birthday but and we play all the birthday games we do all the things instead of like we do cake walks but they're not for like food cake they're for layer cakes yes everything is fabric related so it's very funny mostly you have to dance for your prizes yes if you love to dance yes and they're seeing in music there's all kinds of little workshops and demos all through town all the shops we'll have a huge event for us vendors come to town so there's fun things to buy they make food trucks on Saturday they make these enormous birthday cakes out of fabric and Notions that you can um buy raffle tickets so much fun yeah it's very very fun it's over about three days prank shows and designers all the things we also have Missouri Star Academy which is happening in June and for me I love that because it's you know for most of us we may love a designer but the designer designs a fabric and it goes to the fabric house that they work for and then the fabric house sells it to the shop so you don't ever get to interact with the designer and we bring in these designers from all over the world and you literally have like little mini classes where every 45 minutes you go to another class in another class in another class it's just a wealth of knowledge you get to see you get to meet a lot of the designers and it's just really a fun uh fun event so that's Missouri Star Academy great place to watch for that see all the people that you love right yeah it's very fun kind of like a big fabric Reunion yeah I mean did we cover all the things well I was just going to ask did we can we talk about the quilt auction we absolutely can we talk about it yeah yeah that's coming up next week so this is National quilt month yes right now next week or the week after so the quilts will go live for bidding online on the 21st which is this coming Tuesday okay okay and we will have a live show on the 29th which is the following Wednesday yes so so they'll be they'll be I don't know how many quilts at least 15. 15 exactly 15 quilts and 18 years and it will be yeah we'll be auctioning those yes and it's all to benefit quilts of Valor this year it is yeah so we love that it's benefiting quotes of Valor yeah but we'll they'll be online for a week and you can bid on them and then we'll have a live which we've never done that before right typically you only have that day too but we had a lot of feedback from people a lot of people wanted they said can you put them online for longer and we're like yeah yeah you'll be able to look at them figure out which one you want the most bid during the week and then we'll have the live and that'll finish it out exactly and if you are interested in looking into that maybe uh check out the website this weekend okay open eye on social maybe you can get registered to bid coming very soon and all business happens on your smartphone whether you're in person or online even if everybody has the same way to bid you just bid on your phone and then this Saturday is national uh quilting day tomorrow yes so today we are all most of us look I have green earrings okay I'm on pincher oh yeah so happy Patrick's Day yeah we're wearing an Irish and on in just just one more little note on the quilt auction yeah I generally You're Gonna Love what's coming this year it's amazing so I have assembled we have incredible things that's true but even then it's gonna be a masterpiece or a monster piece we'll see well it is if any of you have ever watched um Edward Scissorhands whoa don't just give it away [Laughter] eBay that's like perfect it's the best you're gonna love this it's going to be great okay you'll love it or hate it but we'll have fun either way we'll have fun we do and I won't be wearing that for a week by the way just that night just that night absolutely absolutely without anything else oh we do have a few more uh four Birthday Bash specifically are there activities for non-quiltsers is there a place for spouses to go we do have a lovely building called man's land and it is called man's land because that used to be a clothing store called man's land but it is for any non-quilters there are 12 recliners two televisions a pool table several vending machines and every recliner comes with its own remote the remote doesn't go to anything it's just for you to hold for comfort so it's the Comfort remote and that was my idea by the way I mean all anybody my age I don't know why we can get rid of a TV but we have to save all the remotes I don't know why that's a thing we have doors of remotes that I don't know what they go to but anyway so uh so we provided every recliner with a remote and it's kind of fun but there are also other things that you can do we have a reservoir you can fish we have a uh 18-hole golf course no it's a nine-hole golf course but if you play it twice if you play twice it's 18. okay okay there are some other local activities and we're close to Kansas City and especially during Birthday Bash there is always like people bring their whole family and there's little make and take so even if you're not necessarily A quilter there's different things for you to do we have a leather shop all kinds of fun things on Saturday there's a big um like a whole Bounce House complex that happens you know it coincides with our local JCPenney days and so it's our big Festival yeah it's the steam engine show that it's now it's next month in August in August yes a month earlier okay but yeah it's a lot of fun it is a lot of fun what if you drive around you could probably find some tractors or lawn mowers you just never know it's an adventure every day here what else so true oh we do have a question will there be any more Triple Play Books coming up anytime soon I hope so I think we'll probably it's probably about probably about time for another yeah I can work on that I love those myself I do I'd like to do one of those a year we'll see we gotta talk to the uh the powers that be yep yep for sure and there's been a lot of love for this today so there's the question of course would you consider doing triple play live again in the future well sure awesome yeah yeah Triple Play Live is fun we actually enjoyed doing this yeah yeah it's been great yeah [Music] yeah well thank you guys so much this has been so much fun it's been awesome should we grab our quilts oh yes okay we gotta do our videos our send off as we always do all right hold your block hold my block oh no all right well I'm gonna what was trying to get away from my arms I'm gonna wear mine because it's more fun that way absolutely cold right you're chilly and Frozen oh wait probably my microphone I can't probably say Okay anyway all right well thank you for joining us today and we hope you enjoyed this tutorial on The Hourglass block from the triple play girls at Missouri Star Quilt Company we'll see you later bye everybody

More Layer Cake tutorials

See all