Skip to content

Free quilting video tutorials from Missouri Star

Quilting Tutorials
What If - Antique Lace

What If - Antique Lace

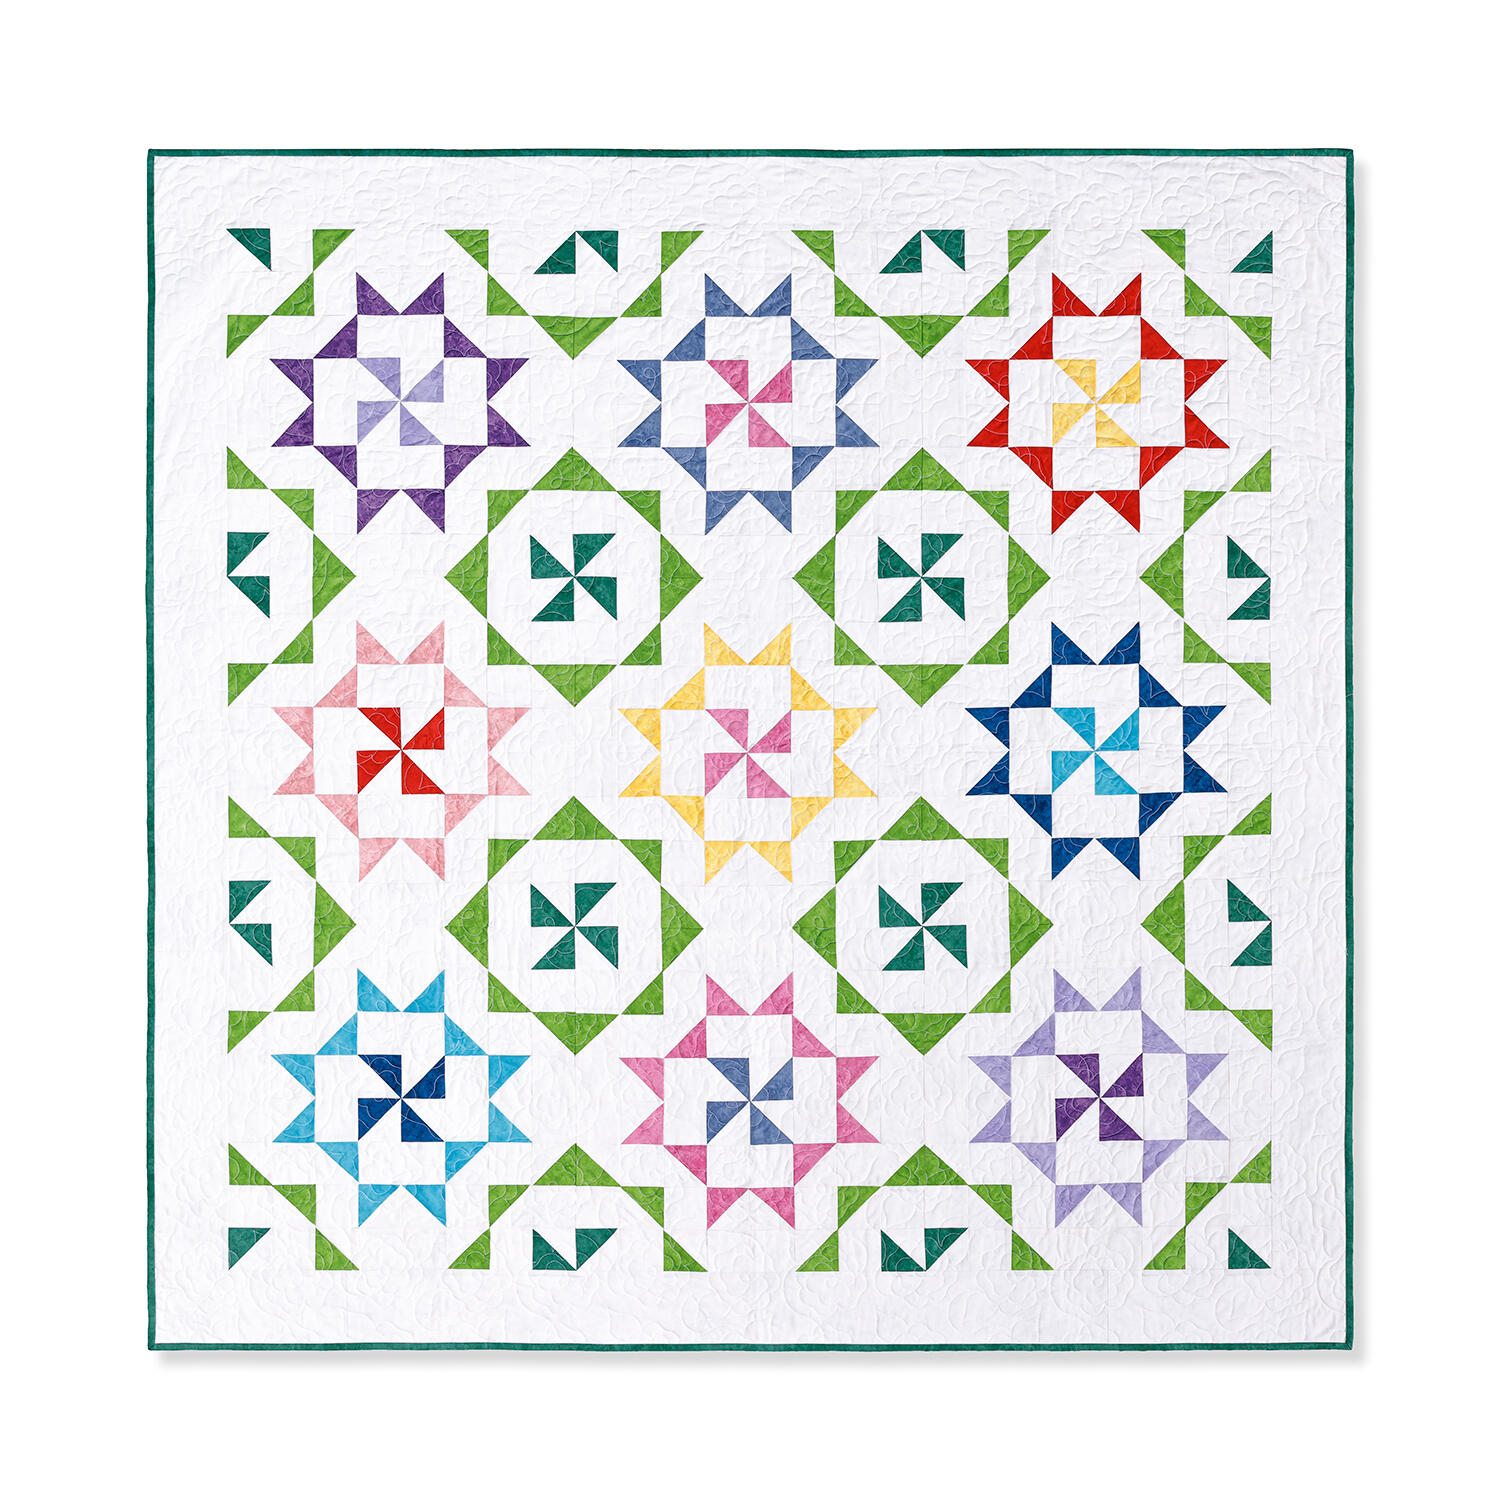
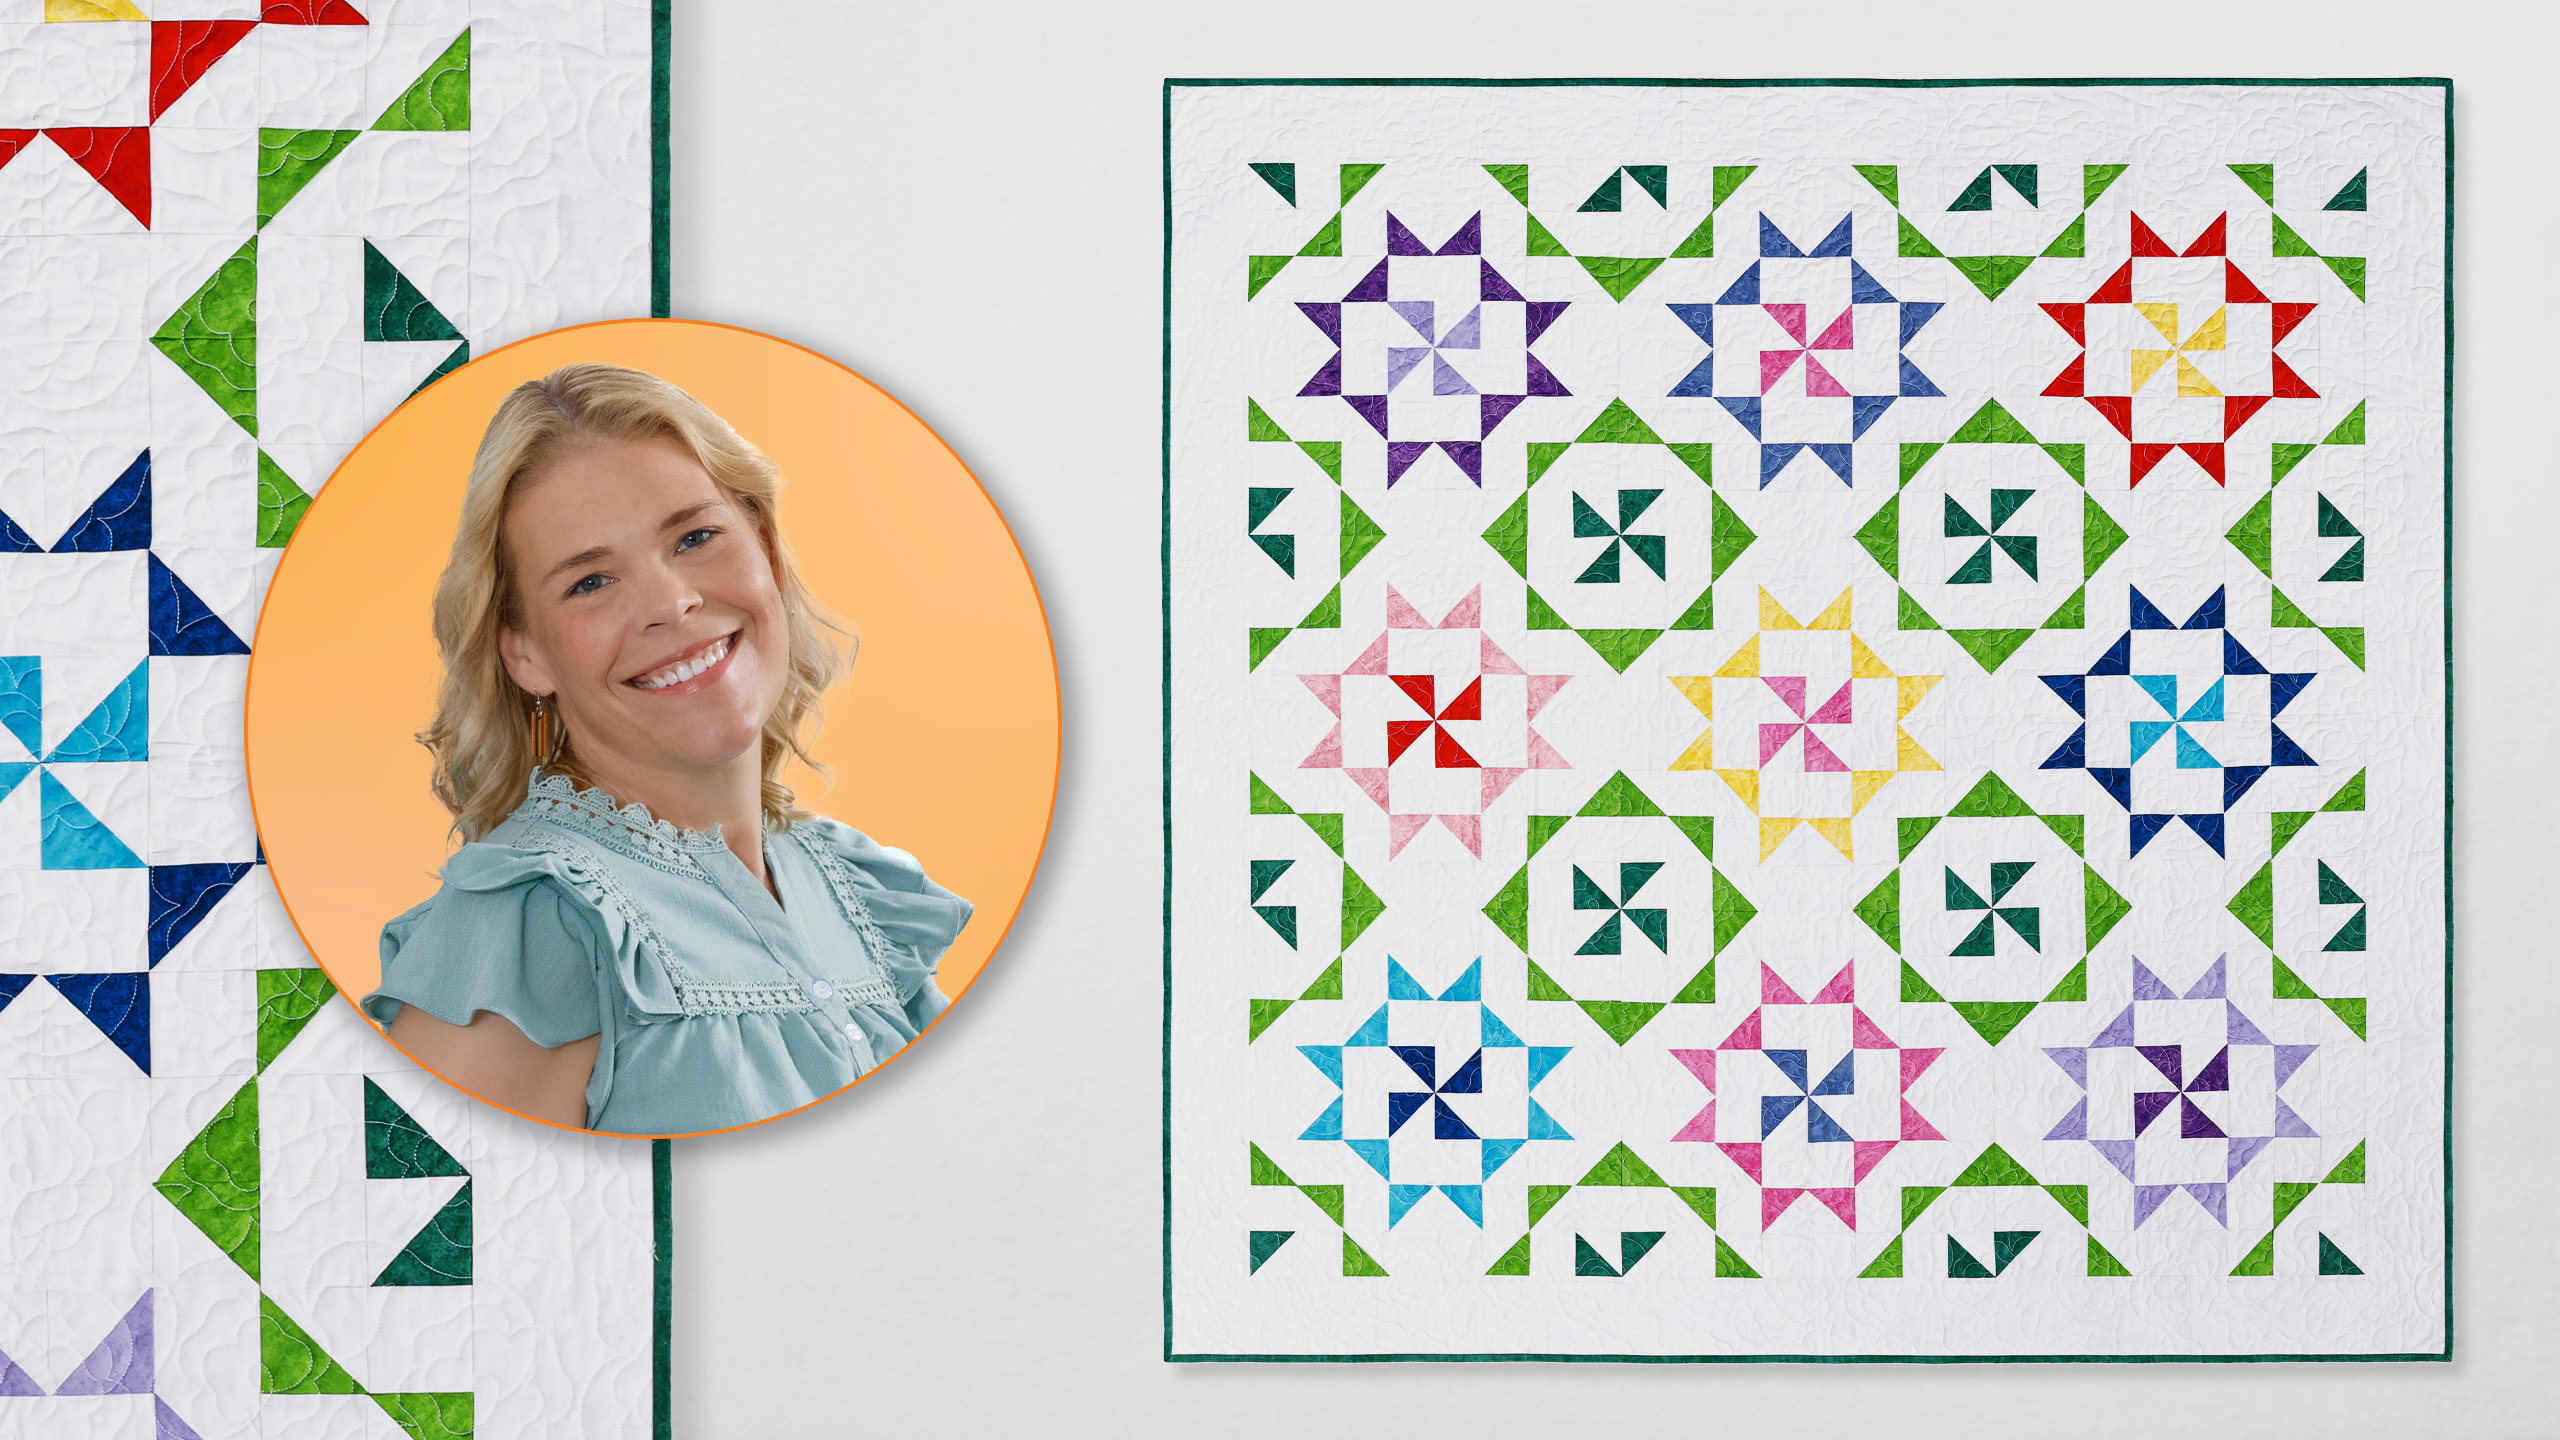
It started with a single quilt block in an antique shop. It was unique—something Jenny had never seen before—so she took it home and stitched up enough copycat blocks to make a quilt. And that, my friends, is how we got Antique Lace. We’ve loved this pattern since 2019; we’ve made it two-color and miniature. And today, Natalie is using Shadow Play fabrics from Maywood Studio to create a lacy garden of COLOR.

Instructor

Natalie Doan

Natalie is the host of Quilting 101, Embroidery 101 and the Creative Strategist and Editor of Block Magazine at Missouri Star Quilt Company. She was taught how to sew by her mom, of course, and began quilting when she grew up.

Common Questions

What is covered in What If - Antique Lace?

It started with a single quilt block in an antique shop. It was unique—something Jenny had never seen before—so she took it home and stitched up enough copycat blocks to make a quilt. And that, my friends, is how we got Antique Lace. We’ve loved this pattern since 2019; we’ve...

How long is the tutorial video?

The tutorial video is 00:18:57.

Are supplies listed for this tutorial?

Yes. The tutorial page includes the supplies and materials connected to this project.

Video Transcript

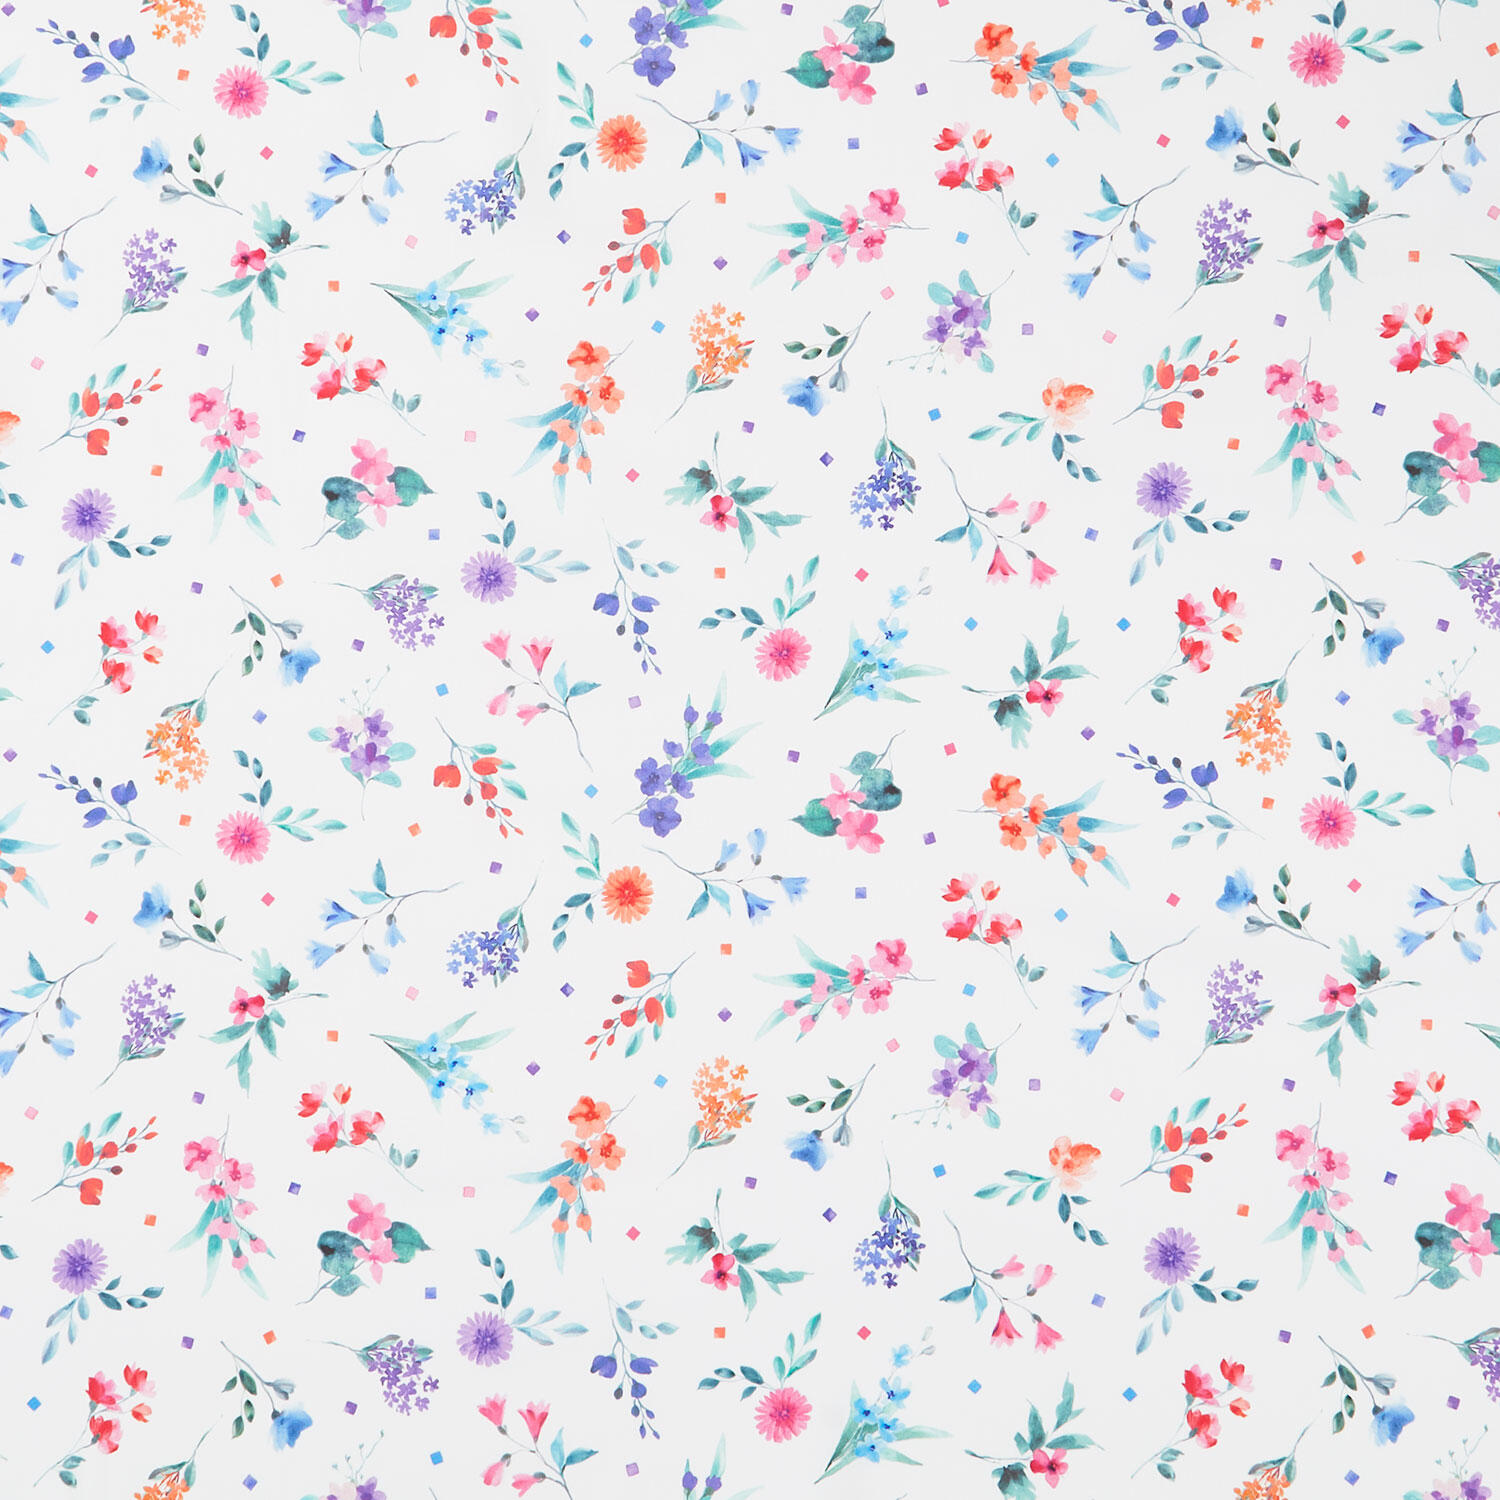
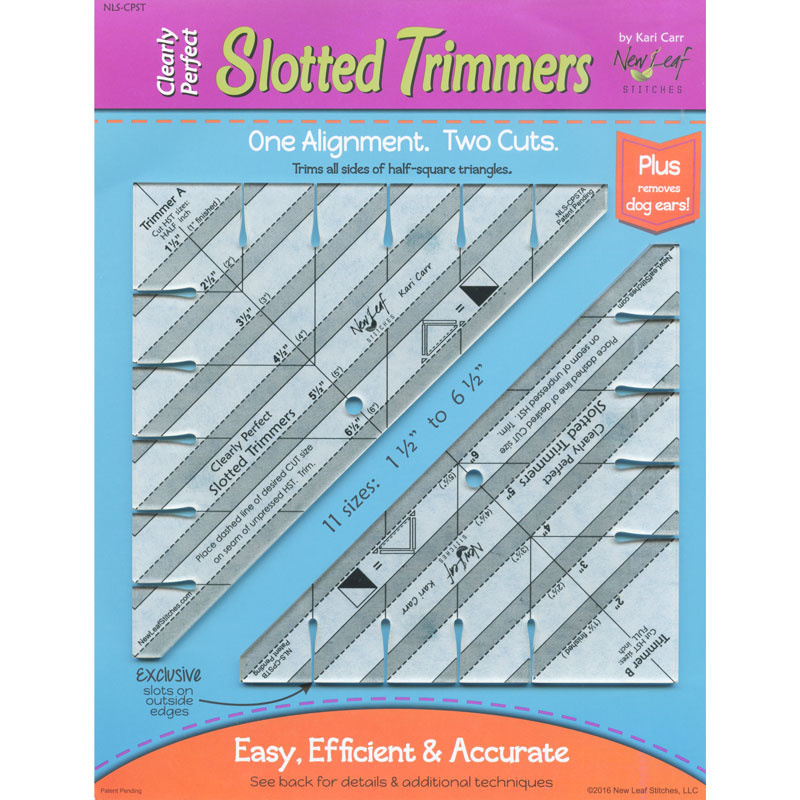
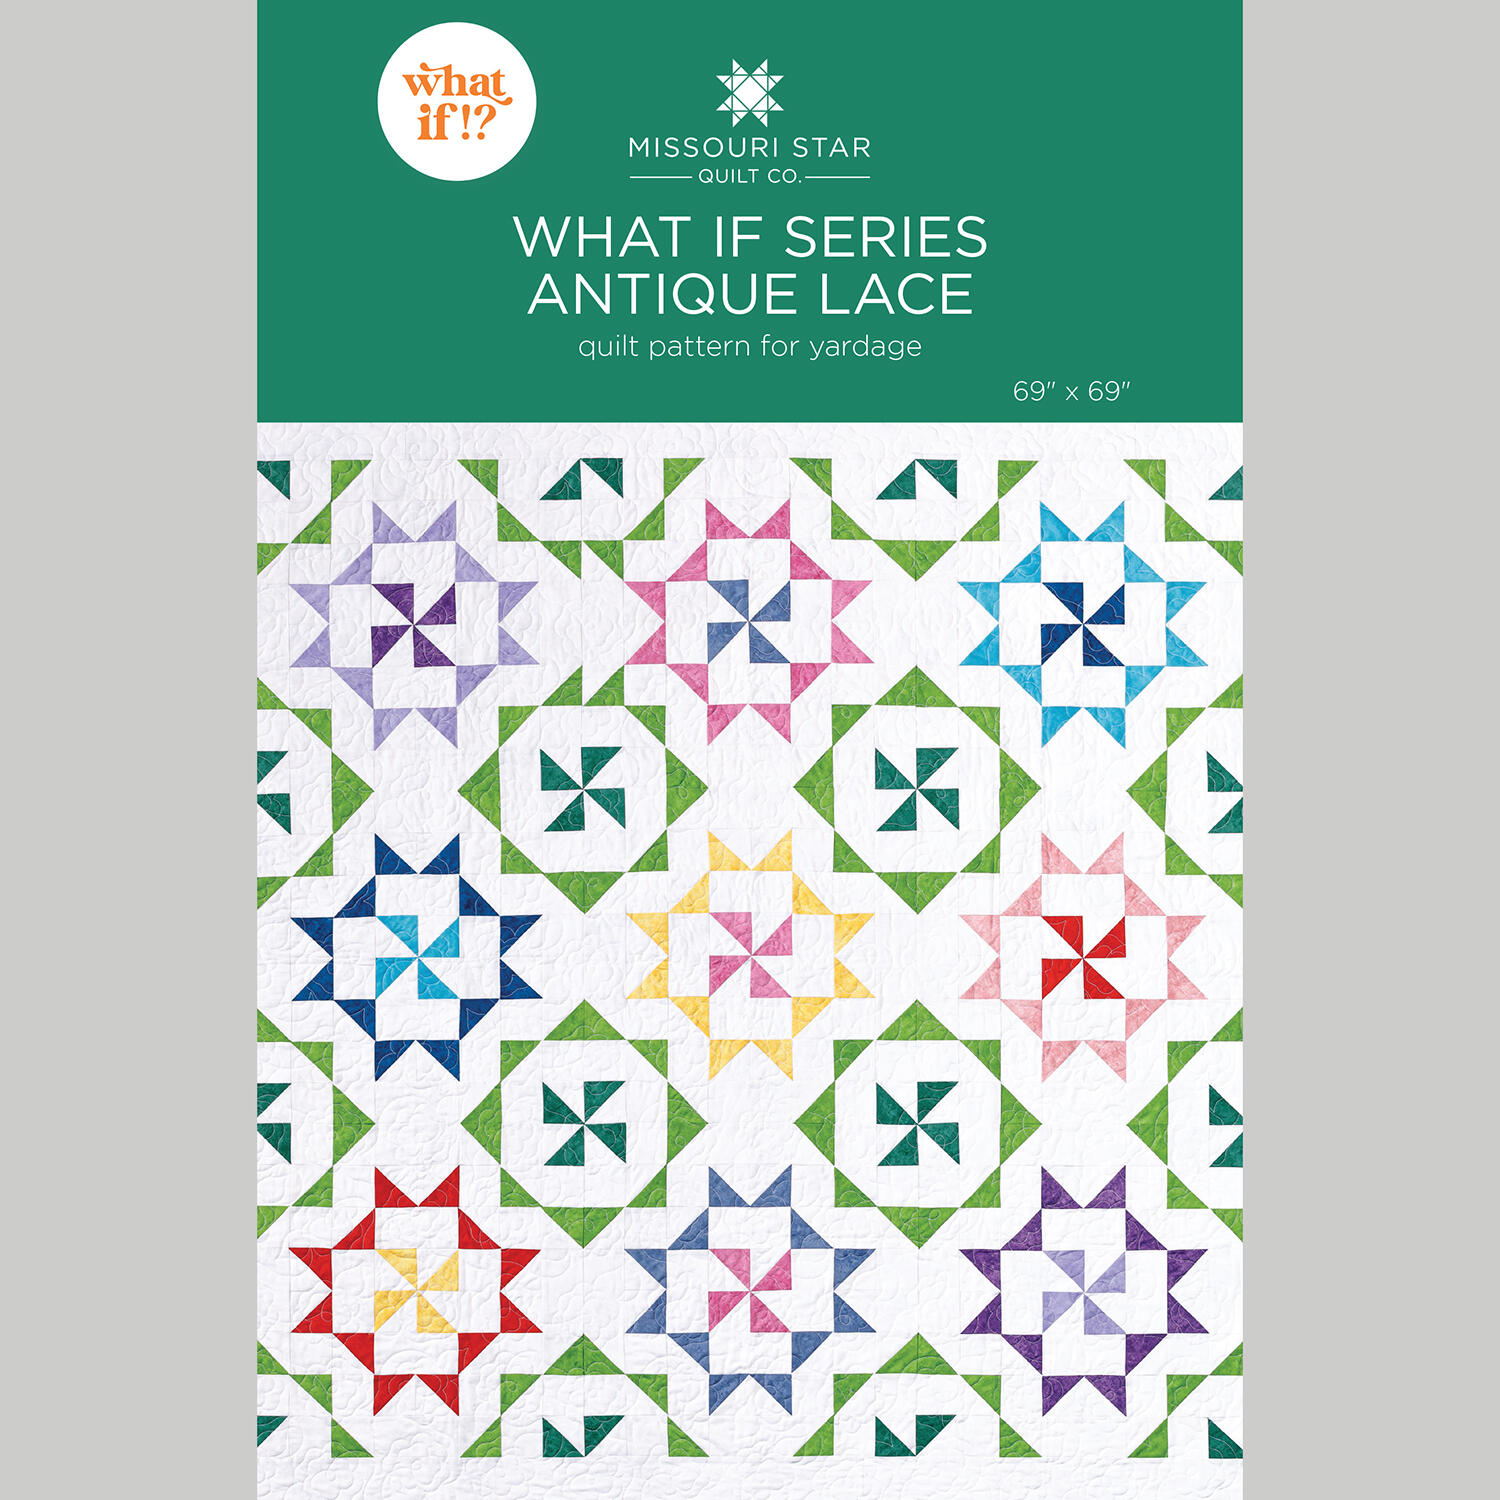
hi everybody i'm natalie with missouri star quilt company and today is our whatif series i'm so excited to teach this quilt it's going to be super fun this is the original antique lace from uh mom's youtube video that she filmed several years ago and it's absolutely gorgeous but if you will wait i'll show you one more all right so this next one isn't that cool just in a two colorway it's a black and white version that we used in mod block and i think it's absolutely stunning but wait until you see what i've got to teach you today we played with color and we made some really cool effects i think you're going to love so here it comes all right so take a look at this quilt i think it turned out just beautifully it is made using um more solid they're they're sort of a tonal fabric but we put colors together that i think look like flowers in a garden so we have these little flowers and then we have this greenery and i think it just looks so summery and bright and it's always super interesting to me what happens when you use colors on purpose in certain areas to create designs and patterns so just kind of keep that in mind as you're making your own quilt it's it's a really fun experiment so let's go ahead and get started the the construction is essentially the same as the first but we'll walk through all the steps okay so to make this quilt you're going to need an eighth of a yard of nine different focal fabrics and these are the colors that we used on all the flower blocks i'm calling them flowers because they they seem like flowers to me and then the green ones sort of seem like the greenery or the leaves so you're you'll need an eighth of a yard of nine focal fabrics and we've used used these beautiful colors from maywood studios you're going to need a couple of accent fabrics now your accent are the greens so the one that you want to see more of in our case we used the light green that's going to be 5/8 of a yard and then the one that you want for your little inner pin wheels that's 3/8 of a yard so not too much of either one but just so you know that's where they go so we've used this light green 5/8 of a yard and then 3/8 for our second accent fabric then we have background background you're going to need 4 and 1/4 yards so for your backing you'll need 4 and 1/3 yards if you use regular 45inch wide fabric and that's what i chose to use this time 2 and 1/4 yards of 108 if you have that on hand or that's what you prefer um i use this beautiful fabric it's that lovely floral it matches the colors on the front really well it's called bloom bright tossed flowers by maywood studios and i just think it's lovely okay so now what we're going to do i'm going to clear off my table we'll take the quilt down and i will show you how to make this version of antique lace on the design wall all right so the first thing you're going to do is take all of those beautiful colored fabrics and cut them into 2 and 1/2 in strips you're going to cut your greens also into 2 and 1/2 in strips those are your uh leaves your foliage and then your background you will additionally need 2 and 1/2 in strips and then you'll need um 3in strips so our half square triangles are going to be squared to three so you're going to subcut some 3in squares and some 3x 5 and 1/2 in rectangles and the numbers for those are in the pattern so let me cut a few squares here i'm i've got these strips already cut um but i'm going to go ahead and grab a few more squares and then we will make our half square triangles the half square triangle method is very easy and simplified for jelly roll strips and makes your whole process go so fast all right so we've got some 2 and 1/2 in or sorry these are 3in squares and then we've got 3x 5 and 1/2 in rectangles so i'm just going to set these aside i've got some of these already cut up here but these we're going to need when we start putting our block together all right we are going to stitch these right sides together on both sides to create a tube so i will do that real quick and then we'll talk about squaring these up you'll want to use a kind of scant 1/4 in seam but don't worry too much about it you should have plenty of room it's a no stress method keep on making sure this fabric stays nice and straight all righty then we're going to flip it around and do the other side here we go so we're going to use our clearly perfect slotted trimmer and we are going to cut half square triangles to 3 in so we're going to line up our seam line on this dashed line here and you'll notice when you look at this that the point of the trimmer tool goes just a tiny bit over my seam at the top and you're just you'll just pick those out so it opens right up there we go so we cut across the top and then back down across the bottom you can pull that away and trim your little edges so that you don't have to deal with those so then see how these are still just attached they just pull right apart it's not a big deal there's just a few little seams there and then you'll come from the other side and do the same thing so you can um you can flip the strip or you can use a rotating mat i just like to kind of go back and forth that way oh and if i forget again you can just cut that um cut those little dog ears you want to make sure that the angle goes in towards the inside of the block and then you won't see those at all and it's not um it's not a cut that ends up being measured against anything so they don't have to be the same angle or the same nothing it's they just want to be you just want to cut that fabric away so that it doesn't create bulk in your seam if that makes sense hopefully all right so we're going to cut all of these half square triangles the clearly perfect tool is the easiest one to use for this method but if you wanted to um if you wanted to or you didn't have it we could use our regular square and line that up but you want to look at where the where the 3-in mark is so it's kind of difficult but you can see that your 3-in line is what you want to line up with your seam line here and if i were you i would go ahead and line this up and then i would place a piece of painters tape perhaps across here because you really can get the exact same effect with the corner of your square so i'm i'm making sure here and i hope you guys can see this on top cam making sure that the 3-in line is right in line with the seam on both edges and then i'm going to cut this across right here just like that and then i will flip it around do the same thing make sure it's at the 3 inch on that seam line on both sides that way i keep it nice and straight and then i'm going to cut back this direction um i'm going to cut my little edges off so that those dog ears are inside you'll still have the little little threads to pull apart at the top but these end up the same size well let me press them it'll be a lot easier to show it when they're pressed okay we'll set our seams and then we'll roll these back to the dark side because when you're working with a white background you'd want to try to have all of your print fabrics pressed to the dark so that you hide that fabric in the uh the seam seam allowance fabric behind the fabric so it doesn't show up under your white fabric i'm going to just show you one more quick thing so you'll notice this one i didn't i didn't trim them off um and so if you wanted to do that you could line your ruler up or you could freehand it if you wanted to i'm i'm confident enough to do that but you can also just cut them off at this point in the process whatever makes more sense to you so hopefully that helped a little bit with some some hints and hacks for squaring but now now that we've got a bunch of half square triangles done you're going to do that with all of your print fabrics and your accent fabrics the greens also all 3in half square triangles so now we can start by putting things together so our center block is a pin wheel that's where we're going to start and we've got light dark light dark light dark light dark just like jenny did and we're going to put this pin wheel together with the colors that we chose you you're kind of going to want to go through your fabrics and make pairs so you have like oh i thought the quilt was behind me but it's not there anymore you're going to want to put together like your reds and yellows or your pinks and blues or purples and pinks whatever color um combinations you like and then you'll start with the pin wheel in the middle and then your other color your your accent color for that block will be all the pieces around it and then out in the corners that's where your green goes and that makes that secondary leafy block all right so we've got a half square triangle you stitch that together like a four patch and i'm going to stick this one right up here on the wall it's our center and then we will go from there so the next thing we're going to do we're going to add our 3x 5 and 1/2 in strips around the edges here we're just going to assemble the whole thing and then we will stitch it together so we've got 3x 5 and 1 halfs and they go right up here i love building blocks out like this because it makes it make so much more sense okay the next thing we're going to do with our secondary fabric we're going to start adding some half square triangles and these ones go around the um around the outside edges and i've got some of them stitched together already but i also have some half square triangles so we're going in with purple in the corners and i need that one these go right in here i just want to make sure i've got my direction right yep so these go in here like this all right so here's our next purple right here found that little guy all right so our next row if we're building from the outside is going to be more purple half square triangles and i've sewn them together in kind of a reverse flying geese or star legs if you will whatever you want to call it i just put these two together with the um white sides touching so these go right here outside to make that beautiful circle that goes around with all the little half square triangles that creates this really lacy look and then we've got some 3inch squares to go on these corners there we've got a couple here okay so then the next color is going to be our light green our accent green fabrics are coming right up and i've actually got these put together in these four patches because well i'll show you i'll show you how it goes together and then i'll plop these ones up because i've already put this unit together so these go just like this long little square in and then we've got our more three and a half or more threeinch squares there's so many sometimes i get the halves and the holes all jumbled up when i'm speaking all right so this goes just like this and this one goes out i believe just like so okay so i've got these ones put together and they're all the same they go right here fills in that corner all right so the next section that we're going to do just fills in these little green um little green half square triangles and another 3x 5 and 1/2 in rectangle and they go out just like that and we're going to continue that all the way around the outside of this block so i've got these stitched together for simplicity and ease but these all point out just like so so it's a it's kind of it can be repetitive you've got a lot of things that are going different directions it makes more sense and can be easier if you put certain pieces together ahead of time so as you go about assembling i would recommend putting together these little four patch outside units and then stitching these together in rectangles these ones as well and then stitch those together and join your whole whole block on the top then i would do the same thing in here but i would build the middle out so i'm going to do this section here and this section here and then add this to itself so that that's one full piece and then have these guys in their long um their long strip sets stitch those together add it to this middle and then strip stitch these ones together and then again same as the top you've got your outside corners and your two rectangle strips sew these together and then sew these to that all right so what i'm going to do the first thing i'm going to stitch together is this one because i've already got these three done so i'm going to go ahead and grab that and sew them up all right so you'll see this quilt behind me is so beautiful these blocks are nice and big and there's no sashing or cornerstones they just connect together so we've got one two three by one two three there's nine blocks total it ends up being 69 in square and that's because we took out the inner border so all of the previous quilts had a 2 and 1/2 in white we just wanted to modernize it a little bit and go with a white 5-in border and then we machine quilted it in this lovely simply roses pattern i don't know if you can see that it's very subtle we used um a quilt that blends in with the background because we want the blocks and the colors to show so they're just it's just very subtle real pretty flowers so the what if series has been so fun for me this year i love seeing what happens when we play with color and try to get creative with our quilts i hope that it's inspired you and i hope that you enjoyed this tutorial on the what if series antique lace from the missouri star quilt company see you next time hi everybody i hope you enjoyed today's video we're trying super hard to get to a million subscribers so if you enjoyed it and you want to see more just hit subscribe and share with your friends and encourage them to do the same and i will see you next friday with a brand new tutorial

More Fabric by Yard tutorials

See all