How to Make a Starry Night Nativity Wall Hanging - Free Project Tutorial
 Courtenay Hughes
- Fat Quarters
- Holiday
- Wall Hanging
- Beginner
- Quilt size 33" × 22"
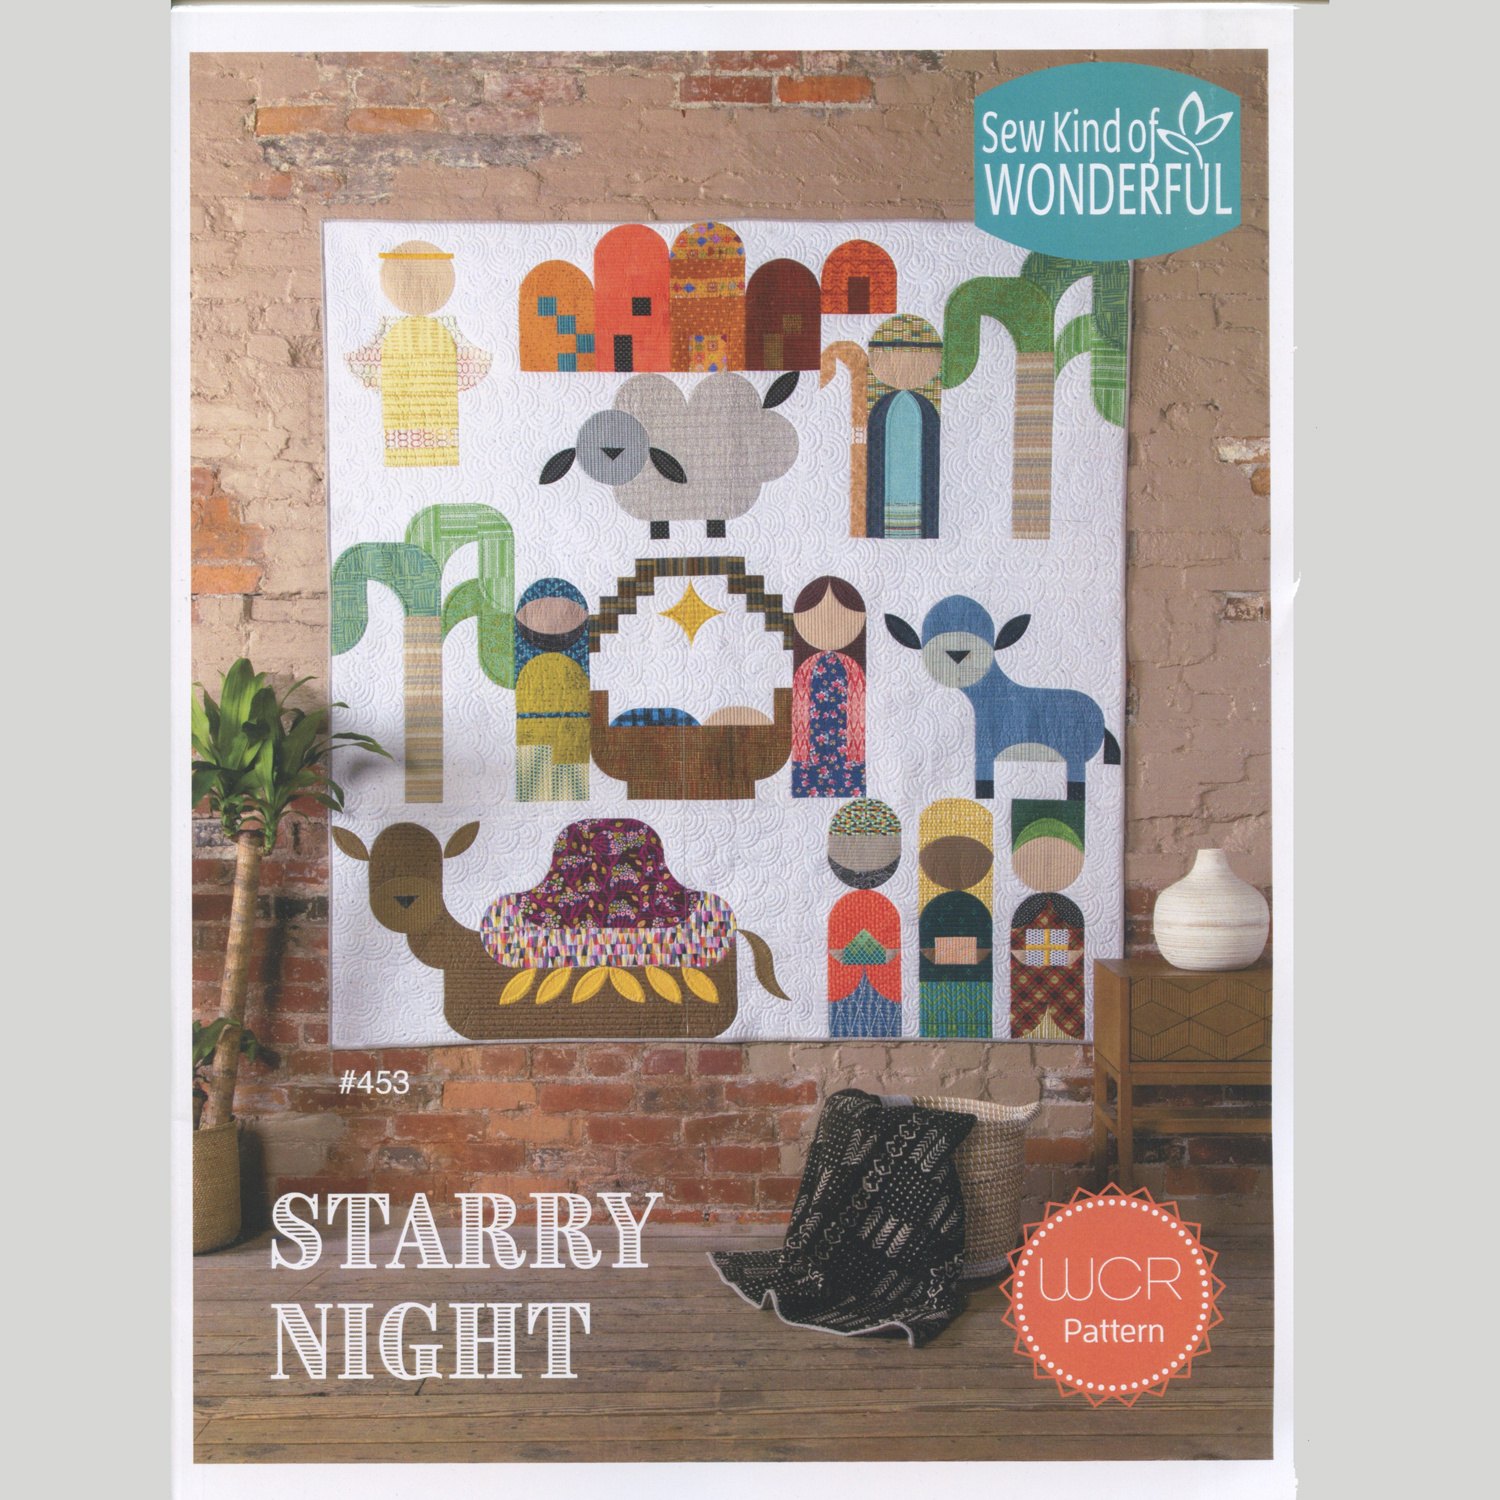
All is calm, all is bright. Learn how to piece a beautiful nativity quilt of a starry night scene with our Missouri Star quilting extraordinaire Courtenay Hughes! Courtenay will take you through each step as you piece this holiday quilt using the wonder curve ruler. When finished, this Holy creation makes a great wall hanging or Christmas decor for family get-togethers.
Instructor
Courtenay Hughes
Courtenay Hughes is a talented instructor of quilting, embroidery, and appliqué classes. She teaches at Missouri Star Academy, in both online and in-person classes.
Shop this tutorial
 Starry Night Quilt Pattern$25.75Shop →
 Wonder Curve Ruler$31.45Shop →
 Kona Cotton - Peacock Yardage$7.28Shop →
 Kona Cotton - Cream Yardage$7.28Shop →
 Kona Cotton - Otter Yardage$7.28Shop →
 Kona Cotton - Banana Yardage$7.28Shop →
 Kona Cotton - White Yardage$7.28Shop →
 Kona Cotton - Pool Yardage$7.28Shop →
 Kona Cotton - Chestnut Yardage$7.28Shop →
 Kona Cotton - Natural Yardage$7.28Shop →
 Kona Cotton - Titanium Yardage$7.28Shop →
 Kona Cotton - Putty Yardage$7.28Shop →
 Kona Cotton - Ocean Yardage$7.28Shop →
 Kona Cotton - Orangeade Yardage$7.28Shop →
 Kona Cotton - Grellow Yardage$7.28Shop →
 Missouri Star Quilter’s Best Blend Crib Batting$14.45Shop →
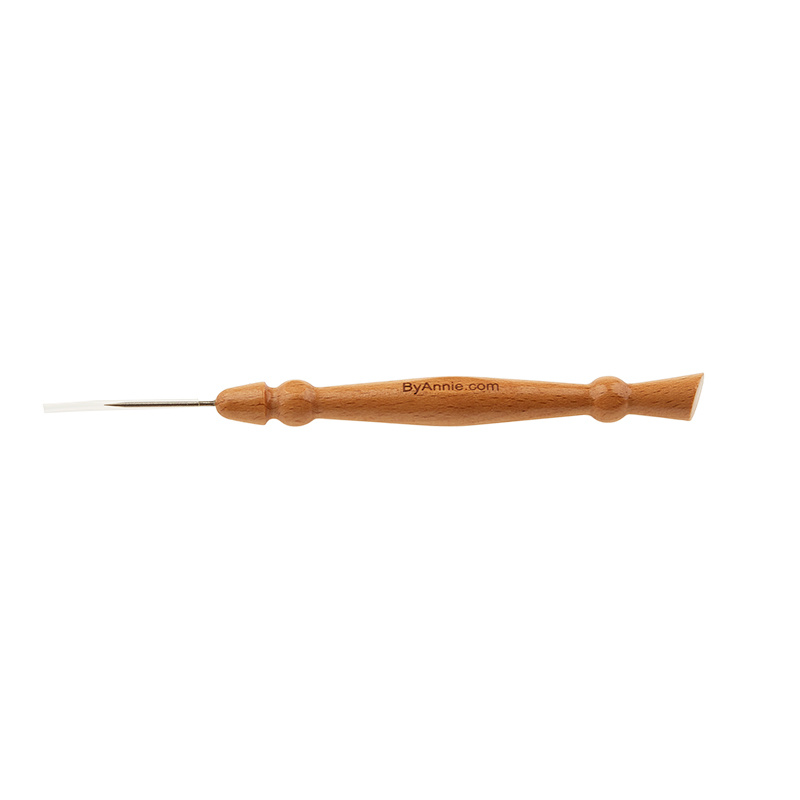 ByAnnie Stiletto & Pressing Tool$19.45Shop →
 Olfa Splash Aqua 45mm Rotary Cutter$18.75Shop →
 Exclusive Missouri Star Jenny TG1600 ProPlus Oliso Smart Iron$199.99Shop →
 Missouri Star Wooly Betty Board - 17.5" x 17.5" Aqua Border$88.95Shop →
Common Questions
What is covered in How to Make a Starry Night Nativity Wall Hanging - Free Project Tutorial?
All is calm, all is bright. Learn how to piece a beautiful nativity quilt of a starry night scene with our Missouri Star quilting extraordinaire Courtenay Hughes! Courtenay will take you through each step as you piece this holiday quilt using the wonder curve ruler. When finis...
How long is the tutorial video?
The tutorial video is 00:29:51.
Are supplies listed for this tutorial?
Yes. The tutorial page includes the supplies and materials connected to this project.
Is a transcript available?
Yes. A written transcript is available on the tutorial page.
Video Transcript
of the quilt. It's called O Holy Night. It is in the whole pattern, we just need a few things to get started let's go!
So let's talk about supplies that you're going to need. You're going to need
fabric obviously. So depending on which quilt you want to make in the Starry Night pattern that'll depend on how much fabric you need. So one of the things that I looked for first was some of the face fabrics. Robert Kaufman has a great little charm pack of tans into browns into lights that really made a good starting point. And then you can start picking out your fabrics from there. The other thing that you are going to have to have is the Wonder Curve Ruler by Sew Kind of Wonderful. We'll put the link for all of our supplies underneath the video so you can click on the link and just get what you need.
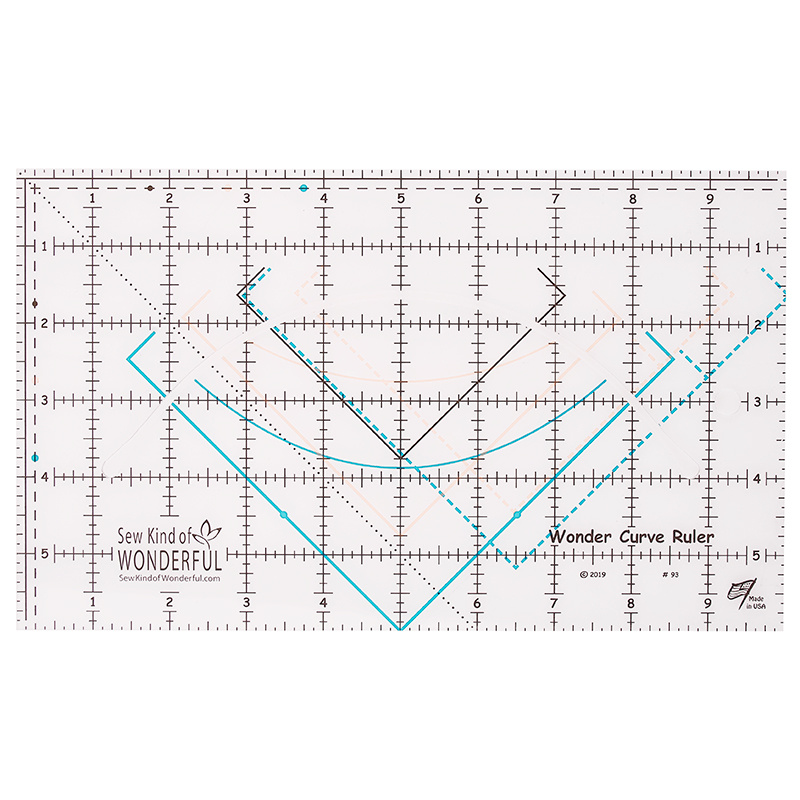
The Wonder Curve Ruler is a great thing to have. They have a lot of neat lines on there. I don't know if you can see those. We'll see these better when we start sewing our blocks, but they have great guidelines on where to lay your blocks so we can square them up. If you're worried about the curves, don't be. These gals know what they're doing - they have you make
everything a little larger than what you need and then we're going to square them up all using this one ruler. They're awesome! Please don't be afraid of curves. If I can do it, you can do it, right?
The other thing that I found handy that I love to use is this By Annie stiletto. What this does is right at the bottom of our curve, I find sometimes my curve wants to come apart from the other piece and I'll show you that when I'm sewing. I love the point on this stiletto - it really gets in there and grabs that fabric nice and tight.
The other thing that I really love is this grippy non-slick non-slip coating. I spray that on the back of my ruler to make make it a little grippy. I like it a
little better than the dots and the sandpaper dots, because it doesn't get in the way of any of my measurements. It keeps my ruler flat on my fabric. And I did find that this ruler, it's made so well, that it did tend to slip and you'll be able to see sometimes when I'm cutting that it looks like it's cloudy in spots - that's from the grippy. You don't need a whole lot. You want to hold your template quite a bit away when you're spraying it so you don't cover it totally. Eventually it'll wear off and you just need to spray it again to give it a little bit more of a grippy coating, but I really love it for this. It held my ruler on top of my pieces great and it worked just fine.
All right, so this ruler is so awesome. It has all of these wonderful lines marked on it - all of our registration marks. There's curves on here and there's these little guidelines that'll go at the end of your squares. Any curve any squaring up will be done with this ruler. If you have not used any of the Sew Kind of Wonderful rulers, they have several out there. What I would recommend...in your ruler you will get a free pattern for these cute little butterfly blocks. I recommend you make a couple of these
just to get used to the process. I used some scraps I had just laying
around and made three little blocks just to get just to get more comfortable with. It had been a little while since I made the quilts behind me so I made these great little butterfly blocks. You can turn these into a pillow, a runner, whatever you like. Give them to your best friend! It was a nice way to get used to the ruler so I would recommend that.
So let's get started on our project! All right, so the first thing we're going to
do - don't panic when you open up your lovely little booklet it is a huge
booklet but it's because everything is so well typed up, written out, so thorough. It works just great. What I did do was I went through and since we're making the O Holy Night which is just Mary, the baby, Joseph and the manger, I went ahead and made a copy of those out of my pattern
book and I also made a copy of the Wonder Curve ruler reference chart. And what that has on it it's in your pattern and it has all of the different
blocks that we're going to need when we're making this quilt. That way I
didn't have a lot of flipping back and forth from the back of the book to the front of the book. So I thought this would just make it easier for me, plus I can scribble on these when I'm done cutting. And when I'm done squaring up I can just scribble on it make any notes and I'm not trashing my pattern. So that's what I have here in front of me, all my little cheater notes.
So the first thing that we're going to do we're going to make Mary. So we're going to gather our fabrics and cut them as directed in the pattern.
And the first when we get down to our directions, we're going to start cutting our curves okay. So the first curve we are going to cut is Shimmer A and B. So we are going to reference over on our cutting chart Shimmer A and B - it's right here - it's showing you how to lay it on the ruler. I'm going to get my two squares for my face fabric and I'm going to do two layers at a time. These are solid so it doesn't matter if it's right side up or right side down, but they would be right side up if they had a print on them and I'm
going to lay them down here on my mat. I'm going to lay this right next to you and see if you can see it so I'm going to lay it just like the square is on my pattern here and I'm going to lay my ruler. It says align the corner on the solid blue V. So I'm going to roll this up so you can see where the V is but I'm going to pull that back so my square is just totally encased in this V
and then I'm going to take my rotary cutter and you the 45 millimeter spine, you don't need a smaller one. And that's going to cut my Shimmer A and B shapes. There we go.
So my Shimmer A and B's are cut. Then we're going to go to Shimmer A
which is our hair. So we're going to grab our square we need for that. Here in our directions it says Shimmer A we're going to align the corner on the solid blue line. So we have our little square facing that way again. Here's my solid blue. I moved it up here so you can see it and I'm going to move
that back now since this is a smaller square it's not going to come up at those corners. That's fine. We're just worried about the point down at the
bottom here and making sure that that's in the V. And we're going to cut our Shimmer A shape. And see this ruler is not moving as it's because I have my grippy on the back, so I love it. This little piece we do not
need unless you're a crumb quilter like Jenny, then keep that piece you'll use it for something.
Now the next piece we need is a Shimmer B and this is also for her hair. So we're going to get our larger squares and first we're going to cut this in
half diagonally okay. And this ruler does just it fits these squares just fine.
I'm going to cut this in half on the diagonal and I'm going to lay this one on top of another, right sides up. I wouldn't do any more than two layers
with this just for precision purposes, but that's up to you.
Okay so I'm going to lay it just like it is here in our little directions. Okay
and my Sew Kind of Wonderful words are up here on the top left. I'm going to line these up the corner up the five inch lines here's my five inch
here squared up there and I'm going to cut these corners off. Ok, get these out of here. Then I'm going to turn it this way. I'm not quite done with this yet. And then I am going to align the corners with the solid blue so my solid blue lines right here are aligning with the corner and then my
three on my ruler goes right across the bottom. See how nice that looks?
And we are going to cut on that curve. And here's our Shimmer B shape.
See these shapes are really easy. You just have to take them one at a time! Okay now we're ready for Mary's clothes. We are going to cut her shawl
and that's an antler unit so here we go. This is a new unit we haven't talked about yet. So Antler F. We are going to have our square placed like this and this says we're going to align the corner on the dashed blue line. So there's our dash - you can see our dash right here. I'm going to
move that back, it envelopes this the corner of the square. Just nice the corner this corner is down here. And we're going to cut this and there's our shape. Then if you are using, again I'm using solids so it's non-directional, but you will need to cut one right side up and one right side down so you'll need two of these. But that's our antler piece.
Then we're going to need the Twist C for the dress. So we need a little blue piece for that. And here's our Twist up here. Our Twist C. So we're going to lay that on the diagonal. It says pattern position your fabric right, that upper right side down this would be right side up. We're going to line the corner on the dashed blue v in the cutout. So once again we have the dashed blue - it's a little hard to see. I'm aligning that right here in the
corner, giving this a cut, goes away and here's our dress part okay? And that is Twist C.
And then we're back to another Shimmer B with the background. So Shimmer B again is cut in half, a diagonal. Then we're going to place this on the five inch line, cut off our corners here, flip it around, my ruler around. I'm lining these up with the corners of the of the solid blue this is along the three there on my ruler.
All right now we have all our parts, so let's start sewing. Here's our
four different units that we're going to need. We're going to add to some but these are for basic for now. So I'm going to start with this unit up here.
Move to my machine. Now you are going to want this curve on the bottom. This is going on the top and I know this looks odd. You want it to start about a quarter of an inch down from the top. Okay we're using a quarter inch seam. I went a little bit smaller on my stitch length, so I'm down to about a two. You can use pins if you need to. And I'm just gonna guide this real nice and easy okay. Watching my quarter inch line there.
Now I'm going to show you why my stiletto comes in handy right here.
I'm gonna pull that over. That rascal wants to escape. All right, we sewed a curve. Now we need to iron normally on these. It seems like they want to go sometimes they want to go out on since the white is my background I'm going to press it towards, this is her hair. I'm going to press it towards the hair. That makes it come up off of the fabric a little bit maybe a little bit more dimensional. And here we're just pressing the seams one way just one way or the other and this is up to you, totally up to you. I wouldn't press the seams open at this point though.
So there is our unit all pressed and pretty. We're not going to square that up just yet. Now let's do this one same way. This curve is on the bottom, the convex is on the top. About a quarter of an inch down, and off we go.
Alrighty, we're going to iron this one. And now this one I'm going to iron out towards my hair fabric. All right now we're ready to do the dresses!
So on the dresses same thing, my concave is on the bottom convex is on the top. And I always lay it out to make sure. Sometimes this can get turned around and kind of hard to see what which way it's supposed to go. I've tried to sell that one time that was fun so I'd always just lay it out the way it's supposed to look when it's finished then I know I just flip it over okay. And here they tell you they want you to match the ends on this one. So when you start, you're going to match the ends. All right we're gonna press this one all right and now we're ready for this unit now!
They tell you when you start this start this curve about three quarters of
an inch down from the top. So I'm down quite a bit and I'm just kind of eyeballing it. All right so I have some pretty units here. So now we need to square them up.
Okay so we're going to turn our page. So we're going to lay our unit just
like this on our mat. I do mine a little crooked, just so I can see there is a
little blue dot down here. You can see it right there. We're going to lay that right on the seam between the blue and the orange. Now we can cut our curve out of there that we're not going to use anymore. Doesn't that look funny? But it's not going to look funny for long. So now we're going to go this side. We're going to lay this on the mount just like that. There's another little blue dot there. We're going to lay that blue dot right on the seam again between the orange and the blue, get rid of that, and there we go.
All right we're going to put the B unit, which is her hair, and this is going to be your hair behind her dress and that's going to finish her shoulder area.
So we're ready to sew this. We're going to take it to the machine. This is how it looks it looks all party. And this says start a quarter of an inch
up so I'm about a quarter of an inch down maybe a little tighter. Let's sew this next one. Each got a little heavy. All right.
Let's go press these. In this case the seams kind of wanting to go towards her dress so I'm just going to press it going towards our dress. All right now we're going to square up some blocks. Have our ruler this is laying like this in the picture, and there's a blue dot on the curve. If these don't exactly get on curves get as close as you can, and you want to make sure that they square up within this four inch line here. You want to make sure you have enough room, which I do. We're ready to go, and then we're going to flip this and at this point you can just use your ruler. Your dots should of course land on your seams.
Okay so we have one piece of our hair done now. We're going to go back and square up our unit because we need to make this little part of her hair. So we're going to get our hair and background unit. Now on this one
we're going to use our blue curved line and I'm sort of trying to make sure this goes in the corner. It's not too bad. We're going to square it up anyway so it's not a big deal. I'm not worried about it at all.
So I have this blue curved line there, on the brown. Now we're going to bring in this piece to make the rest of her hair. Okay right sides together quarter of an inch down. All right I'm going to come press this. We have this unit now we can trim that up. We're going back to the dots again
I've got a dot at the corner, right there my four inches. I have plenty
of there to square up. Now I'm just watching the four inch marks and my dots line up at the corners just perfectly. See I'm cutting off quite a bit here. So don't be afraid if your things aren't lined up.
So you'll have two of these for her hair. Now we are ready to square up our other unit. So we have our dress and shoulder unit, get some of these strings out of the way. So we're going to do this one first. Our number two is going to go on the seam here and it's saying my blue dot should be
close to the curve. So I've got a blue dot that's pretty close to the
curve. I've got my number two on the seam between the orange and the blue and I have my little blue dot on the point between the orange the blue and the brown. I'm ready and I'm making sure that the four is within that and it is phew. Again look at how much we're cutting off here, so don't be afraid.
And now I'm going my four. Again my dot is still at the point, my dot's still on the curve. My two is on the line and her dress part is done. And then we do the other one same way. Okay so my dot is close to the curve, my
dot's pretty close to the point. I can probably come a little bit and I'm
watching down here at this four - it's getting pretty close to the corner there so I don't want to go too much further off but I think we're close enough.
Yay now we have our shoulders done. Now all our parts are squared up and we're ready to put her together. All right so here she is all laid out. Here's our two hair with the background and her little face, here's her hair with her dress and then her bottom part of her dress is just three rectangles. You sew these together first and then put the bottom on and she's done.
These really go faster than you think and especially once you get going and you're getting used to doing the units. I got this whipped out and the full quilt whipped out in a couple days. It's not bad, but it's so much fun to see her come together.
So I'm going to show you how to work with the seams when we're putting our little face together. So I'm going to grab these two pieces okay.
We're going to go right sides together as always, quarter inch seam allowance and because of the bulk here instead of starting here I'm going to start at the other end. It just seemed to sew for me a little better doing that way. Having that bulk end up there instead of starting with it and that's just personal preference.
Now at this point I'm going to press the seams open. And now I'm going to take her little face, do it the same way. Again I'm going to press the seams open. All right now I'm ready to sew her together. You just want to make sure that your seam lines up in the middle there. All right now we're going to come back I'm going to press the seam opening again. It just seems that lays flatter when you have all these little seams coming together. Now as I'm pressing I'm thinking about if you've ever seen me doing anything
else you know I'm a starch lover. So if you're not using pre-cuts I recommend you use a starch product to get your pieces all nice and stiff. It helps to me make those curves real nice and it just makes my pieces lay flat.
So here's her sweet little face. Okay and don't worry about down here
because that's going to be in the quarter inch seam allowance and that's
going to be in your seam allowance up top. So you're just going to continue down. You're going to sew her little shoulders together, that unit, then you're going to sew these three units together and you're going to
put this on the bottom and she's all done.
Now we can move on to the next part and we can do Joseph. We've already done the units that you need to. Now we're going to go on to Joseph. These are our three main units for Joseph. Let me show you where they work in the quilt. Okay so these units are the same units that we did for Mary, just in different spots. So this is his shoulder unit, with his scarf
and his under dress. Then we have his head and his face, or his head is his face I guess and it's the head scarf, let's call it that. And the background and that's going to go there and you're going to have one exactly opposite. It'll go right here and then we do his beard and the scarf, and his face
and that will go right there and then you'll have one that looks exactly
opposite of that. Then as we come down, we just have rectangles you'll sew these all together is how I did it. First press all your seams open then you're coming down here with rectangles which you are capable of
sewing together. Get that all sewn together and pressed and we're ready to do the baby.
All right so we're ready to do the baby and the manger. You've already done these units easy peasy. We've got some antler units and some
Shimmer A B units. Let me show you how those work into the quilt. So
you're going to make two of the blanket unit, one this way one will be the exact opposite. And then there's a little two patch in here in between each to make the blanket okay. And that's your antler unit, you've done those.
And then you're going to have the same unit out of the baby head. One like this and then one exactly opposite. Again another antler unit,
you've done that before. And then down here at the corner of the
manger we've got a Shimmer A B unit that'll just sit in there on that side.
And then one will sit on this side and then the rest of the unit on the manger on this part is just rectangles. This is a nice big rectangle in here, rectangles here and on the side and then across the bottom.
Then for the manger part that's just some smaller Shimmer units. So you'll make four of those and I've got two sewn together here where you can see the bottom half of the stars. And then the whole rest of the top is just rectangles and rectangles there. Might be a few squares in there but
mostly rectangles. And then once you're done you'll sew these two parts together, your Joseph on this side, your Mary on this side or you can reverse them of course as your quilt. And then I sewed a little bit of a border on here - that's a four inch border. And then put binding on it.
So now that you've done this quilt you have all the units. You've done all
the units that you need to do the whole big quilt. So you can pull any of the pieces any of the little scenes from this quilt and make them. You saw how easy it was it was a really fun quilt to do. And I have a few more thoughts for you all right?
So this is the whole quilt, it's called Starry Night. This is the section we did today - this is this little section is called Oh Holy Night. You'll see here that I use some different fabrics in the whole quilt. I want to bling mine up a little bit so I have a lot of like silver and gold in my in my pieces. I've got... in Joseph's scarf he's got a little bit of metallic in there as opposed to
the solid. That was the solid was fun to do, but I found I had a really good time searching for fabrics for this. I don't have a lot of gold in my stash but I felt like I needed to use it in mine. So I had found this fun fabric. I was at a retreat and they brought a shop with them I shopped there. I know y'all like to shop hop when your shop hopping look for fabric. I thought this grunge I got this here it was a restart for the lamb. And the donkey was
a lot of fun. They just were all it just made me smile as I made it.
We'd like to see any of the projects you make with this wonderful pattern from Sew Kind of Wonderful. Share them with us at hashtag #msqcshowandtell! Thank you for watching this tutorial from the Missouri
Star Quilt Company.