Make a "Block Lotto Bird" Quilt with Jenny Doan of Missouri Star
 Jenny Doan
- Fat Quarters
- Modern
- Wall Hanging
- Beginner
- Quilt size 49" × 52"
Jenny Doan demonstrates how to make an adorable bird quilt using precut fat quarters or scraps. This pattern was designed by Jean-sophie Wood, creator of the Block Lotto blog. During the early 2000s, Jean-sophie designed quilt block patterns for her blog. Every month, quilters mailed in their finished blocks, and one lucky entrant won the lot! The Block Lotto is now a distant memory, but Jean-sophie’s patterns are still available, including this delightful Bird Block.
Instructor
Jenny Doan
Jenny Doan is an American quilter, author, and YouTube personality. Jenny started Missouri Star Quilt Company in 2008 and today it is the largest quilting supply vendor in the United States.
Shop this tutorial



Common Questions
What is covered in Make a "Block Lotto Bird" Quilt with Jenny Doan of Missouri Star?
Jenny Doan demonstrates how to make an adorable bird quilt using precut fat quarters or scraps. This pattern was designed by Jean-sophie Wood, creator of the Block Lotto blog. During the early 2000s, Jean-sophie designed quilt block patterns for her blog. Every month, quilters...
How long is the tutorial video?
The tutorial video is 00:19:28.
Are supplies listed for this tutorial?
Yes. The tutorial page includes the supplies and materials connected to this project.
Is a transcript available?
Yes. A written transcript is available on the tutorial page.
Video Transcript
Hi everybody, it’s Jenny from the Missouri Star Quilt Company. And I am super excited about today’s project. You may have seen over my posts in the last year, on my personal Instagram, I made birds. And I loved making these birds. This is a quilt I made that hangs in my stair hallway. And look at this cute row of birds where they’re all, it looks like a ticker tape. Now for fun’s sake, when I made these birds I thought I’ll do this as a table runner and put a big square here in the middle because I don’t like to put a pieced block in the middle of my table runner. I like to put a plain block because that’s where you set your flowers or your candle or whatever. But when I put that black block right here in the middle it looked like these birds weren’t speaking to each other. They were no longer happy birds. They were very angry at each other. So I took the black out and we just individually pieced them to show. I’ve made them for Christmas. Look at these Christmas birds. Look at these with their stripy legs. Let me lay them all out here. They’re just so cute. Look, all different size legs, all different size birds. So I fell in love with this bird pattern. I mean they’re just adorable. Really, the cutest things you’ve ever seen and I wanted to teach you how to do it. It’s a free pattern online. And we’ll link to it, the Bird Block pattern by Block Lotto. And I wanted to get permission to teach it in a tutorial because I just love this bird so much and they’re so many things you can do with it. You know, at our age a lot of us have binoculars on our window sill and we’re watching what’s happening out there and we just love the birds.
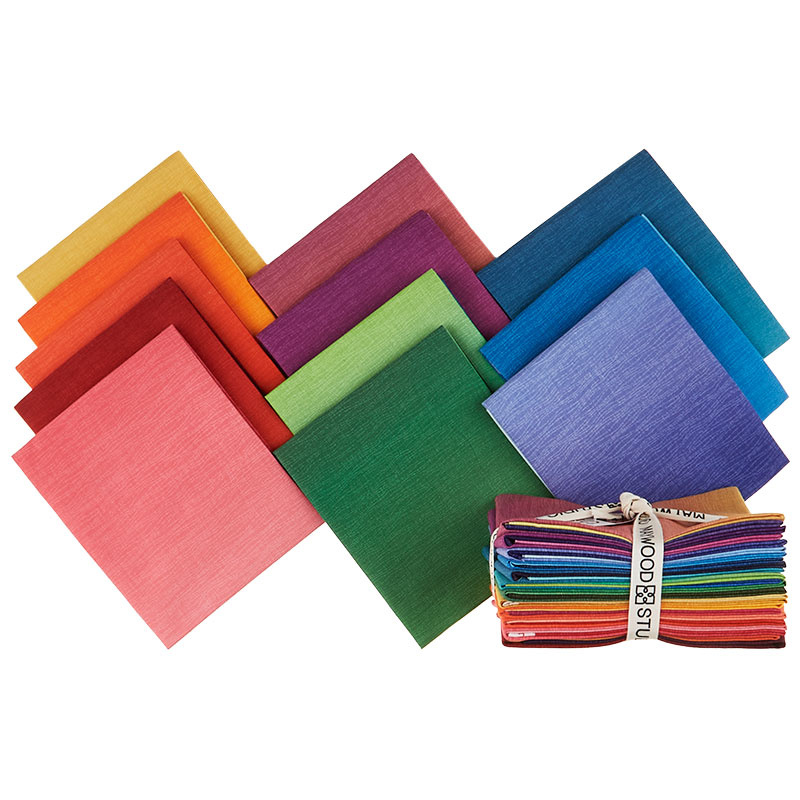
So anyway, what I use, basically, to make this is scraps. You know, your legs can be different colors. My legs all happen to be black up here or a dark, dark gray, you know. So just think about the scraps that you have and things like that. But one of the things I loved working with on this project were these fat quarters that are ombre. So they go, look how they go. This one goes from light yellow into orange, clear into pink. And when you see these ombre, beautiful ombre fat quarters, I can get, you know, one, two, three, four, five, different bird wings out of this and they’re all going to look like different birds. So I’m super excited about these ombre fat quarters. They come plain, they come, look at this one with its, this one is, how cool is that? And let’s see a blue one, let’s just look at a few of them so you can see how many different shades are in every fat quarter. And so they’re just gorgeous pieces of fabric. We have several different types of sky fabric. This is the sky fabric I used up here in this one. It’s just this really light cloudy piece, very pretty. This was my binding, I love a stripe. And I love that it just kind of pulls in the colors, especially on a binding, you know, you’re dealing with a space this big so it just hits it every once in a while. And then I had some black for my legs. I did my border out of this one. You’re going to need legs and beak out of something that’s going to pop and show up. And so I used black for that. Now the key to making this really is in the cutting and I made two little sticky notes for me of what I was cutting out of what fabric as I go along.
So you’re going to cut out of your fat quarter bundle for your wings, you’re going to cut a five inch square. And then we’re going to cut those diagonally once and it makes a wing like this. I did try to see if I could do it with, you know, where it’s all together and I just cut it once. It doesn’t really work and so I’m just going to stick with the pattern and show you how to do it. So these are five inch squares that I’ve cut on the diagonal once. And the direction your bird goes is the direction that you decorate your half square triangle. So if your half square triangle is this way, your bird is going to be going that way. And if your half square triangle is this way, he’s going to be going that way. So it’s how you lay it out. So that’s the wing. You also need some background for the wing, which again is a five inch square that we’ve cut in half diagonally. And so this will be the background for the wing. And I’m just going to kind of build this out here while I’m doing it.
So let’s make us a little purple bird. Oh I have one right here. Let me scoot these back just a little bit and I’ll tell you the measurements as we get to them. So he’s going to go on here but not before we have some one inch squares. So the next thing you’re going to do is you’re going to build the body of the bird right here, this part. And you can see we have two little 1 ½ inch squares that happen on that triangle. So I cut a five inch strip and a 1 ½ inch strip and cut my pieces out of that. So here’s a piece of this 1 ½ right here. I’m going to unfold it because I’m only going to use this top side for this. And I’m going to make sure that I have some matching squares that will go on my bird body over here. So let me cut this at five. And I just did stacks of these so that I had them ready to go. Alright so there’s this one. So this is going to be his little bird body right here. And I’m going to take you to this point.
So the first thing we’re going to do is we are going to put the little tummy on this bird part right here. That means we’re going to lay this square right in the corner, this 1 ½ inch square, we’re going to sew diagonally corner to corner. We’re going to do that first and that’s going to be the part of our tummy where it curves in. And so just go straight across, corner to corner just like this. We’re going to trim off this little piece right here. You don’t have to trim it if you don’t want to, it’s up to you. And we’re going to press that out. Let me move these down here so we can always see what we’re ironing. Alright so that’s the tummy part. And this is the little part that goes up by the shoulder of the bird. And so you want to be sure that it covers the point. So you’re just going to put it on right sides together and you’re just going to face it across there. And I just guestimate that. If you look at my birds closely, you’ll see that that piece is always a different size. And so you just want to make sure when you fold it up it covers the tip. And so sometimes I don’t even do a quarter of an inch like right there. That’s a very small quarter. So I’m now going fold this up. And then I’m going to look on the back and I’m going to let my little triangle be my pattern and so I’ll trim this off right here like that. And then I’ll trim it off right here. And then this is the top of my little bird, his tummy and his shoulder. So now I’m going to add a background square to him like this.
So now we’re just going to put these right sides together and I’m going to sew a quarter inch seam right down the side. So here’s this. Alright, now we’re going to press this open. And we’re going to have to trim this down to 4 ½. So that’s the size we want our bird body. So I am just going to lay this, you can press it either way. I’m going to press to the dark side. And then I’m going to grab my bloc loc ruler and I am just going to square him to 4 ½. Now I want to keep most of the body that I can and so I am just going to literally make sure that I have got that all included that I can get on there. And it looks like I’m going to have to trim little bitt off this corner up here. Alright, so here’s our little bird. Now we’re going to add the other piece of his tummy, that’s our 1 ½ strip here and it should be 1 ½ by 4 ½ and I cut that five so let me trim that little half inch off. So it’s going to be 1 ½ by 4 ½. And then you can see, right here on the bottom, this strip right here has a little piece of sky. So we’re going to take a 1 ½ inch square of our sky or our background, whatever your background is and we’re going to put that in this corner right here. And we’re going to sew it the same direction the tummy goes. We’re going to sew this same block that same direction. So we’re going to sew corner to corner going the same direction. And that’s one of those things. Now if you get it wrong, just save it for a bird that’s going the other direction. At first I was like, oh no I have to tear this out but you know what, the birds that are going the other way that’s perfect for them. Alright so the other trick to this is before you cut it look at it and make sure it’s working the way you want it to. And ours is going the same direction. So I’m going to trim this off and press it back. Just like that. And then we’re going to sew this onto this piece right here. Alright.
Now out of our background fabric you’re going to want to cut a 1 ½ inch strip because you use the 1 ½ for this. You’re going to want to cut a five inch strip because we’re going to use them for these wing squares. And for the top and bottoms of our birds you’re going to want to cut a three inch strip. The two pieces we’re going to cut off of that are going to be three by 6 ½ and three by eight. But that, you know, we can switch those around a little bit. So on my bird now I’m going to add one more piece of sky 1 ½ by 4 ½. So we’re going to cut that off our strip like this. And this is where the beak comes in. So we’re going to grab a little piece of black. And literally I just have tons of little scrabric, that’s scrap fabric, scrabric. So I’m just going to cut a little piece off of here because the beak is all improv. So you’re going to take your piece here and you’re going to lay your beak and you want to make sure that the beak opens toward or I mean the white part of the beak goes toward the body part of the bird like this. And you can make it come out and be a long beak, you know, you can make it be a really fat beak, whatever you want to do. So it’s totally improv. So however you want to do it is going to be great as long as your bird has a beak because he needs to sing. Alright so then I’m going to iron this back and this is going to be like a short little fat beak. But to me every one of these birds as I finished them up, they had such personality. And I just loved that they were so different. Alright, so then you’re going to use your little piece as your pattern. You’re going to trim it up and you can do that with a rotary cutter or your scissor. And then you’re ready to put this on here like this. And so we’re going to lay it right sides together and sew that seam. And you’ll enclose that beak into the middle. He’s got a nice big beak. And then this is basically your bird body.
So then what we’re going to do, this should measure 6 ½, let me see what it measures. It is 6 ½. Now on some of mine I noticed when I did this pattern right here, not all of them were the same size and so I made that up by changing the size of my sashings that went around them so that I could cut them all the same size and they would float in that block. But what we’re going to do now is I’m going to take my three inch strip, and I’m not even going to cut into a 6 ½ inch piece. I’m just going to piece it on here like this and then I’ll cut the whole thing. So that way it fits the size of your block versus the perfect measurement if you will. Alright so I’m going to come across here. And this is going across the head part, the top of the head. Alright so now what I’m going to do is I’m just going to trim this off right here and press it back and then we get to add the legs.
Alright so this is the top part of our bird but he needs some legs and so for the bottom legs what I’m going to do is I’m going to take a piece here. Now they say three by eight and that’s to give you enough wiggle room. I found I could do it with seven or even a little less but you know, use your best judgment. I’m going to go ahead and do it how I’m supposed to do it. One, two, three, four, five, six, seven, eight, I’m going to trim this off right here. And then this is the fun part right here. So we’ve got this piece, we know our legs are going to go in here, what do we want our legs to look like. Now I’m sure there’s a perfect way to always put your legs the same but all of my legs are different. One goes back further, one goes forward. Look at these guys, they’re all doing different. When we walk we all have different gaits and I felt like birds did too. So I took a little pleasure in deciding which way my bird was going to walk. So I know if my bird is going this way, that back leg, you know, should have some stride to it. And so I’m going to take this in here. And one of the things I did was I folded it in half, made a little crease so that I knew where the middle of my strip was. And then I’m going to come over here and I’m going to cut just a, you know, I’m just making a cut, whatever I want to do. And so this one, this one goes back quite a bit, this one is going to go a little bit straighter and we’re going to go over here. And I left about, you know, an inch or so in the middle. You can do whatever you want. You can bring them right together if you want. And then what I did was, I’m going to cut some leg pieces off of here. This is a folded ten inch square and I think in there they have the legs at ¾ inch so let’s cut a couple of ¾ inch strips like this. And you’ll need one for each leg. But oh, I guess I don’t need to cut more. When I cut them, I always cut a bunch of legs and so I’m just going to cut two for you. And you just want to make sure that when you put them in you have a little bit of wiggle room at the top and a little bit of wiggle room at the bottom. So then what we’re going to do is I sew mine to this side right here and I just use a quarter of an inch so when you take a quarter of an inch off ¾ of an inch you’re going to have some little skinny legs. And so I’m probably not going to do a full quarter, I’m going to go to the edge and sew it on. And then I’m just going to finger press it over like this. And I’m going to add this middle piece now. And keep those pieces together for you angley challenged people, keep those pieces together so they don’t get in the wrong place. Alright now I’m going to add the other leg over here to this other side. And I just let my leg be a little, come a little taller off the top, I mean just a little further off the top than bottom. I like a little bit of wiggle room. And I finger press those back and I’m going to add this other piece over here. And of course I think it would be fun to make a whole quilt of stripy legs, you know, how fun would those be? Here’s what that looks like. I’m going to press it out now. And you can see it’s a little bit wonky, not great so I’m just going to trim this off right here, make it nice and straight because that’s going to be sewn to the bottom of my bird block. And then I’m going to trim this one off as well. And now I can put his legs on.
So I’m going to lay him on here because you want his legs to be, you know, and I think that extra inch gives you the opportunity to shift this a little bit back and forth. And so I think if we put him right here, this will be perfect. So I’ll lay this on here like this. And I’m just going to sew this down. So I have about a half an inch hanging over on each side but that will depend entirely upon where you put your legs. So then, oh he’s so cute. So I don’t know if you guys know this but every morning when I come in I try to do a little bit of sewing just for me because, you know, I do a lot of work for Missouri Star and sometimes you just want to do something that’s just for you and so birds is one of the blocks that I make because it makes me smile every morning. I also do the little houses and some stars. I have several projects that I work on all the time. But these birds make me so happy and I’m so glad that I get to teach you how to do that. And I just trimmed off those extra sides and look how cute he is.
You know, so then when you go to put him together this is up to you. So on the, you know, on the front, this is done like the Brady Bunch birds right here and they have a little white sashing through them. You could put a black sashing. See how every bird has a different sky. I love that as well. I made a little quilt of these for my camper. It’s just two or three birds, you know, there’s not a lot of room to hang things in a camper but I have my cute little birds hanging up there. I think there’s three or four of them. But you can see, you know, like really see the ombre on this bird how it goes. I mean I just love how they come together. I love how they make me feel. They make me smile every time I do them. And I’m so glad that I got to teach you how to make your own birds. Don’t forget you can make them for any season. Look at these cuties with their stripy legs. I mean any season, any width of leg, anything you want to do. I hope you enjoyed the tutorial today with the permission of Jean Sophie Wood on the Block Lotto Bird Block pattern from the Missouri Star Quilt Company.
Hi everybody, it’s Jenny from the Missouri Star Quilt Company. We hope you enjoyed watching this video. If you aren’t already part of the Missouri Star Quilt Company family be sure to subscribe so you won’t miss a thing. And if you click that bell it will notify you every time a new tutorial comes out. See you next Friday.