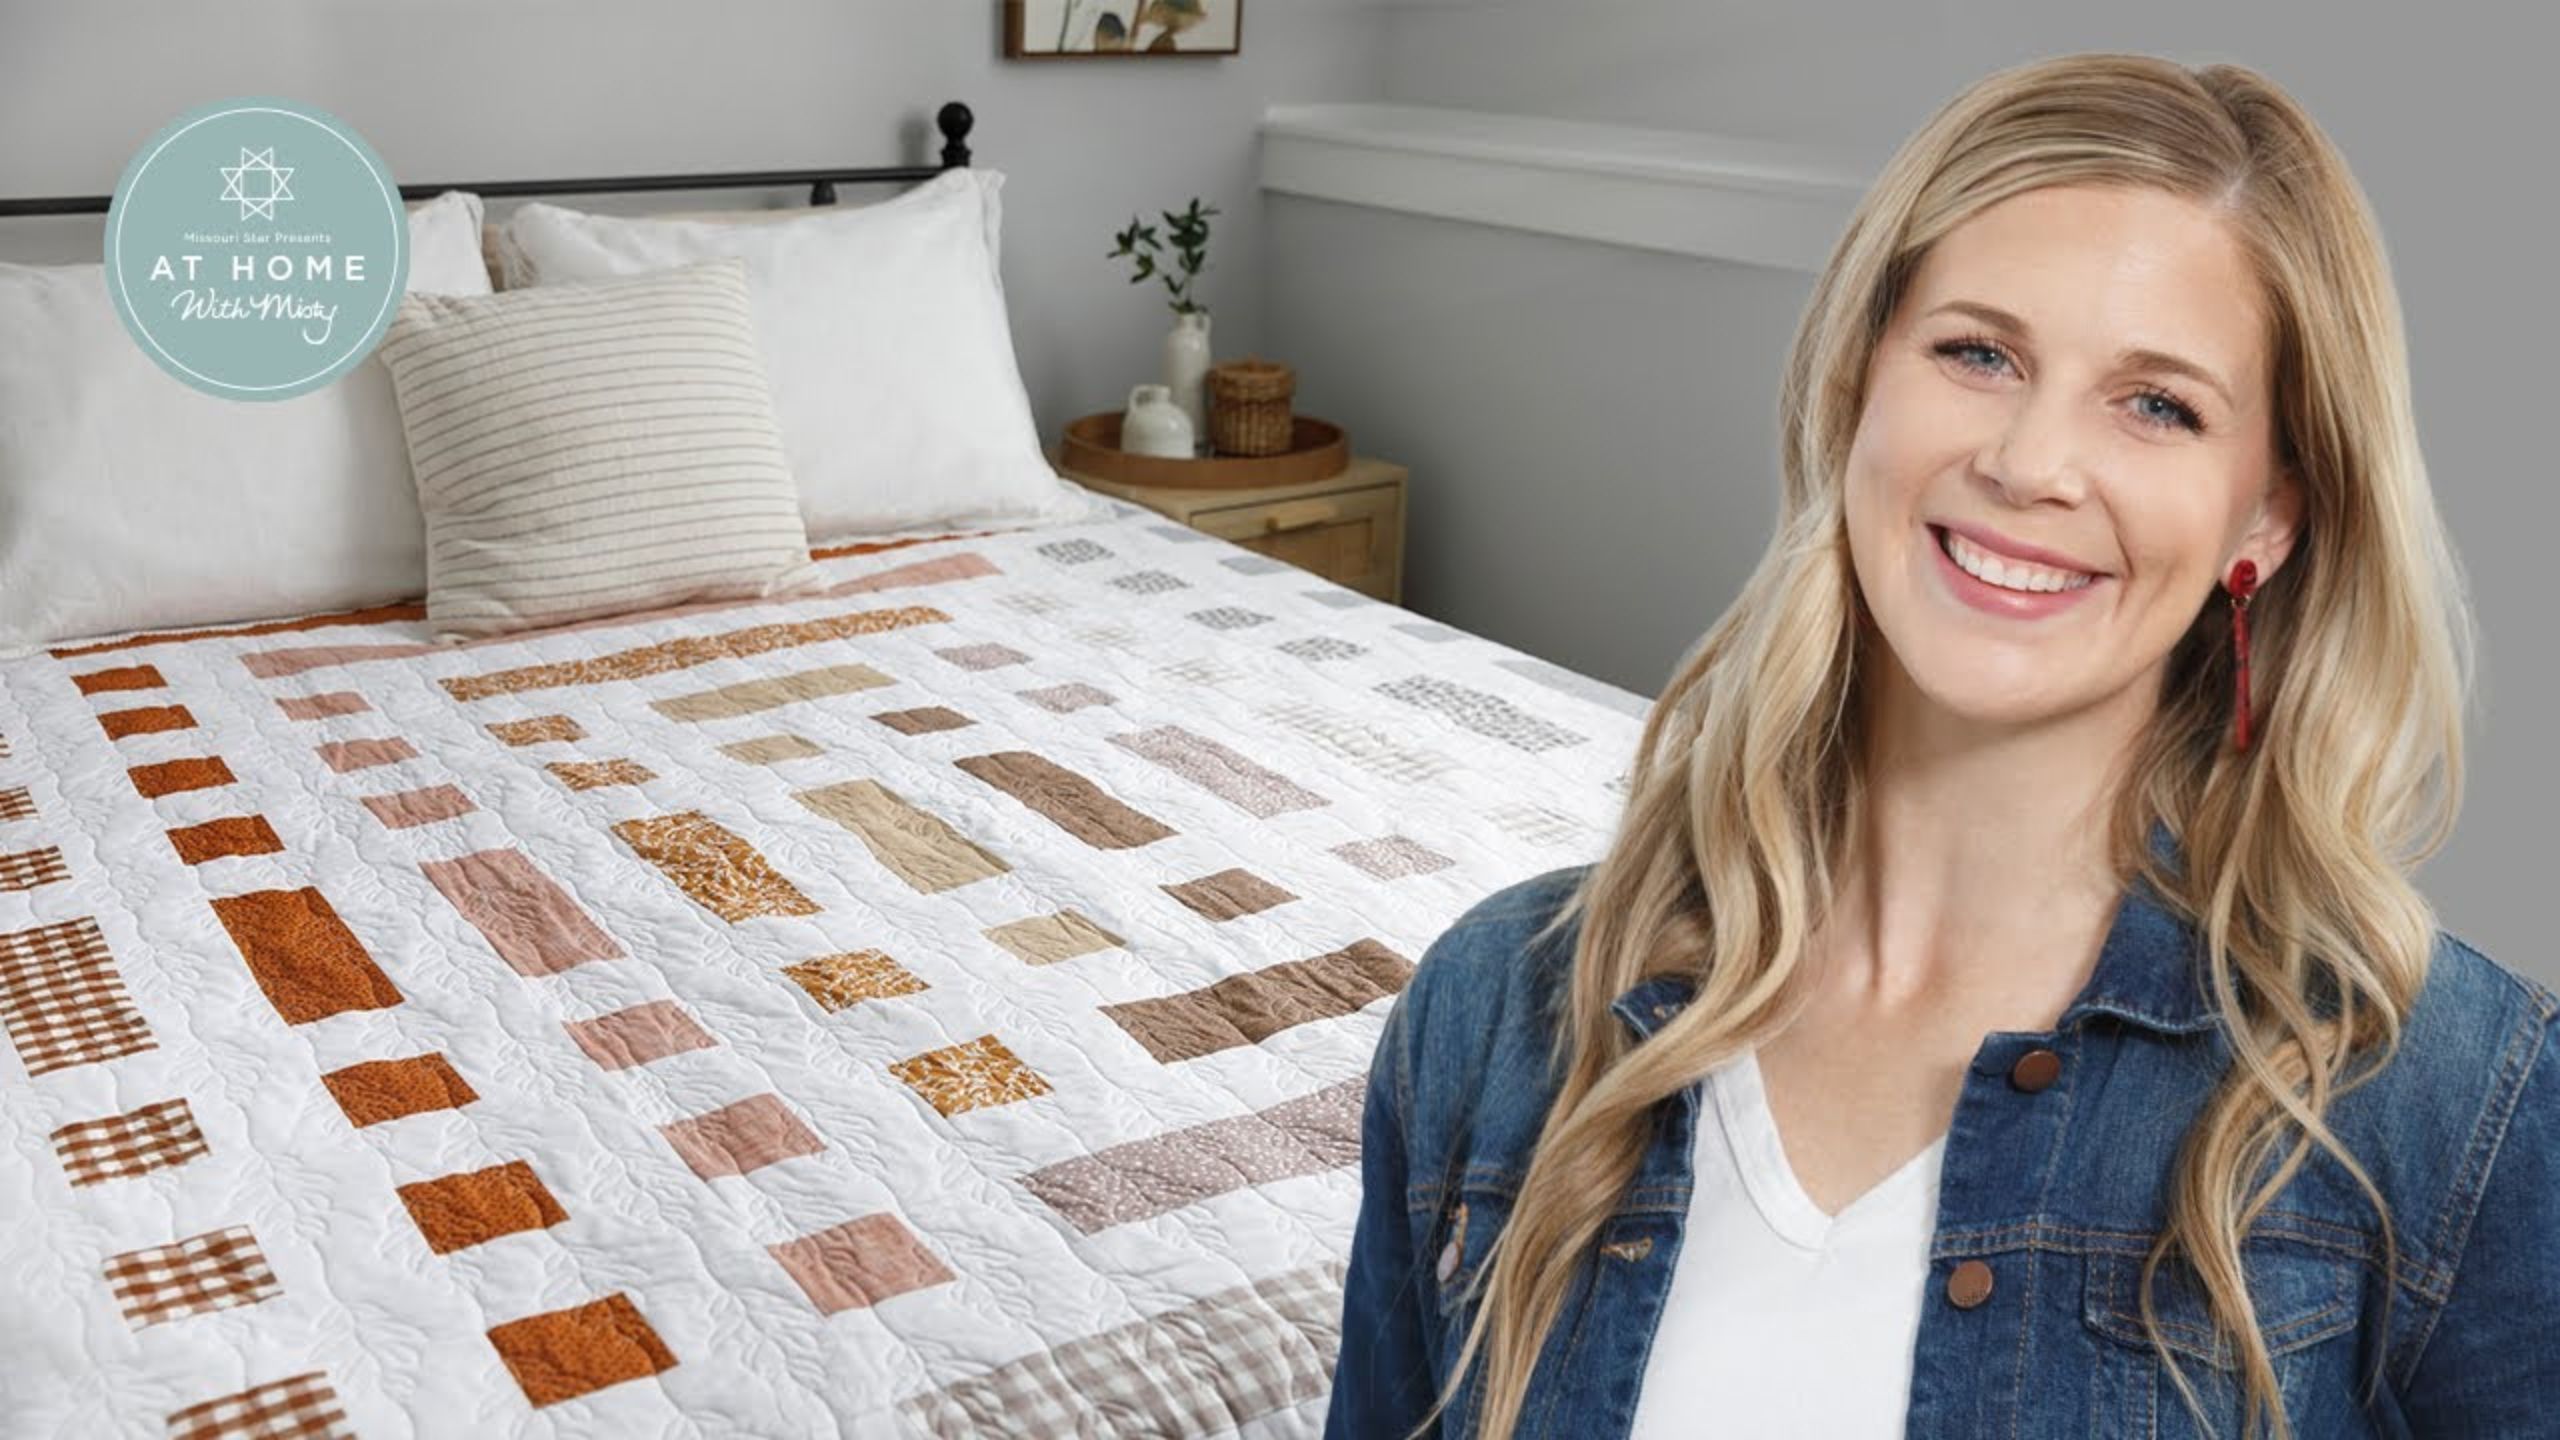
Make a "Mackintosh" Quilt with Misty Doan and Guest Allie Perry from Taren Studios!
 Misty Doan
- Fat Quarters
- Modern
- Baby
- Beginner
- Quilt size 63" × 75"
Join Misty and guest of honor Allie Perry as they sew the magnificent Mackintosh Quilt from Taren Studios! This modern twist on the log cabin style quilt block presents the perfect opportunity to showcase your favorite colors and small prints! The Mackintosh pattern includes directions for two sizes. Follow along as Misty and Allie tackle the 63" x 75" throw size, using yardage and fat quarters from the Paintbox collection by Elizabeth Hartman.
Instructor
Misty Doan
Misty Doan grew up surrounded by sewing and quilting. She loves spending time sharing tutorials each week each week, and when she’s not stitching up one of her fun sewing projects for home decor, most likely you’ll find her hanging out with her husband and three awesome kids or working on a house project.
Shop this tutorial
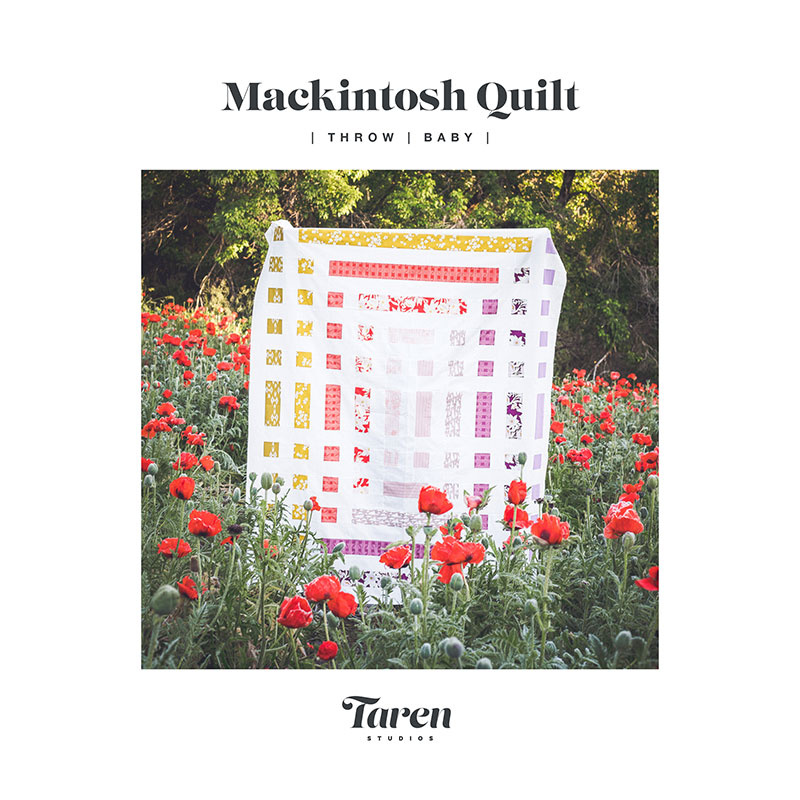 Mackintosh Quilt Pattern$11.75Shop →
 Kona Cotton - White Yardage$7.28Shop →
- Kona Cotton - White Yardage$7.28Shop →
 Missouri Star Quilter’s Best Blend Twin Batting$26.45Shop →
 Missouri Star 2.5" x 8" Ruler$10.95Shop →
 Missouri Star 5" x 15" Ruler$15.95Shop →
 Missouri Star 50 WT Cotton Thread White$6.95Shop →
 Elan 8" Dressmaker Scissors$20.95Shop →
 Olfa Splash Aqua 45mm Rotary Cutter$18.75Shop →
 Olfa Splash 24" x 36" Cutting Mat Navy$68.95Shop →
 Exclusive Missouri Star Jenny TG1600 ProPlus Oliso Smart Iron$199.99Shop →
 Missouri Star Wooly Betty Board - 17.25" x 25.5" Orange Border$98.95Shop →
Common Questions
What is covered in Make a "Mackintosh" Quilt with Misty Doan and Guest Allie Perry from Taren Studios! (Video Tutorial)?
Join Misty and guest of honor Allie Perry as they sew the magnificent Mackintosh Quilt from Taren Studios! This modern twist on the log cabin style quilt block presents the perfect opportunity to showcase your favorite colors and small prints! The Mackintosh pattern includes d...
How long is the tutorial video?
The tutorial video is 00:15:14.
Are supplies listed for this tutorial?
Yes. The tutorial page includes the supplies and materials connected to this project.
Is a transcript available?
Yes. A written transcript is available on the tutorial page.
Video Transcript
Misty: I'm so excited for all of you to meet Allie. This is Allie Perry! You want to tell everyone a little bit about yourself?
Allie: Sure. I'm from Utah. I have a cute little family and I design patterns
for Taren Studios.
Misty: That's awesome! She has agreed to come on and share this beautiful quilt that you see that comes in two sizes. There's the baby quilt here behind us and then do you call this throw size?
Allie: Yeah throw size.
Misty: Over here on the design wall. They're just absolutely beautiful and so quick and easy. Thank you so much for coming! So I will let you just dive right into it. We want to start by telling everybody what they need to make this?
Allie: Yup. So this pattern you can do with fat quarters if you like or you can also do yardage. Today I'll show you how to use a fat quarter bundle. This is such a cute one that we have. I wanted to show you kind of how to use the fat quarters, because there are special instructions for the fat quarters in this pattern.
Misty: Yeah I love how you've done the diagrams for this - it's super super handy! She's written a really fabulous pattern!
Allie: Thank you! So we'll just dive right in, yeah.
Misty: Rip it open!
Allie: It's the best part - it's like Christmas!
Misty: Yep exactly
Allie: Maybe. Especially when you can't open it! Okay. So with the Mackintosh quilt there are lots of different ways that you can rearrange the colors and kind of play with them. For this one, you only need 10 fat quarters so we'll take out a couple. This one has 12 super cute fabrics in it.
So what I like to do when I'm deciding which way to go with this is I like to do a gradient of colors. Or light and dark. For this one I decided to gradiate through all the colors. With that you can just kind of lay them out and arrange them however you want.
Misty: I love the textures on this. I mean this is no kind of linen, it's just so beautiful.
Allie: For this one, I wanted to go through all the colors and end
with the neutrals on the end. So this is how I laid this one out. You can always play around with it more if you want. Different fabrics, to come together in the middle, outside.
Misty: This is such a beautiful pack. It's a Paint Box Neutrals by Robert Kaufman.
From here you can open up the fat quarter. You may need to iron it. Just iron out the crinkles. Once you open it up you will cut your strips out. This is a strip based quilt. I love doing that. It makes things just quick and simple.
Misty: Yeah totally.
Allie: In the pattern it tells you…there's a diagram here that shows which color goes where. So you'll need to reference colors one through ten. For this one, we will be cutting. You know these will be the same, and then these will be the same.
Misty: Oh you're kind of working outside in! That makes sense.
Allie: Yep so and the pattern tells you all the strips that you need and everything. So we'll go ahead and cut some strips.
Misty: Are these four inches wide?
Allie: These are three and a half inches wide. They're the same as the
Background - everything is all the same width so it makes it easy.
So I'll just go through and cut and I am one that has to count multiple times.
Misty: Me too! Yeah it's better to be safe and double check.
Allie: We'll just start with these and then I'll have you sew these together. But for this, what we'll want to do is a little different where they're not full width of fabric strips. We have your background and for your background you'll need three and a half yards. So you'll take your width of fabric strip with you which you already pre-cut that same three and a half. And then you'll just take your main color and then put them right sides together. I like to make sure to line up the selvedges and then just sew.
And when you get to the bottom then, we'll just add the other.
Misty: Let's do it. Just some long chain piecing here.
Allie: Yes, that works great. Then we'll just stick this one on there and get as close as you can but you don't have to line it.
Misty: Yeah so I could lift the presser foot and slide that a little closer. Just pause and make sure it's all staying together. Perfect - there we go.
Allie: It's okay if it doesn't line up at the end. We'll trim it right. Then from there um and you'll do that with every color - however many strips it tells you in the pattern. Then from there it'll tell you the exact things to cut and I'll show you some examples of that.
From there, I like to start just on one side and trim them down. You'll cut the same three and a half inches…cut strips that way.
Misty: Oh, I see what you're saying. You're measuring over three and a
half inches.
Allie: So we'll just go over to three and a half - perfect. That's for some of them. So these will become the little squares throughout the quilt. And then you'll cut the different lengths throughout that you need and again the pattern will tell you what you need.
So there will be some of these strips and some of them, as you can see, they're extra long strips. And those you will combine. When you are cutting those you'll end up with your strips that look like this like what we just made. And you'll have the extras on the end and these you'll want to keep just the same length. Okay so you'll be really careful not to trim off too much when you're cutting the edges. So we'll go ahead and just trim this.
Misty: Are you looking for like 22”? 23”?
Allie: 21”. So I have to count them always. And you'll get just right along the edge and cut. So then from there you'll combine this one and you'll do the exact same thing on this side and then combine those. And then there's another extra little strip and this one is for the top that long piece that runs across the top of the quilt and also on the bottom. Okay so that combines to make that length.
Misty: Okay perfect, I love that! So then do you want to talk about the
layout? Do you need me to press anything? If you want to go ahead, I'm going to press these. I'm pressing to the dark side - is that the right thing okay?
Allie: Yes! Thanks for mentioning that. Of course, in the pattern on the very back page where the layout guide is. There are arrows indicating which way
you can press things for a flatter quilt.
Misty: That's so helpful!
Allie: But for these strips, yes, just press toward the dark side. And then from here you're going to add some strips to the bottom. So these are three and a half by six and a half inch strips, and you'll just lay them out. So you go through all of your colors, all of them that are like this, and all of
them that are the size as well. You need to make sure that the color is on the left side and then this is on the bottom. So then you'll go through and just sew those together. You want to do that?
Misty: You bet! Happy to! All right if I can get it to line up…there we go.
Allie: And chain piecing is your friend on this.
Misty: I believe it. That's one of the nice things about strip quilts - they come together so quick because you are sewing those long runs and if you can just put one in under the presser foot after the other it makes it quick.
Allie: It does!
Allie: There's that one. You can do that one if you want.
Misty: Perfect, thank you. All right. There we go. Should I press those two?
Allie: Yes, that's perfect. You'll end up with some of every single color which then you will go through and lay out. And the nice thing about doing it this way, is I wanted to make sure where it was nice and clean and sharp, that all of the squares lined up. So the reason why I made it this way is so that when you are sewing it together, all of them line up because you're lining up your seams.
Misty: That makes sense.
Allie: So from there you just go through and just follow the the layout guide.
Misty: So should we lay out a few blocks and just see how some of it comes together up here?
Allie: All right, let's do that.
Misty: I think it'll be fun for people to see.
Allie: Yes. So this one, this goes across that way and I like to go through and make them all this way. I like to kind of arrange them out by their numbers. And then when you're going through to put them together, then you know you know I need number one and then the long piece of number two that you went through, and that's your first row!
Misty: That makes a ton of sense.
Allie: Yep. And then on this one, since we just made the long strip and here's not this extra piece of white on there, you'll have extra sashing pieces, because you'll just add one there and then it just seamlessly all goes together.
Misty: I love that - it's so quick and easy and I just love how a strip quilt comes together so fast and you get this really amazing impact. I love this line. I think it suits your beautiful design just perfectly. So thank you so much for sharing it. And you want to talk a little bit about the baby size as well, yes?
Allie: So this one I made in a two color quilt, which the pattern also comes with instructions on how to do that and fabric requirements for that. I just think it makes a fun statement from that.
Misty: It's so cute.
Allie: And this pattern actually was inspired by a chair.
Misty: Really?
Allie: Yes. So I have a background in interior design and we had to take a history of furnishings and architecture, like multiple of those. I fell in love with different styles of chairs and all that stuff, which sounds kind of funny
Misty: No, not to me. I love it.
Allie: But it's something I love and so this one, the reason why it's called a Mackintosh quilt is someone named Charles Rene Mackintosh designed
these amazing chairs and I've always loved them and wanted to do something off of that. So this one in the two color quilts kind of shows more of that.
Misty: That's so cool! Now I'm going to have to go research him. I'm dying to see his work. That's really, really cool. Well Allie, thank you so much for being here. Before we go, I would love to hear a little bit more about your story and how you got into quilting, so do you want to share that with us?
Allie: Sure. Growing up, my mom is a big quilter, she loves sewing and she would make clothes for us and she has some long arm machines - she's gone full out with quilting and she's amazing at it. So I've grown up
doing that and just loving you know making things with my hands. A while ago when I started staying home with my kids she and I went to a wholesale fabric sale.
Misty: Okay, that can be dangerous!
Allie: It was dangerous! So we ended up starting a quilt shop online after that. So we saw fabric online and then from there buying other people's patterns and stuff, I really wanted to make my own and enjoy that part of it.
Misty: I love it. I love that so much. And I got to meet Allie actually at Garden of Quilts last year, and she had a cute little booth set up with all of her beautiful designs and it was like, I want to make them all! They're so great.
So I just really appreciate you being here and being willing to share your beautiful designs with all of us, so thank you so much. I think we have some more things up our sleeve in the future I hope. So we will see you next time but before we sign off, make sure you tell everyone where they can find you online.
Allie: I'm um on instagram @tarenstudios and you can also find our website at tarenstudios.com.
Misty: Perfect! Thank you Allie. We'll see you guys next time!